

Hello again,
Just a quick share of my layouts I created when I participated in Janet Madison’s 4 for 4 Summer Series. For those of you who don’t know, Janet is a wonderful, experienced scrapbooker who loves to share her skills and knowledge with others. Janet has her own  YouTube channel where she offers a huge range of videos based around the various needs of her followers. Some of the series she produces deal with the organisation of your supplies, making your own scrapbook kits, and scrapbook tips and tricks to speed up the scrapbook process.
The 4 for 4 series demonstrates how to create layouts using only 4 papers with some embellishments, and a few supplement papers (which are optional). You end up with 4 layouts, either single or double (you choose) and a set of cards. I tend to only make the layouts and never quite get to the cardmaking, using those paper pieces for more layouts. It’s a fun process to try and those participating often share what they create on the FB Love RTS group page.
This series was a summer theme and for us down under, in Australia, well we are dealing with winter, wet and cold days. I didn’t have any summer photos to scrap, so I went with gardening photos, more of a Spring and Autumn approach. Below is what I worked on, four double-page layouts of my garden.
I started by selecting my papers, a range of patterned papers and some coloured cardstock. The beautiful garden-themed papers are from the DCWV Botanical Beauty pad, it is one of those collections which you never want to cut into. Absolutely gorgeous  papers, and if I get the chance to buy a second pad I will snatch it up, it’s amazing. I ended up using very little of the cardstock or supplement papers, and just focused on using my main four papers and white cardstock. Mainly because I wanted to include some stamped images, some lovely insects from the Tim Holtz Entomology stamp set.


My embellishment selection ended up huge. I went through everything looking for anything that had a garden feel or went with my paper colour selection.


Janet’s instructions, putting together your kit.
The first part of the process has you cutting your 4 papers into pieces following Janet’s very clear advice in her video.
Janet releases the videos slowly, about a week apart for each layout. It can be agonising waiting for each video, as you are excited to get creating! The videos are worth the wait, her delivery is very friendly and down to earth, often you will find yourself laughing along with Janet who has a wicked sense of humour.
My Layout #1.
I used photos of Gazania flowers in our springtime garden, they are so colourful and cheery and worked beautifully with the paper I had selected. The black strips on the layout are actually copper metallic washi tape, it didn’t photo well, as it is reflective.
Janet’s instructions are here.


My Layout #2.
This layout is of our vegetable garden just before our Spring planting. The garden beds have been weeded and prepped ready for new seeds and seedlings. Luckily for me, Hubby is a mad gardener and loves growing produce which helps cuts grocery costs and gives us a healthy diet. It was very useful when we had young children, now we produce far more than we can eat and pass it on to family and friends.
Janet’s instructions are here.


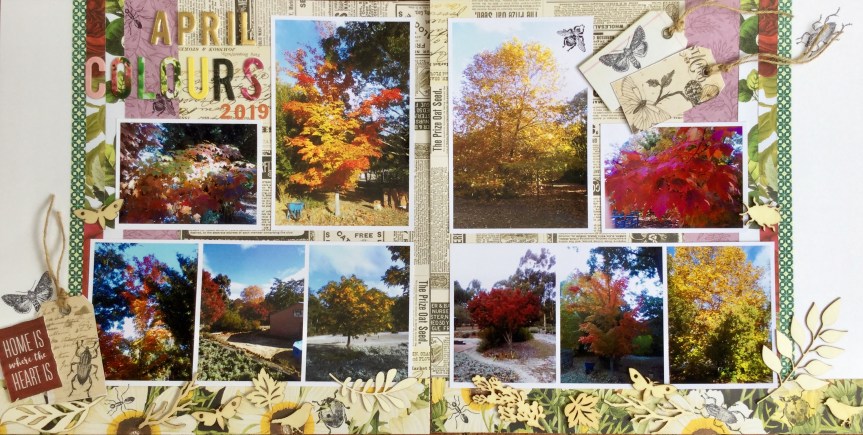
My Layout #3.
This layout is some Autumn colour in our garden.


Janet’s instructions are here.
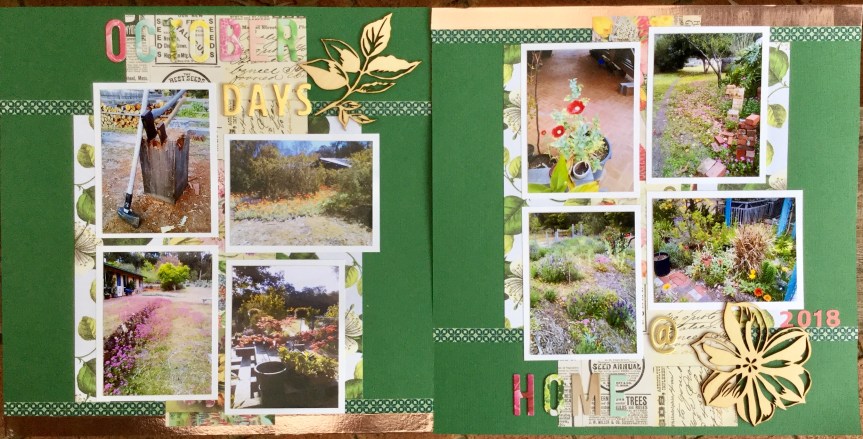
My Layout #4.
My last layout is various shots of the garden and property in October, hubby likes to snap photos on his phone of what is happening in the garden each month. I used fewer photos than Janet, as my photos were larger.


Janet’s instructions are here.
Well, that’s it! I have lots of bits and pieces left to complete some more garden layouts. If you are interested in making Janet’s cards here are the instructions.
Look into joining the Love RTS Facebook group and join in the fun, a great bunch of people who share and help each other with their crafting needs.
Keep on scrapping 🙂

I loved reading through your process and seeing your garden. What a perfect idea!
LikeLike