

What I have been working on is my one and only subscription kit which I purchase from Uniquely Creative. In my challenge to use things up and cut down on my spending, this is the one thing I couldn’t give up. What I love about this scrapbooking kit is that it often challenges you to try new techniques and products which you may not have used before. It is great value, you get loads of product based around one of Kaisercraft’s new collections. This months kit, from June, featured the Anthology collection. I try and create every layout with the kit which is possible if you add a few more pieces of cardstock and swap a few papers around. They also include card projects within the kit but I am no longer a card maker, so I use the ideas as embellishments on layouts.
Here are a few layouts I have made using June 2018, kit.  The first is one of the layouts designed by Tracey Schultz. I swapped the paint colours to suit my photo and used different bird embellishments.
The next kit layout I created was designed by Elisa Ablett, once again I made some changes to work with my photo and layout theme. My photos are of my grandson and husband stalking our chickens, well, there was a little bit of chasing involved. No chickens were hurt in the production of this layout!
I swapped the floral print paper for the Anthology 12×12 Scrapbook Paper – Plumology paper. Then I got to work colouring in the feathers to match with the colours in my photo, my grandson’s t-shirt was the inspiration. I loved how Elisa Ablett had coloured the chipboard title, so I followed her lead and used my Copic markers to do the same. It was an easy process, line up the ruler and run the marker along the edge of the ruler, the result is beautiful pastel lines!


I had several photos to use and decided to make it a double layout. The original design has flower die cuts, so I grabbed my Tim Holtz dies and some matching paper/cardstock scraps to make a bunch of flowers. I also inked up some flower embellishments and doilies to go with the colour theme. I am pretty happy with the finished layouts, they will be back to back in my album and I will add a pocket page layout for the rest of the chook chasing photos.


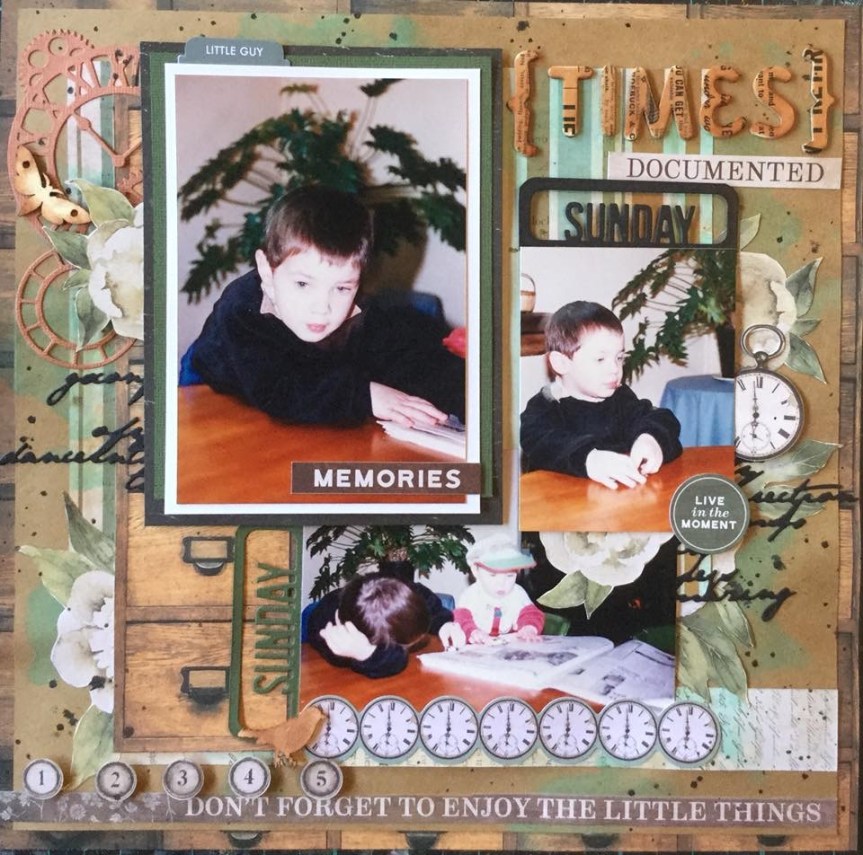
After making several of the kit layouts I went rogue and created my own layout. I selected papers and embellishments from the kit but added a few extras, using Kaisercraft dies, cardstock scraps and a very old Cosmo Cricket chipboard alpha called ‘Extra Extra’. Hitting the mark with my self-imposed challenge of using up an old product.


 I started off by altering the paper itself, my photo is of my son and daughter bathed and ready for bed, and I was thinking about what related to clean. Bubbles seemed to pop into my creative brainstorm and would link nicely with the circular design on the paper. I used a Kaisercraft stencil and acrylic paint to sponge bubbles across the page.
 sponge to apply my mix media colours. I have been using car wash sponge for years, you can pick one up from any of the cheap, two dollar type shops. Use some large scissors to snip the sponge into 8-10 pieces and you a have a very versatile application tool which has only cost you a couple of dollars for the whole lot. When working with inks you can use each edge of your sponge piece for a different colour! They wash clean very easily with soap and water, some staining will occur but doesn’t transfer when you use them next. When you use them with acrylic paint, wash them as soon as you finish otherwise they will dry with a firm crust. Should this happen, you can simply trim off the stiffened surface and you are good to go again.


