Making a scrapbook layout using my Spectrum Sherbet inspired background!

Hello all, I hope everyone is well and getting some crafty time.

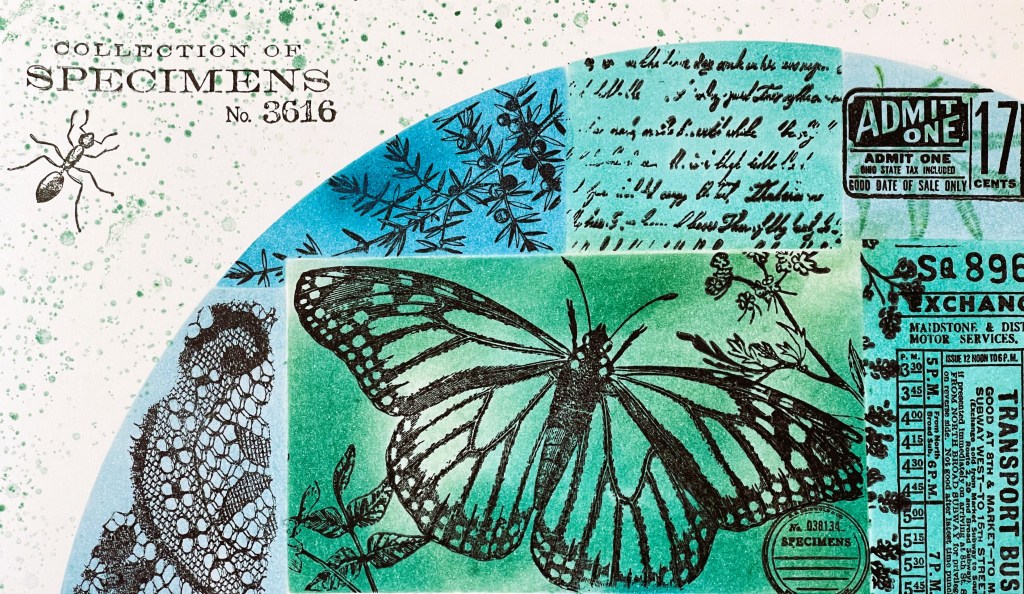
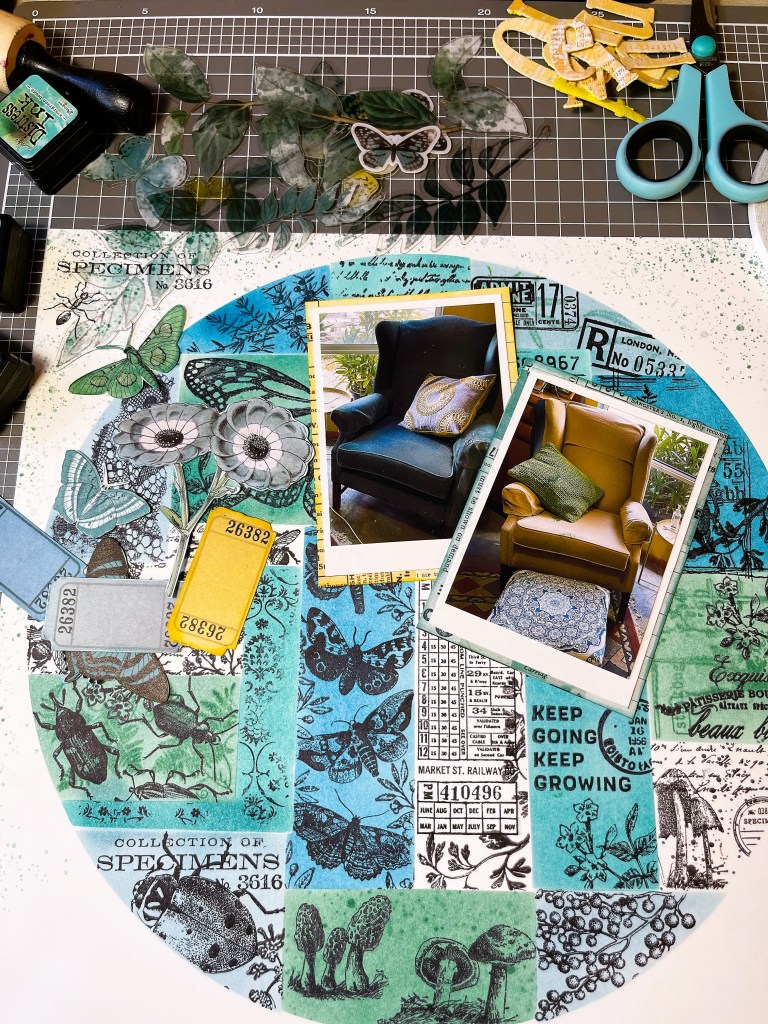
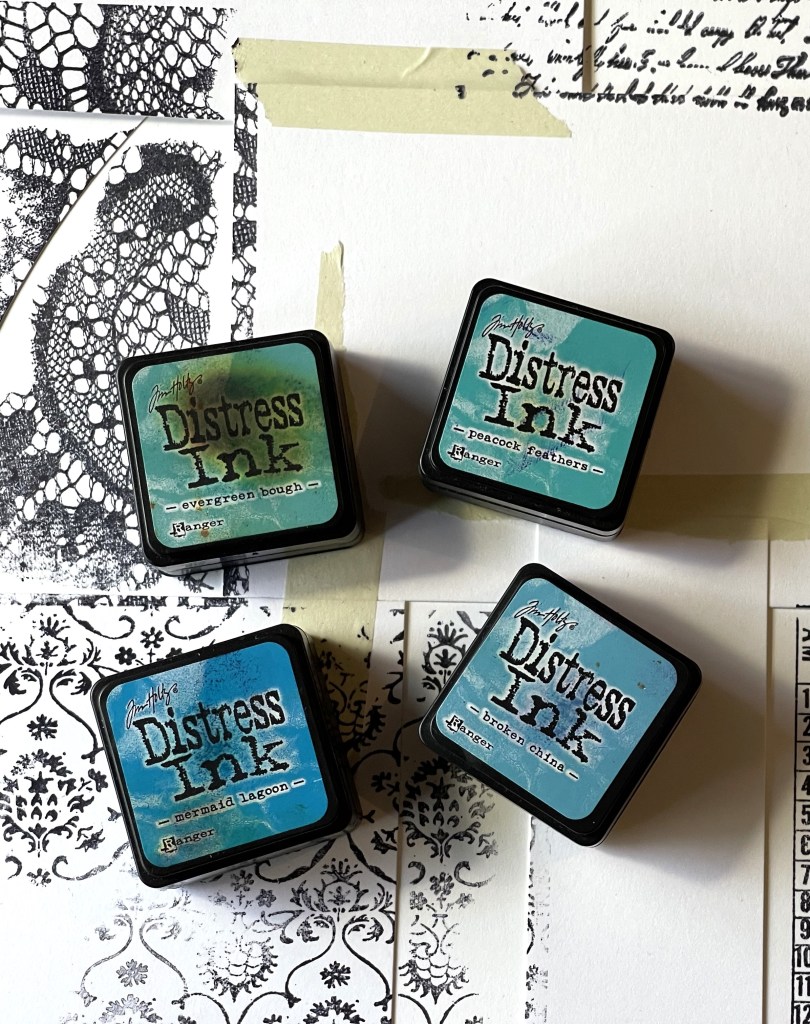
I have had a few requests regarding the stamped Spectrum Sherbet inspired 12×12 background that I created, shared on my blog, filmed and put on my YouTube channel. Some people were interested in seeing how I would use this background paper and others were keen to know which Tim Holtz inks I used. So, yesterday I created the layout, using more Tim Holtz distress ink and the 49 and Market-Spectrum Sherbet acetate embellishments (these are drool-worthy, love them). I love how it has turned out, the acetate embellishments really make a statement. The translucency of these allows for parts of the background to show through if you are using white or light cardstock, for instance, my ink splatters show through. However, some of the embellishments are opaque which is necessary in order for them to stand out on your page if you are using a heavily patterned background like I have. So, the acetate embellishments are pretty versatile, and a credit to the designer, they really thought about a crafter’s needs.
If you haven’t watched the ‘Make your own Spectrum Sherbet inspired scrapbook backgrounds’ video you can view it here. Later today my new video will come out showing how I assembled the layout and what products I used. I noted in the description the main products I used if you are interested. I have not included where to purchase any of the products, as I’m not affiliated with any companies, and I’m a big believer in encouraging you to shop local when possible or stay loyal to your favourite online store. Having said that, the 49 and Market, Spectrum Sherbet collection has been very popular worldwide and many stores sold out quickly, so you may have to search for stock.

Anyway, here’s what I did with it, in constructing the layout.

I used the embellishment sheet which comes with the collection. I needed some pieces which would pick up the colours on my stamped background and the colours in my photos. The photos which I’m using are of furniture, the latest to enter our house last month. I went to a local charity auction on my birthday and couldn’t quite believe it when no one was bidding on these two very lovely wingbacked chairs. The auctioneer was so desperate to sell them, with no bids happening, that he said $5! Well, then I couldn’t not bid, I raised my auction card knowing that others would then start bidding, only they didn’t and so, I ended up winning the bid. I am now the very happy owner of two wingback chairs that only cost me $5 for both! Did I need any chairs…no! We are now contemplating which lounge to get rid of, as things are a little tight in the living room.

Next, I double-matted my photos using some white cardstock and some of the 49 and Market-Spectrum Sherbet-Classics papers. Then, I made my title using some Paper Roses alpha dies, the Spectrum Sherbet-Classics-Brumbleberry paper (B-side) and some adhesive foam to give the title some dimension.

I inked the edges of my photo mats and my cut-apart embellishments. The inks I used were Tim Holtz distress inks – Broken China, Peacock Feathers, Mermaid Lagoon, Evergreen Bough and Mustard Seed (my favourite yellow).

Time to put it all together, it was just a matter of layering the embellishments. I use wet glue, Mono Aqua Liquid Glue, and double-sided tape to adhere everything. The Mono Aqua Liquid Glue worked really well to adhere the acetate embellishments, as it’s a clear glue.
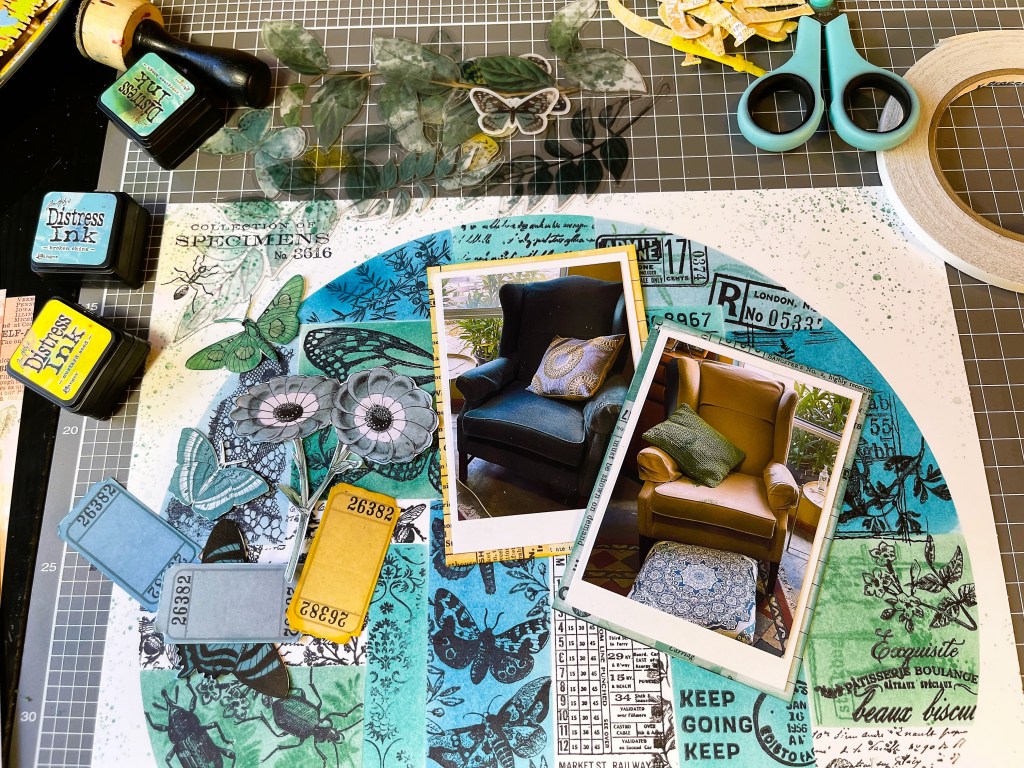
Overall, I am very pleased with how it looks.

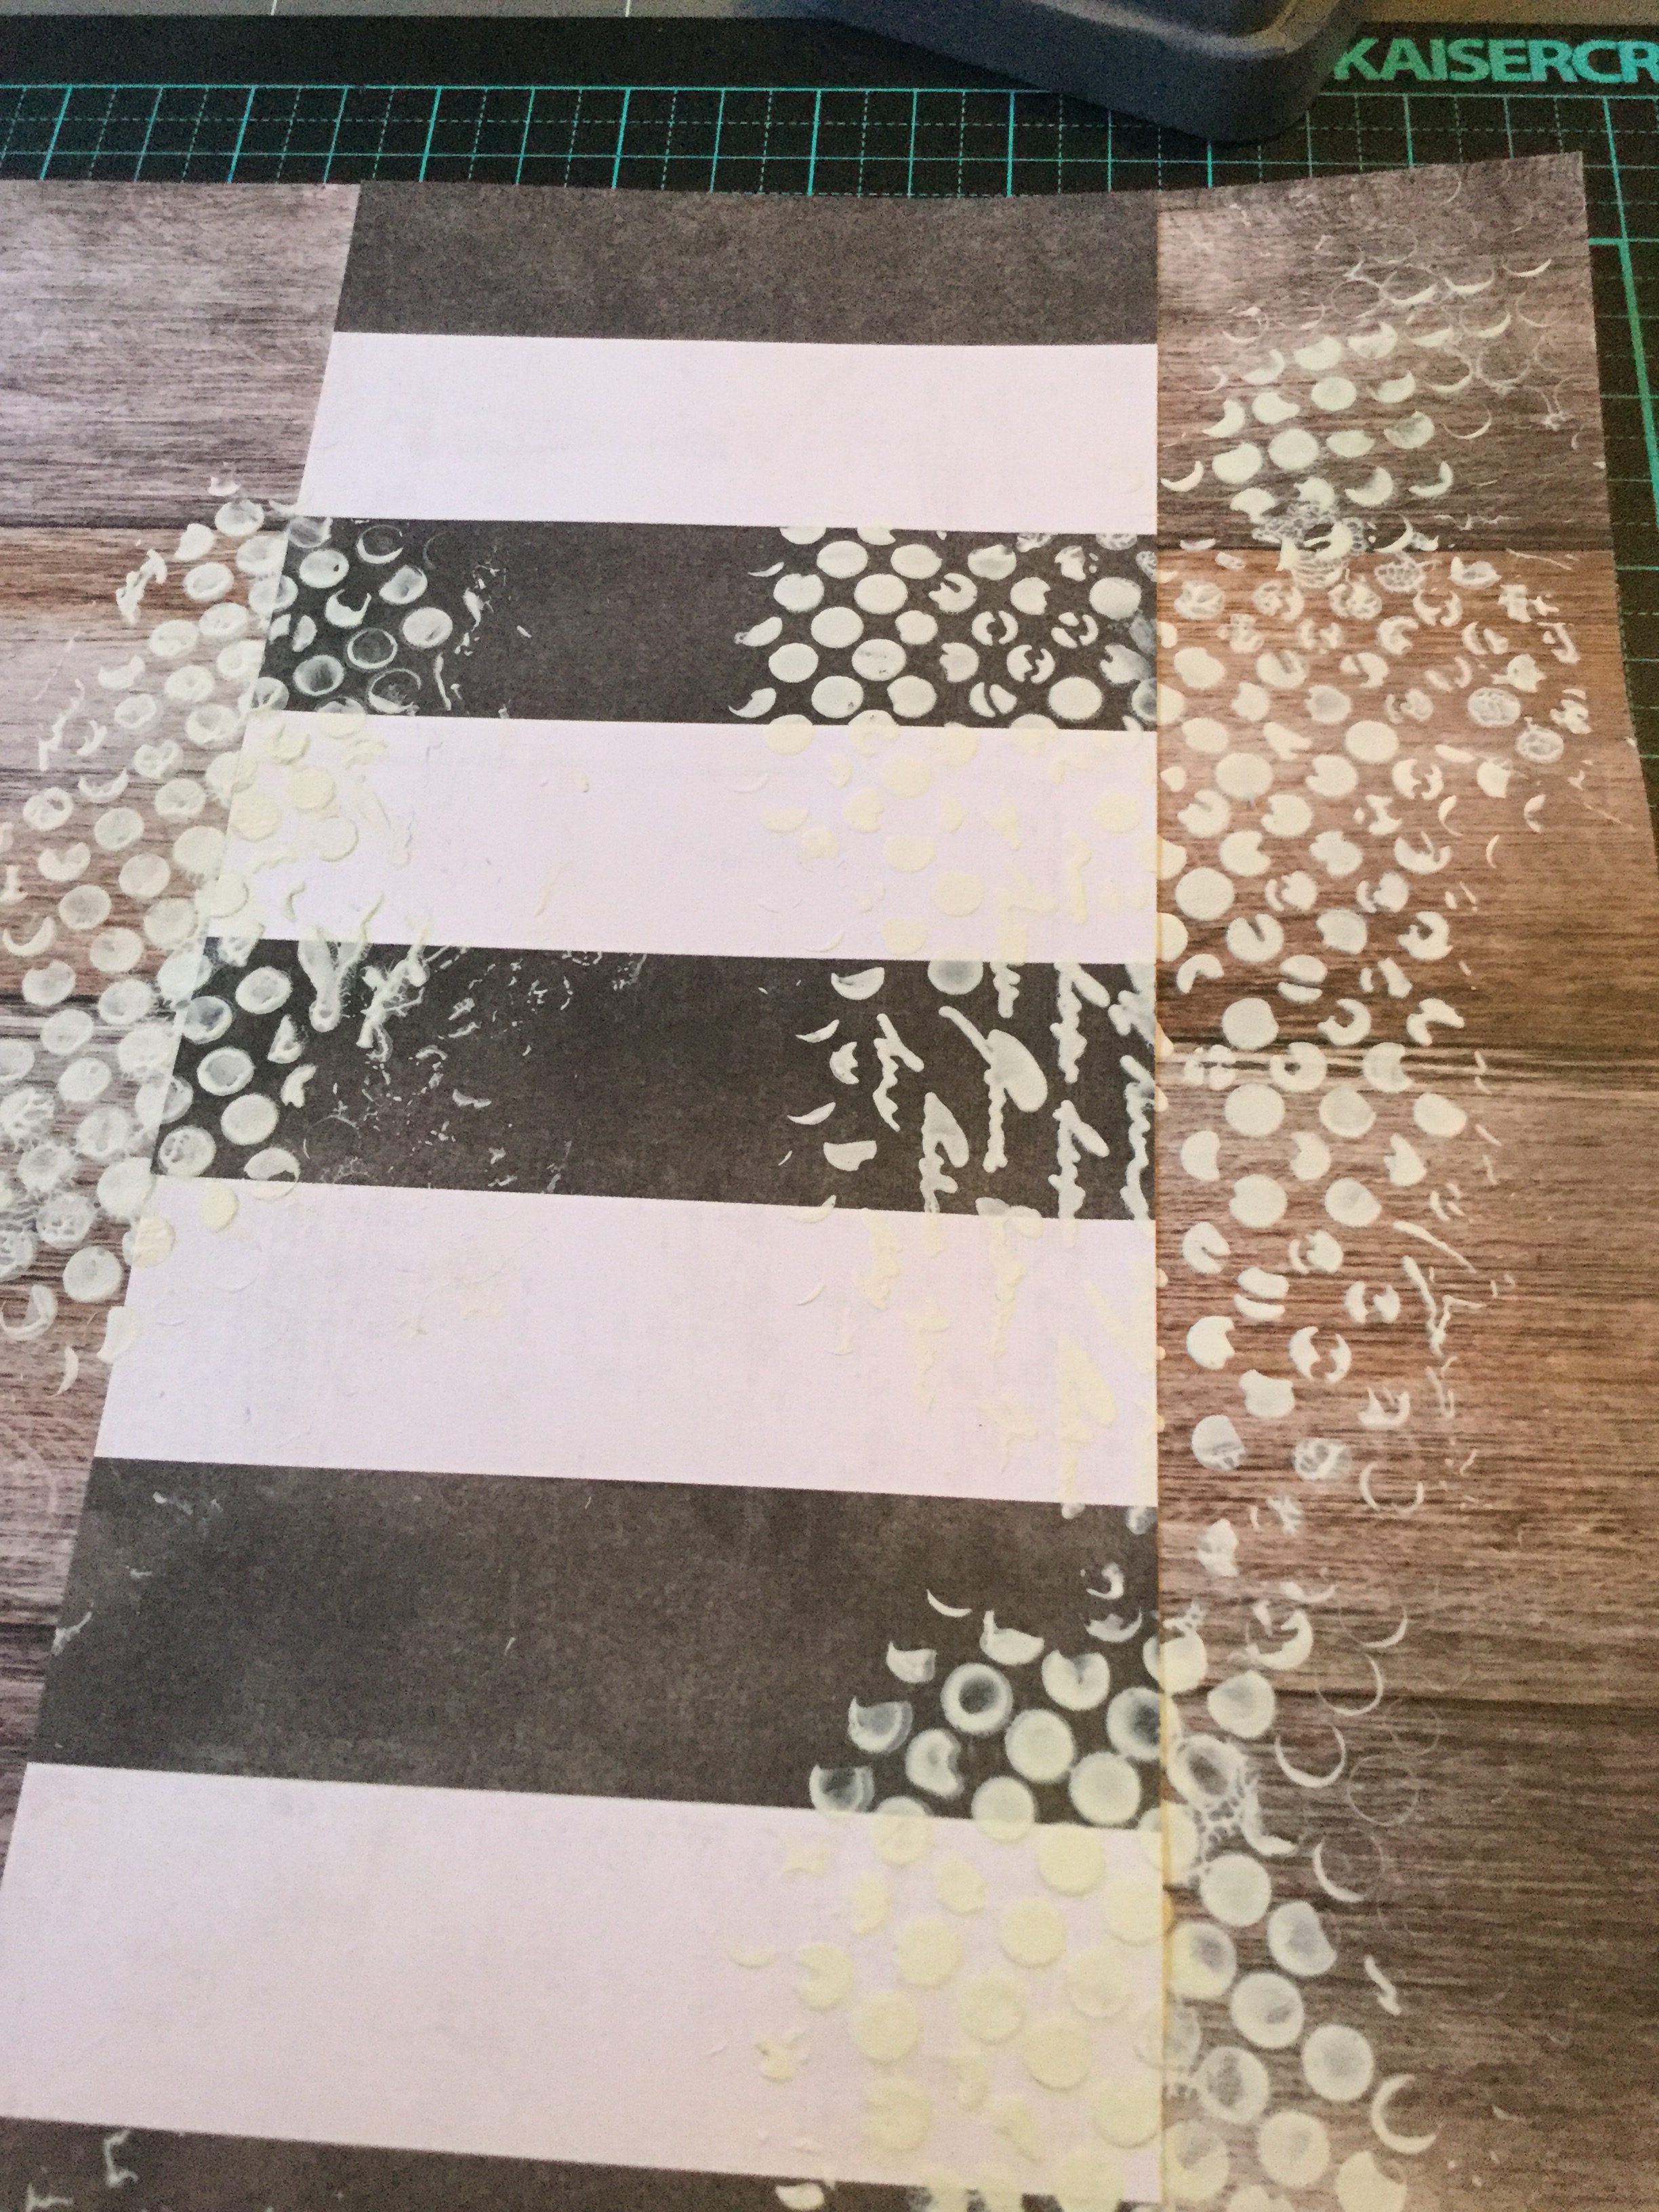
My next layout share will be working with the brown/grey stamped background I created, also inspired by the collaged effect found on the B-side papers from the 49 and Market-Spectrum Sherbet Classics pack. You can view images of this stamped background in my last blog post, scroll right to the bottom to view them.

To view the process video click here.

To view how to make the stamped background click here.

Making Spectrum Sherbet inspired backgrounds!

Hello, old friends!

Here I am back again playing after a very loooonnnngggg break. Life last year got completely crazy for me and time to blog was just beyond me. I was overwhelmed with going back to University to study for the third time, what was I thinking? Well, really it was studying, and upgrading my qualifications or losing the chance to further employment. Anyway, I qualified with flying colours and life is a lot more mellow. So, I have been loving having the opportunity to scrap and paint when I’m not working.

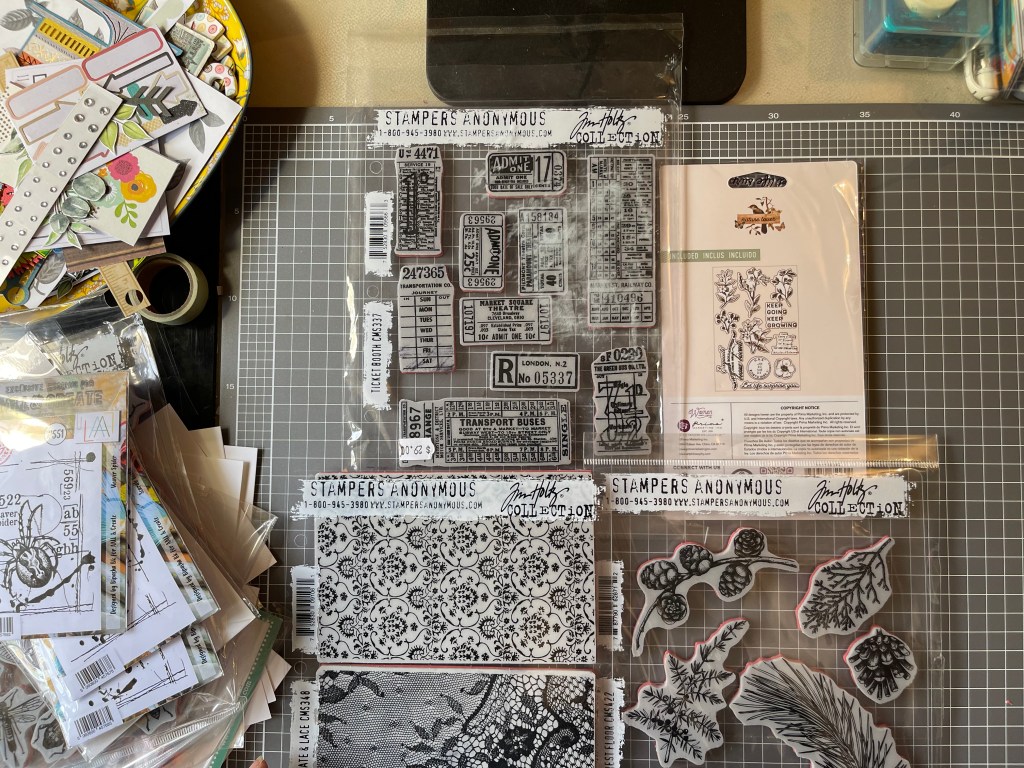
Anyway, let’s scrap! Like half the scrapbook community I have fallen completely in love with the 49 and Market, Spectrum Sherbet collection. A scrapbook collection with the most amazing colours, textures and patterns. I wanted to buy it all but unfortunately, my finances couldn’t stretch to buying the whole collection, plus I already have so many supplies to use up, that I held back and just purchased the one classic pack and two packets of the acetate leaves. Both products are absolutely beautiful.

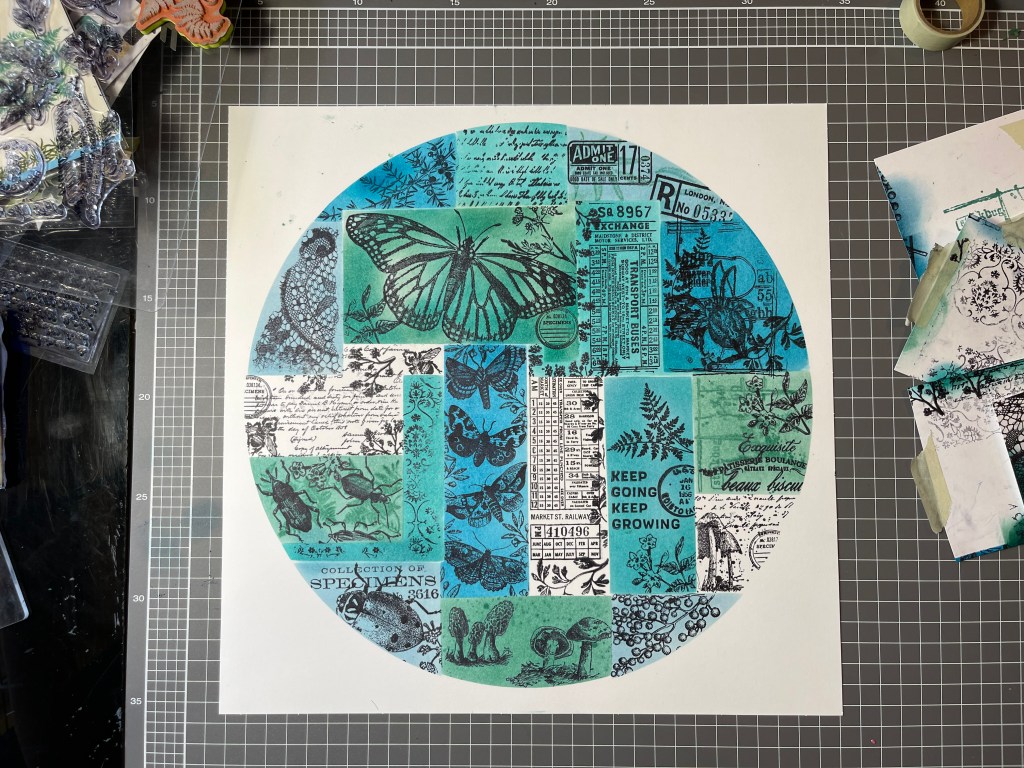
So, beautiful that I don’t want to use the paper as I only have one of each! Being two-sided sheets, with gorgeous designs on both sides makes it even more difficult. How can I possibly choose which side to use? Well, my creative mind had an epiphany when I realised that I could try and make some of my own papers in the same style as these beauties.

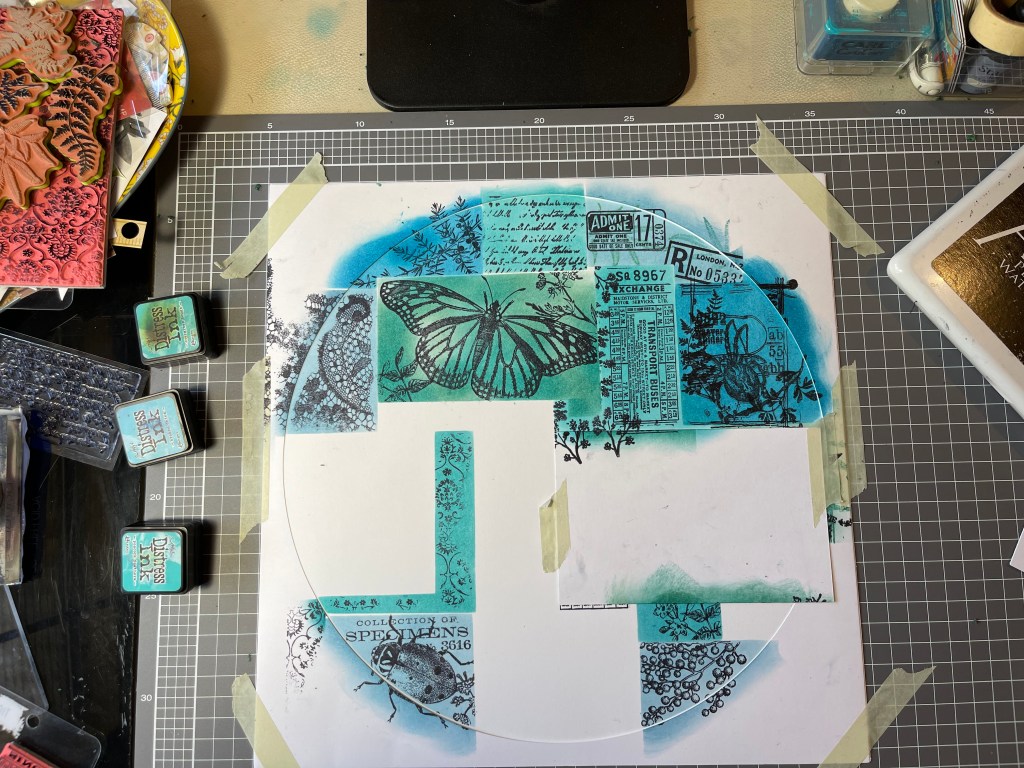
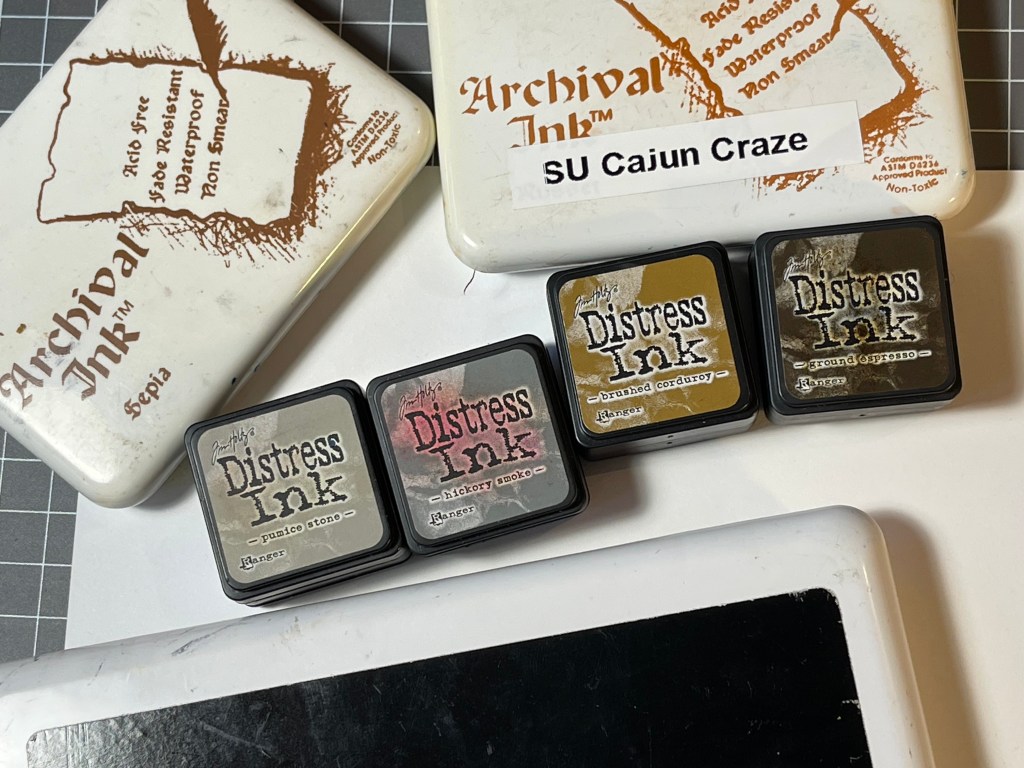
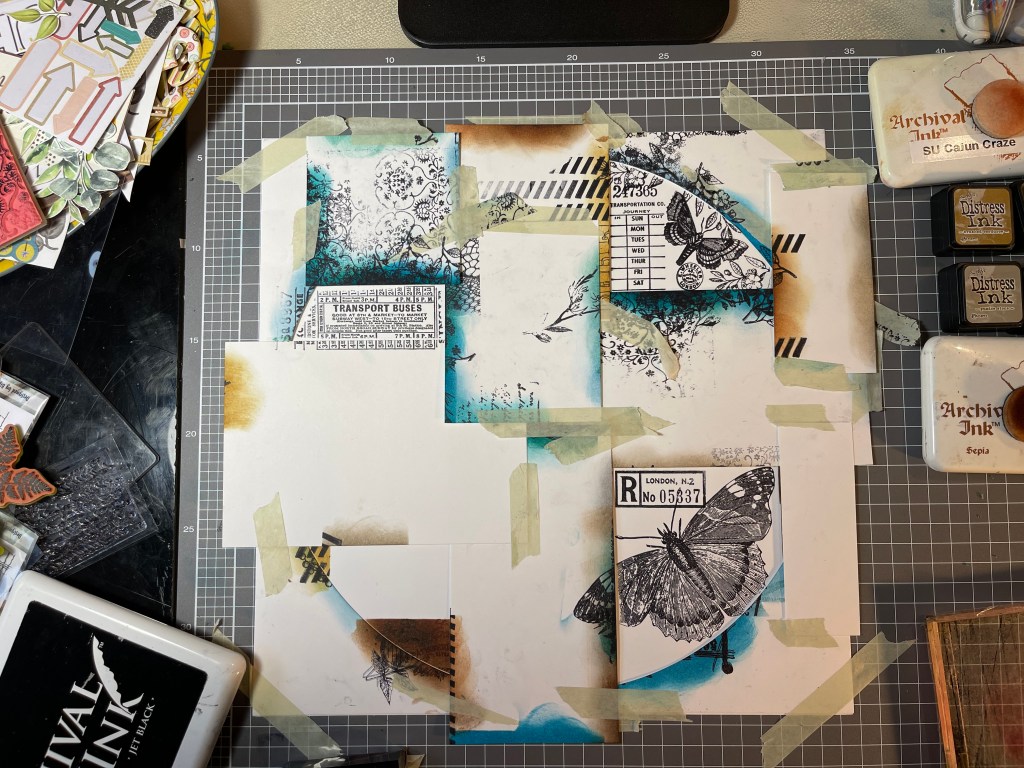
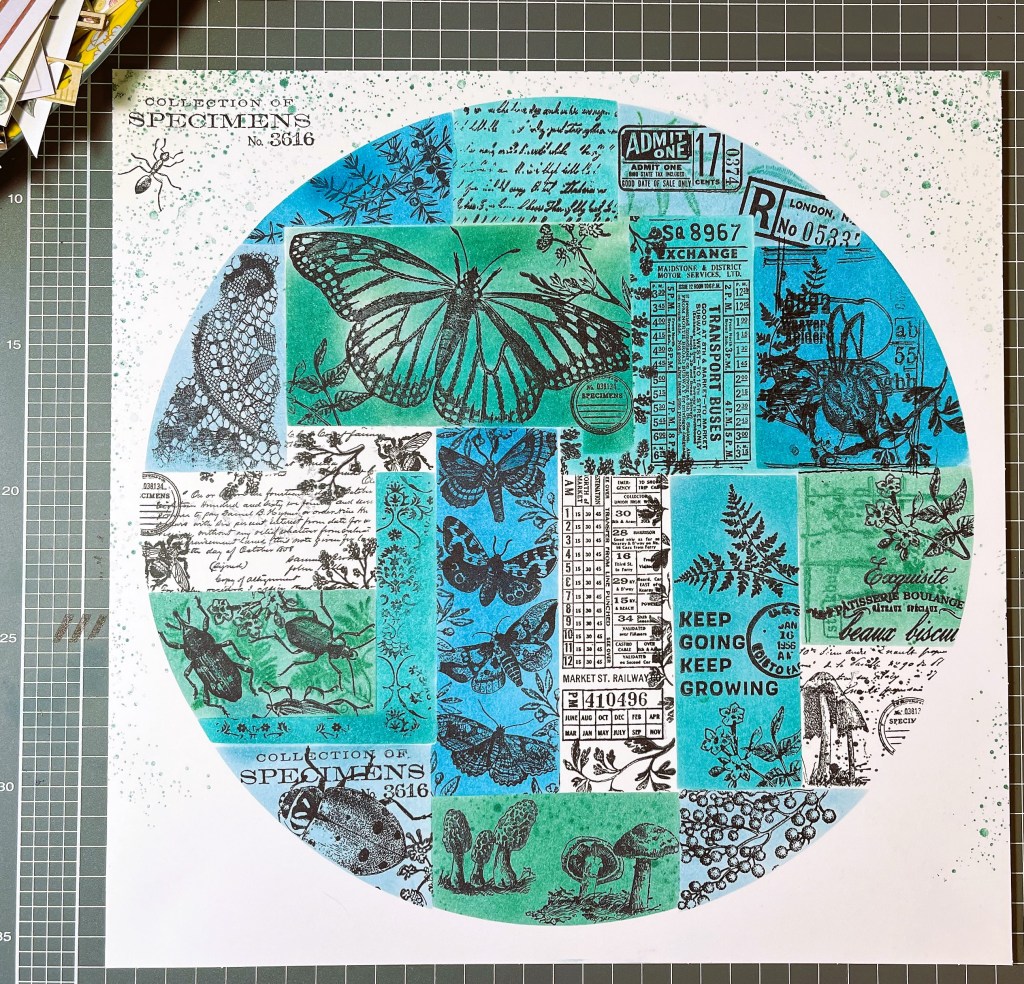
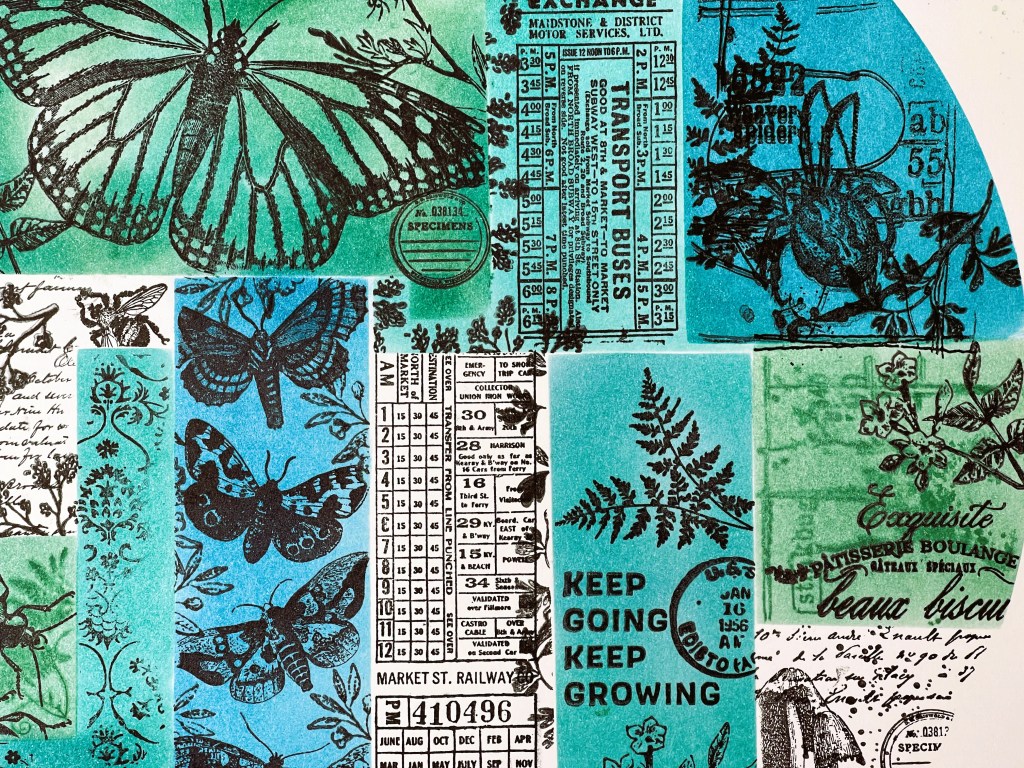
So, make I did, and it was a wonderful experience. Yes, it took me a few hours but who cares about time when one is creating. I stepped back in time and used an old stamping technique, masking, which worked really well to create that collaged look. I chose to work with Tim Holtz Distress inks (for my first attempt) and chose to try and create a teal blue and green background.

I really stepped out of my comfort zone and even filmed the process. Yes, people, I have made my first ever scrapbook video. Something that I have been planning to do for years but have not been brave enough, nor had the time. It’s pretty basic, so be kind. If you are interested in watching it, you can view it on my YouTube channel here. I would appreciate any feedback, so please do leave a constructive comment and like the video. With some motivation and support from other crafters, I hope to continue to develop my video production skills.
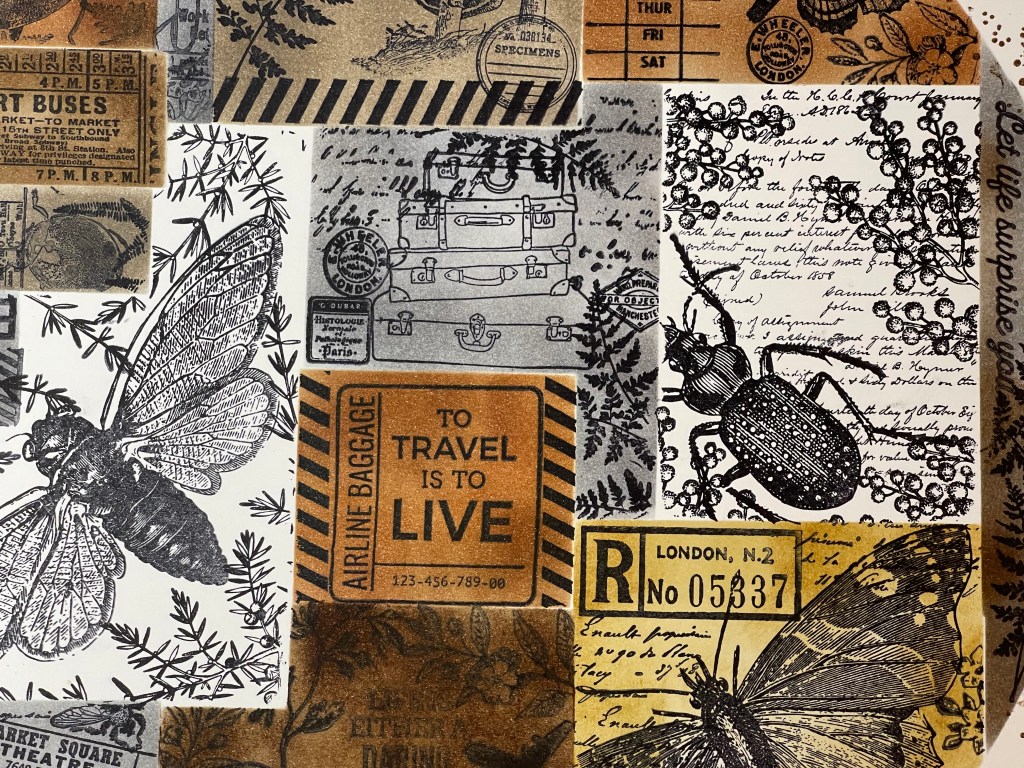
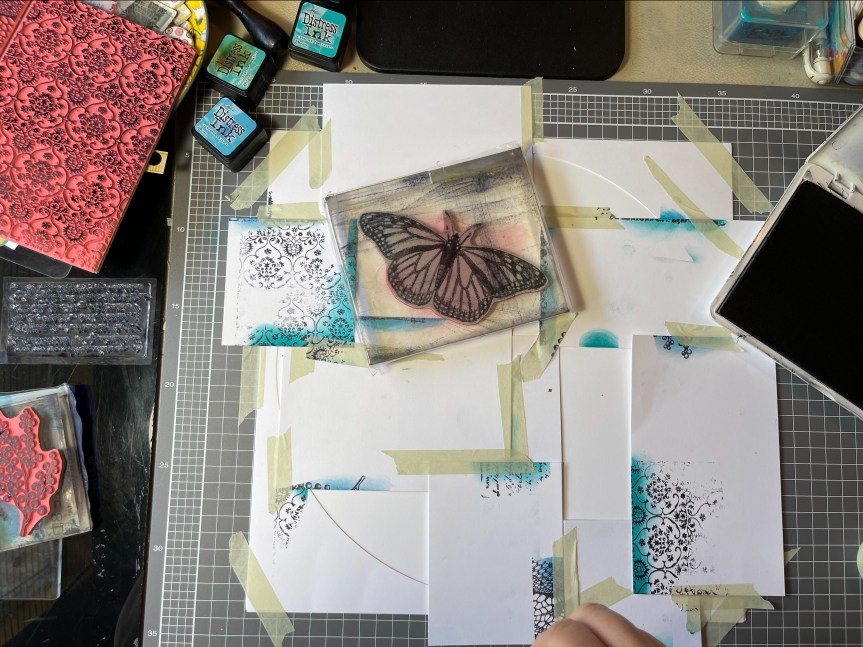
Right, so let’s look at stamping and masking. First I selected a heap of stamps which could blend to create a similar nature theme. I also selected some travel stamps for fun, which I used on the second background. I chose to use some Vicki Boutin foundation mixed media cardstock for the first layout, it’s a good quality cardstock made to take wet media, so should easily handle a bit of ink. I also use some thinner Poppy Craft cardstock which I used for the masking shapes and for making a template.

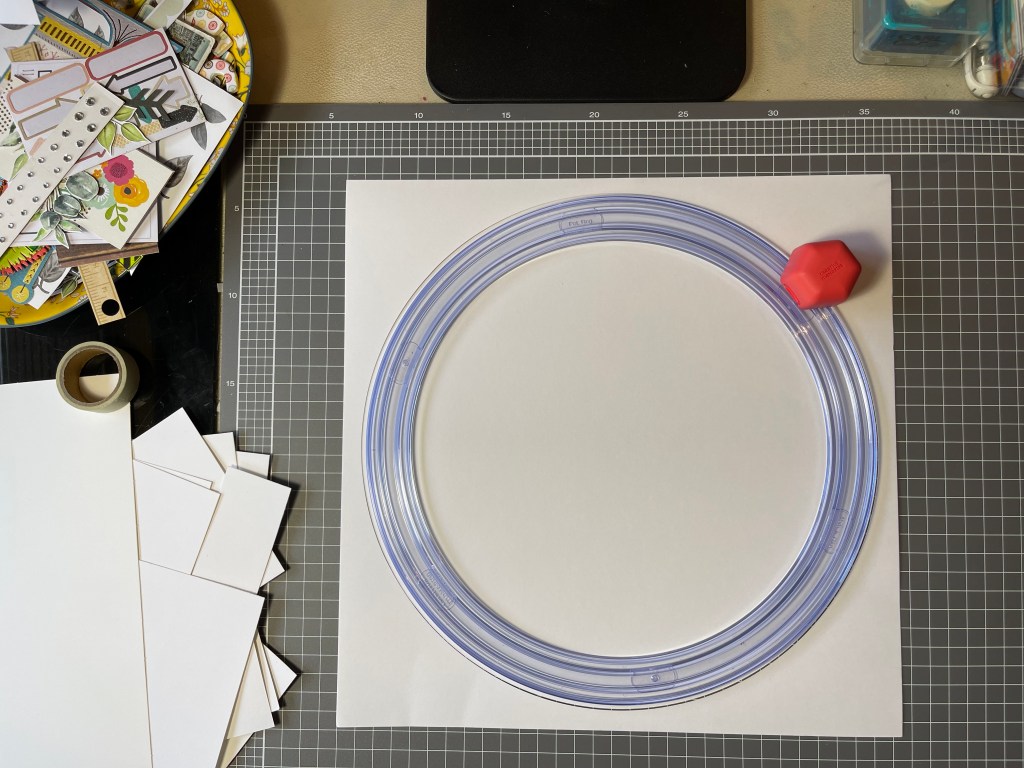
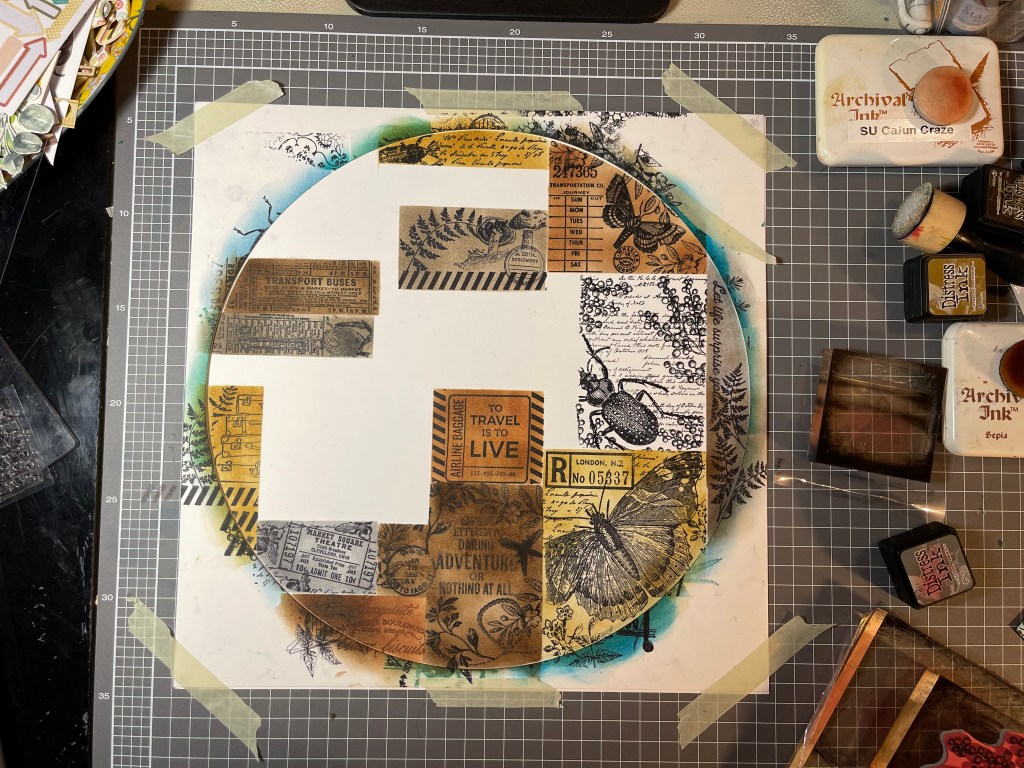
Template? Yes, I decided to not directly copy the Spectrum Sherbet design making a 12×12 sheet but used the collage look within a circle template design. I masked off different sections of the circle and stamped on my images, colouring each section with the distress inks. It was a pretty easy process but a bit fiddly and time-consuming. I really like how it looks in a circle design. I ended up adding a little stamped splash around the edges where I accidentally got some ink smudges. overall, I’m pretty happy with how it turned out.

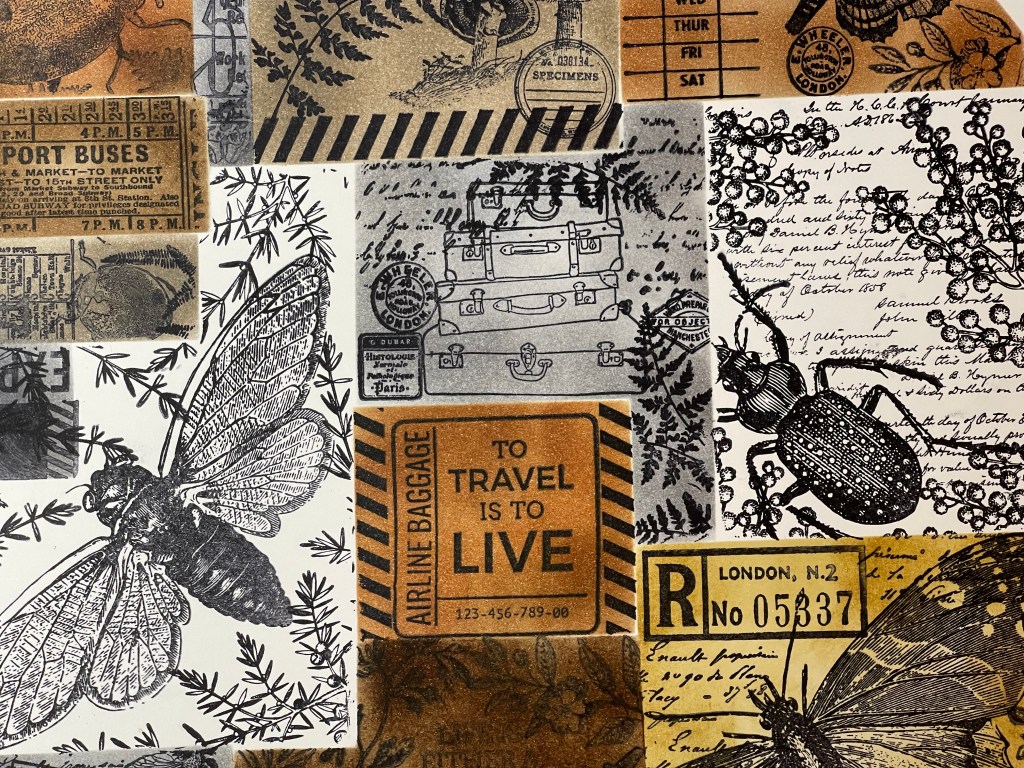
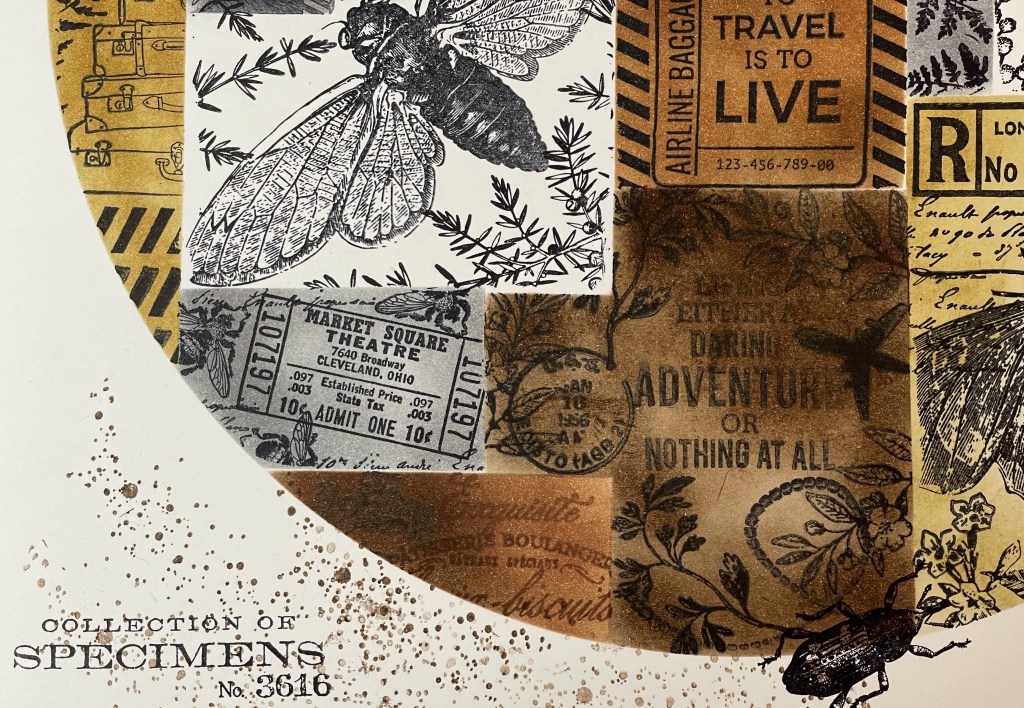
So happy that I made a second background, working with grey and brown inks and adding some travel stamped images. Not at all a sherbet colour, but I love it anyway.

2020…First Layouts of the New Decade!

Happy New Year to all, hope that you all had a lovely time celebrating with family and friends. My New Year celebrations were spent with my girlfriends who help me get through every year with love, laughter and support. None of them are scrapbookers and they don’t really get it, but they are artists and we try to spend arty times together throughout the year. 2019, was a little lacking on our normal arty events with us all dealing with busy lives. I hope to make more effort this year in keeping our creative catch-ups happening with a few arty outings throughout the year.

Anyhow, to kick off my 2020 scrapping, I chose to do a scraplift. The problem I have is 2020-01-02 09.13.09that I don’t know who created the original layout, I tried Google image search and had no luck…they linked it to artificial flowers! I wonder why? Haha. So, if you know whose layout this is please let me know, I would like to credit them? What I loved about this layout was the negative space and the layering on both sides of the layout.

My attempt started with building up some background using gesso and a stencil. The main reason I did this was that I didn’t really have a whole heap of embellishments to use with my photos, plus it gave me time to get messy and really play. I wanted to use some new supplies from Santa, the papers, plus use up some neglected products, the ribbon and frames.

I blended out the gesso edges, rubbing it with my fingers. Then, I sponged on some oxide distress ink, as the white gesso was a bit too stark.

Next, I mounted and built up the layers behind the photos and used the same papers to begin the corner embellishment cluster.

I then, layered up my embellishments with some found old Sizzix cut die cuts, wood veneers and die-cut alphas for the title. The last touch was adding some Nuvo Crystal Drops to create enamel dots. I’m slowly getting better at applying the Nuvo drops, though some are trickier than others due to how thick the mix is.

The finished layout is pleasing but I do need to add some journaling about why we have to do this for every new tree planted, one word…kangaroos! They devastate pretty much anything new, if they can reach it they will eat it and the tree guards can not be removed until the tree is well established.2020-01-02 08.51.33-1

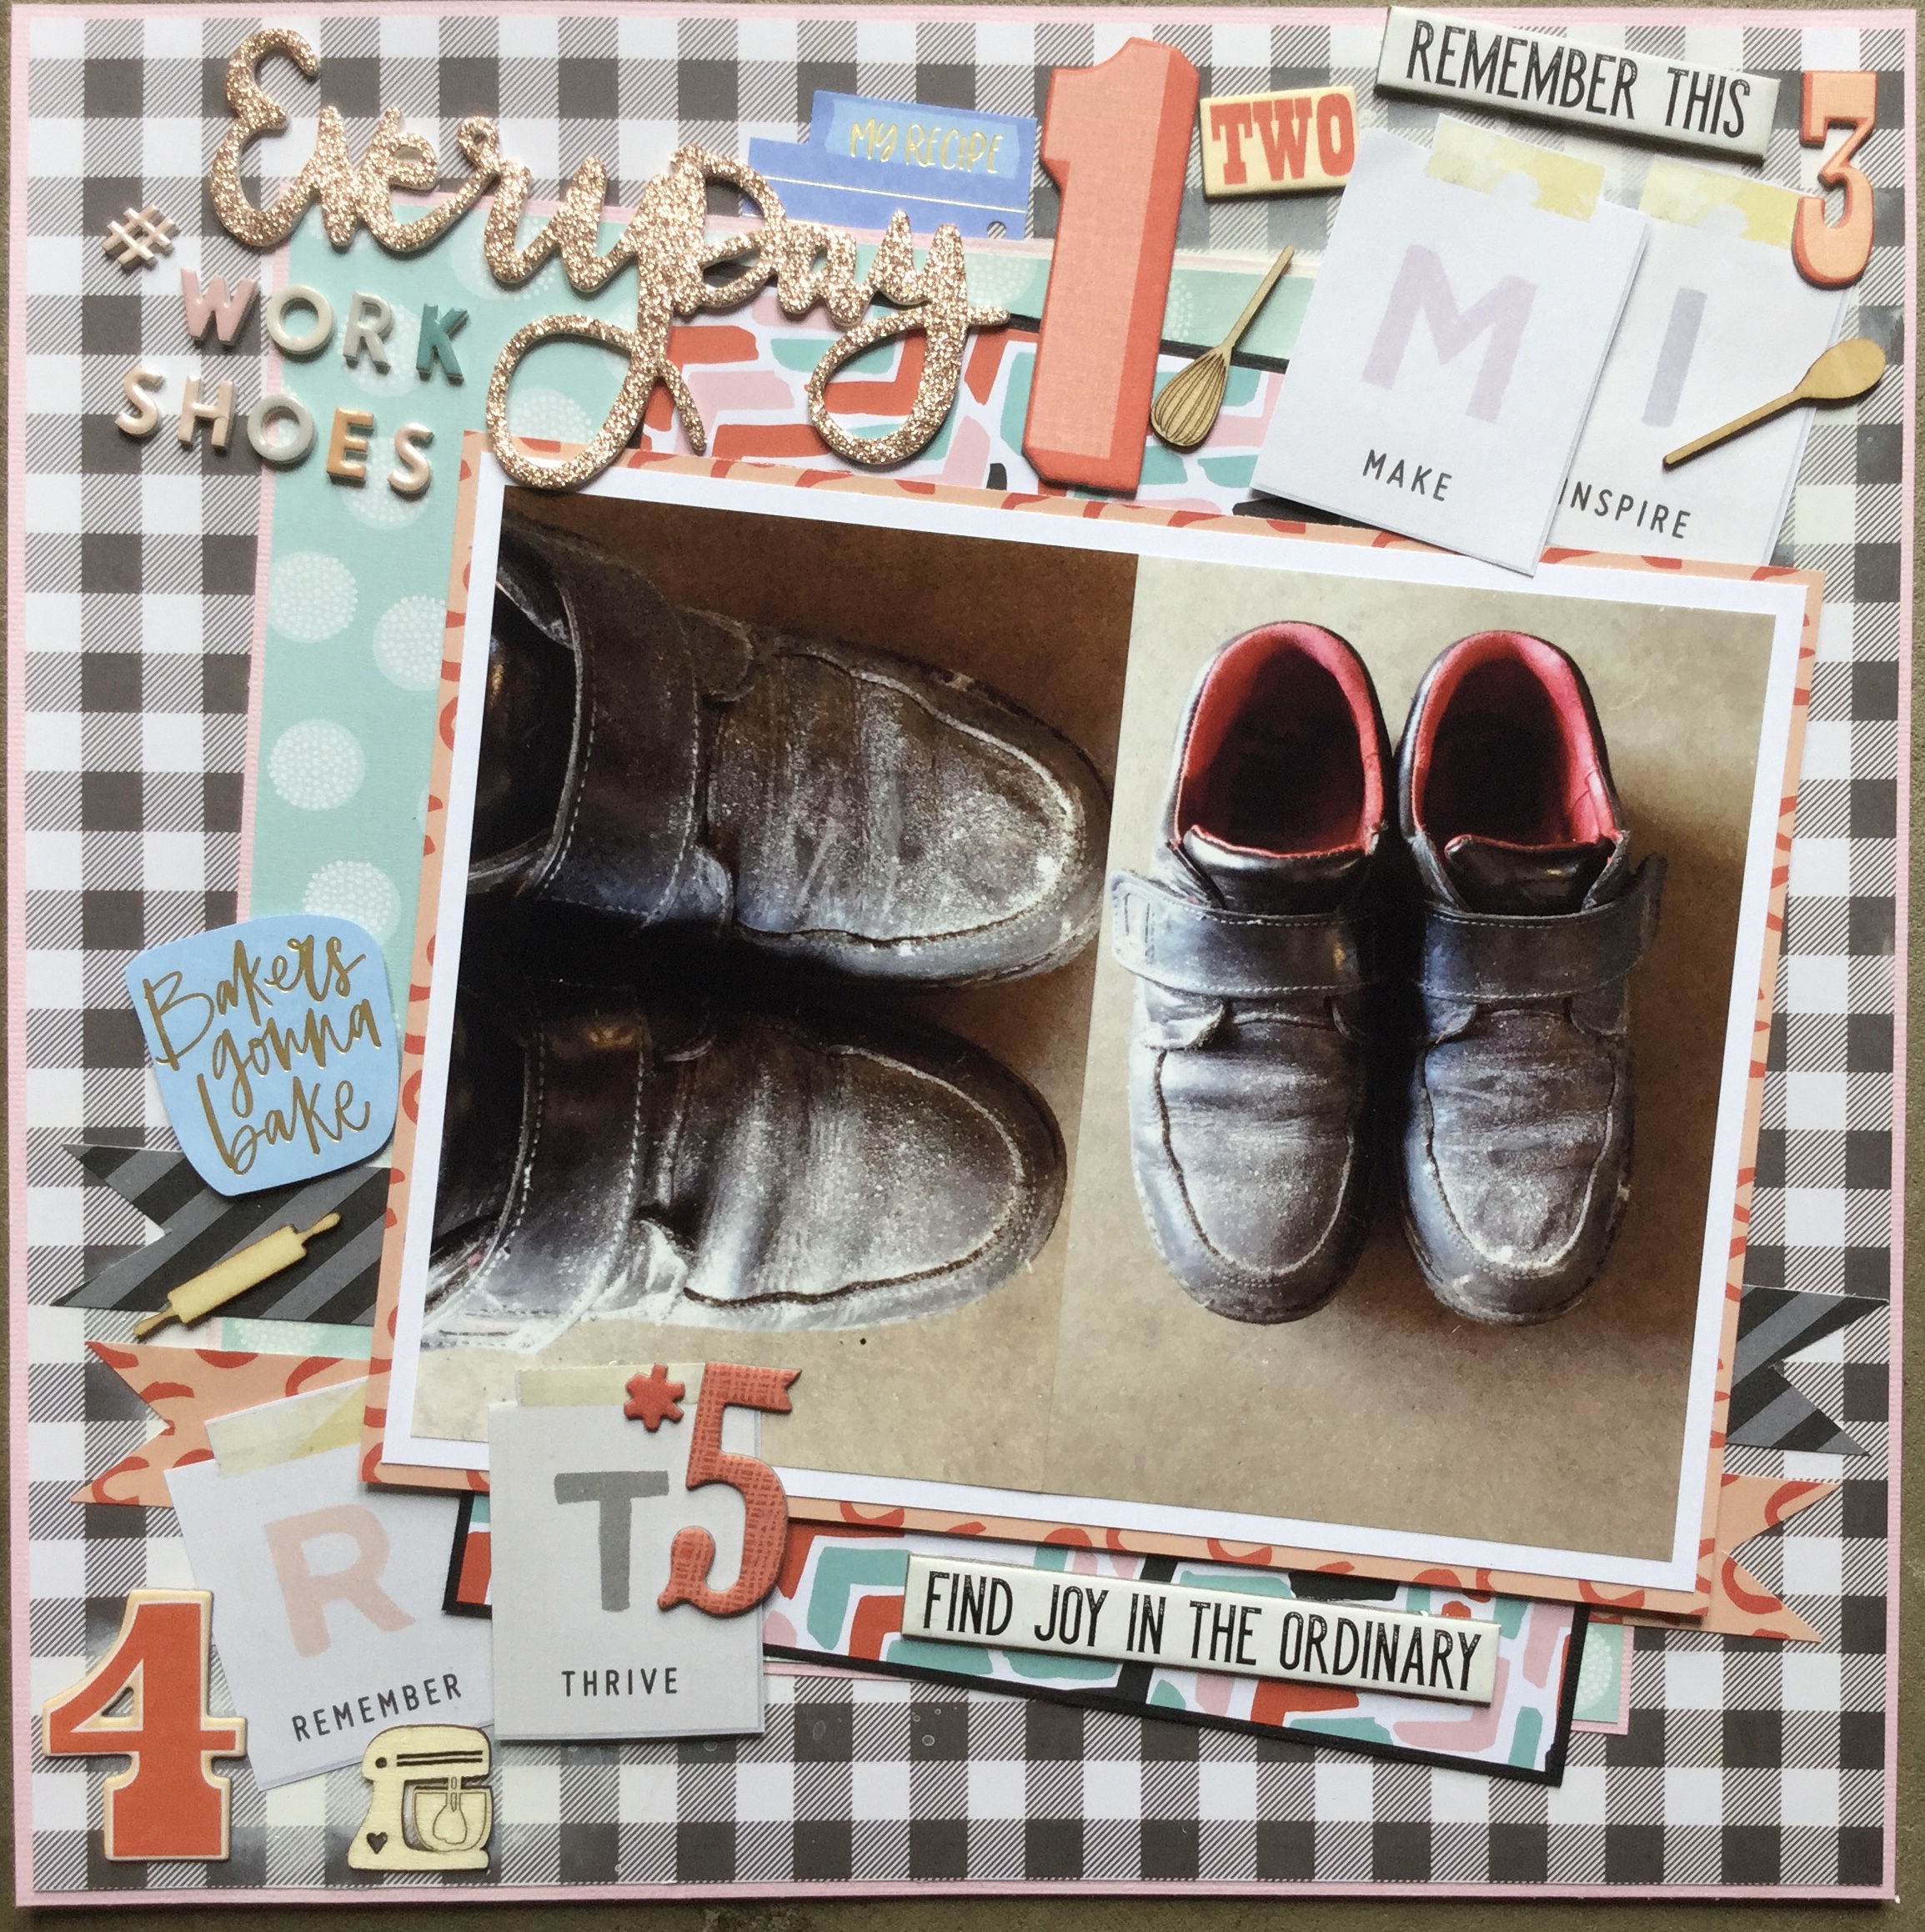
The second layout for 2020 is about my husband’s shoes, not a topic that most people would scrap. The reason I wanted to capture this memory is that he is finishing up his baking career, he did his last shift two days ago. No more flour-dusted shoes and night shift, it will be a change for us all having him home in the evenings and not having him arrive home while I am drinking my morning cup of tea.

2020-01-02 09.54.03

The papers I used were from Santa, a mix pulled from several paper pads, including this gorgeous alpha sheet from Maggie Holmes’s Bloom collection. I fussy cut this sheet to use as embellishments and selected four of the alpha cards for this layout.

I smeared some white gesso onto two opposite corners on my background to try and get a floury texture and sprinkled on some white ink for spots of flour. In the end, most of this got covered by embellishments and is hard to see in the finished layout photo.

Then, I went to town mounting and layering papers, adding the photos, embellishments and titles. I quite like how it turned out and think it just needs a thin journal strip at the base outlining the story.

2020-01-02 12.14.02-1

The last two layouts I completed are of my grandson, I tried to add some bling to both and use up some sequins. The top layout is made with a Vicki Boutin, mixed media, printed cardstock. Yep, Santa thought that I needed some time off from creating my own mixed media backgrounds and bought me the paper pad. I couldn’t resist adding a touch of colour and stencilled around the edges using a Uniquely Creative stencil and some TH distress inks. Both layouts have some Maggie Holmes and Shimelle papers/embellishments, and the bottom layout has some more Nuvo drops (don’t look too closely, some of the dots are not round…haha).

2020-01-03 07.47.44-1

2020-01-03 07.49.07-1

I hope you all are getting some time to scrap and have a fabulous crafty year. For some of our Australian friends and crafters, life is tough at the moment with the extreme fires burning across our country. Many have lost homes and loved ones, if you can support them in some way, please do? It may be just in prayers, offering accommodation, food and supplies, or donating cash to one of the many collection funds which have been set up across Australia and the World. Every little bit will help in this intense time of need. Thank you to all our emergency services and volunteers across the country who are working at full capacity, and to the USA firefighters who are coming to help us out. Let us all hope that rain will arrive soon and help quench the flames, it is really the only thing that will stop this firestorm.


Happy scrapping everyone  🙂

Please leave a comment below or share with other creatives, remember you need to open the post by clicking on the title to access the comment box if you are on the home page.


RTS 6×6 SG Challenge Layouts

Hey all,

I am playing catch up and only just sharing these layouts from several weeks ago!  I had a lot of fun joining in with Janet Maden’s challenge from RTS which focuses on using 6×6 paper pads with scrapbook sketches from Allison Davis at Scrapbook Generations.

It has felt like a step back in time, using double page sketches, as I tend to focus on single layouts with a matching pocket page these days unless it is for a challenge. When I do use a double layout format it seems to be all or nothing, I make a stack of them in one week, then none for months and months. I do have have a few on my blog from last year which I will share links too at the end of the page.

So, here we go, my seven layouts from the RTS 6×6 Challenge

I mostly followed the Allison Davis sketches whilst watching Janet’s RTS 6 x 6 series, Janet always has a different slant on how to use your cut pieces in multiple ways. My first layout is of my grandson after he took to himself with a permanent marker! I’m pretty sure he will end up with real tattoos when he is old enough, he is influenced by his parents who both have tattoos and he has an uncle who is an apprentice tattooist.

Layout #1. Cool Tatts, homemade! Lots of ink splashed around here and some stamping, every layout has mixed media in this bunch. I used some old TLC rubons and a mix of quote embellishments.

2019-10-27 11.55.37-1

Layout #2. Big Blow Up! A blower vac war between my hubby and grandson. Ink and stencils this time, some of the new Vicki Boutin honey stencils and a Kaisercraft floral stencil.


2019-10-27-07.40.46-copy.jpg

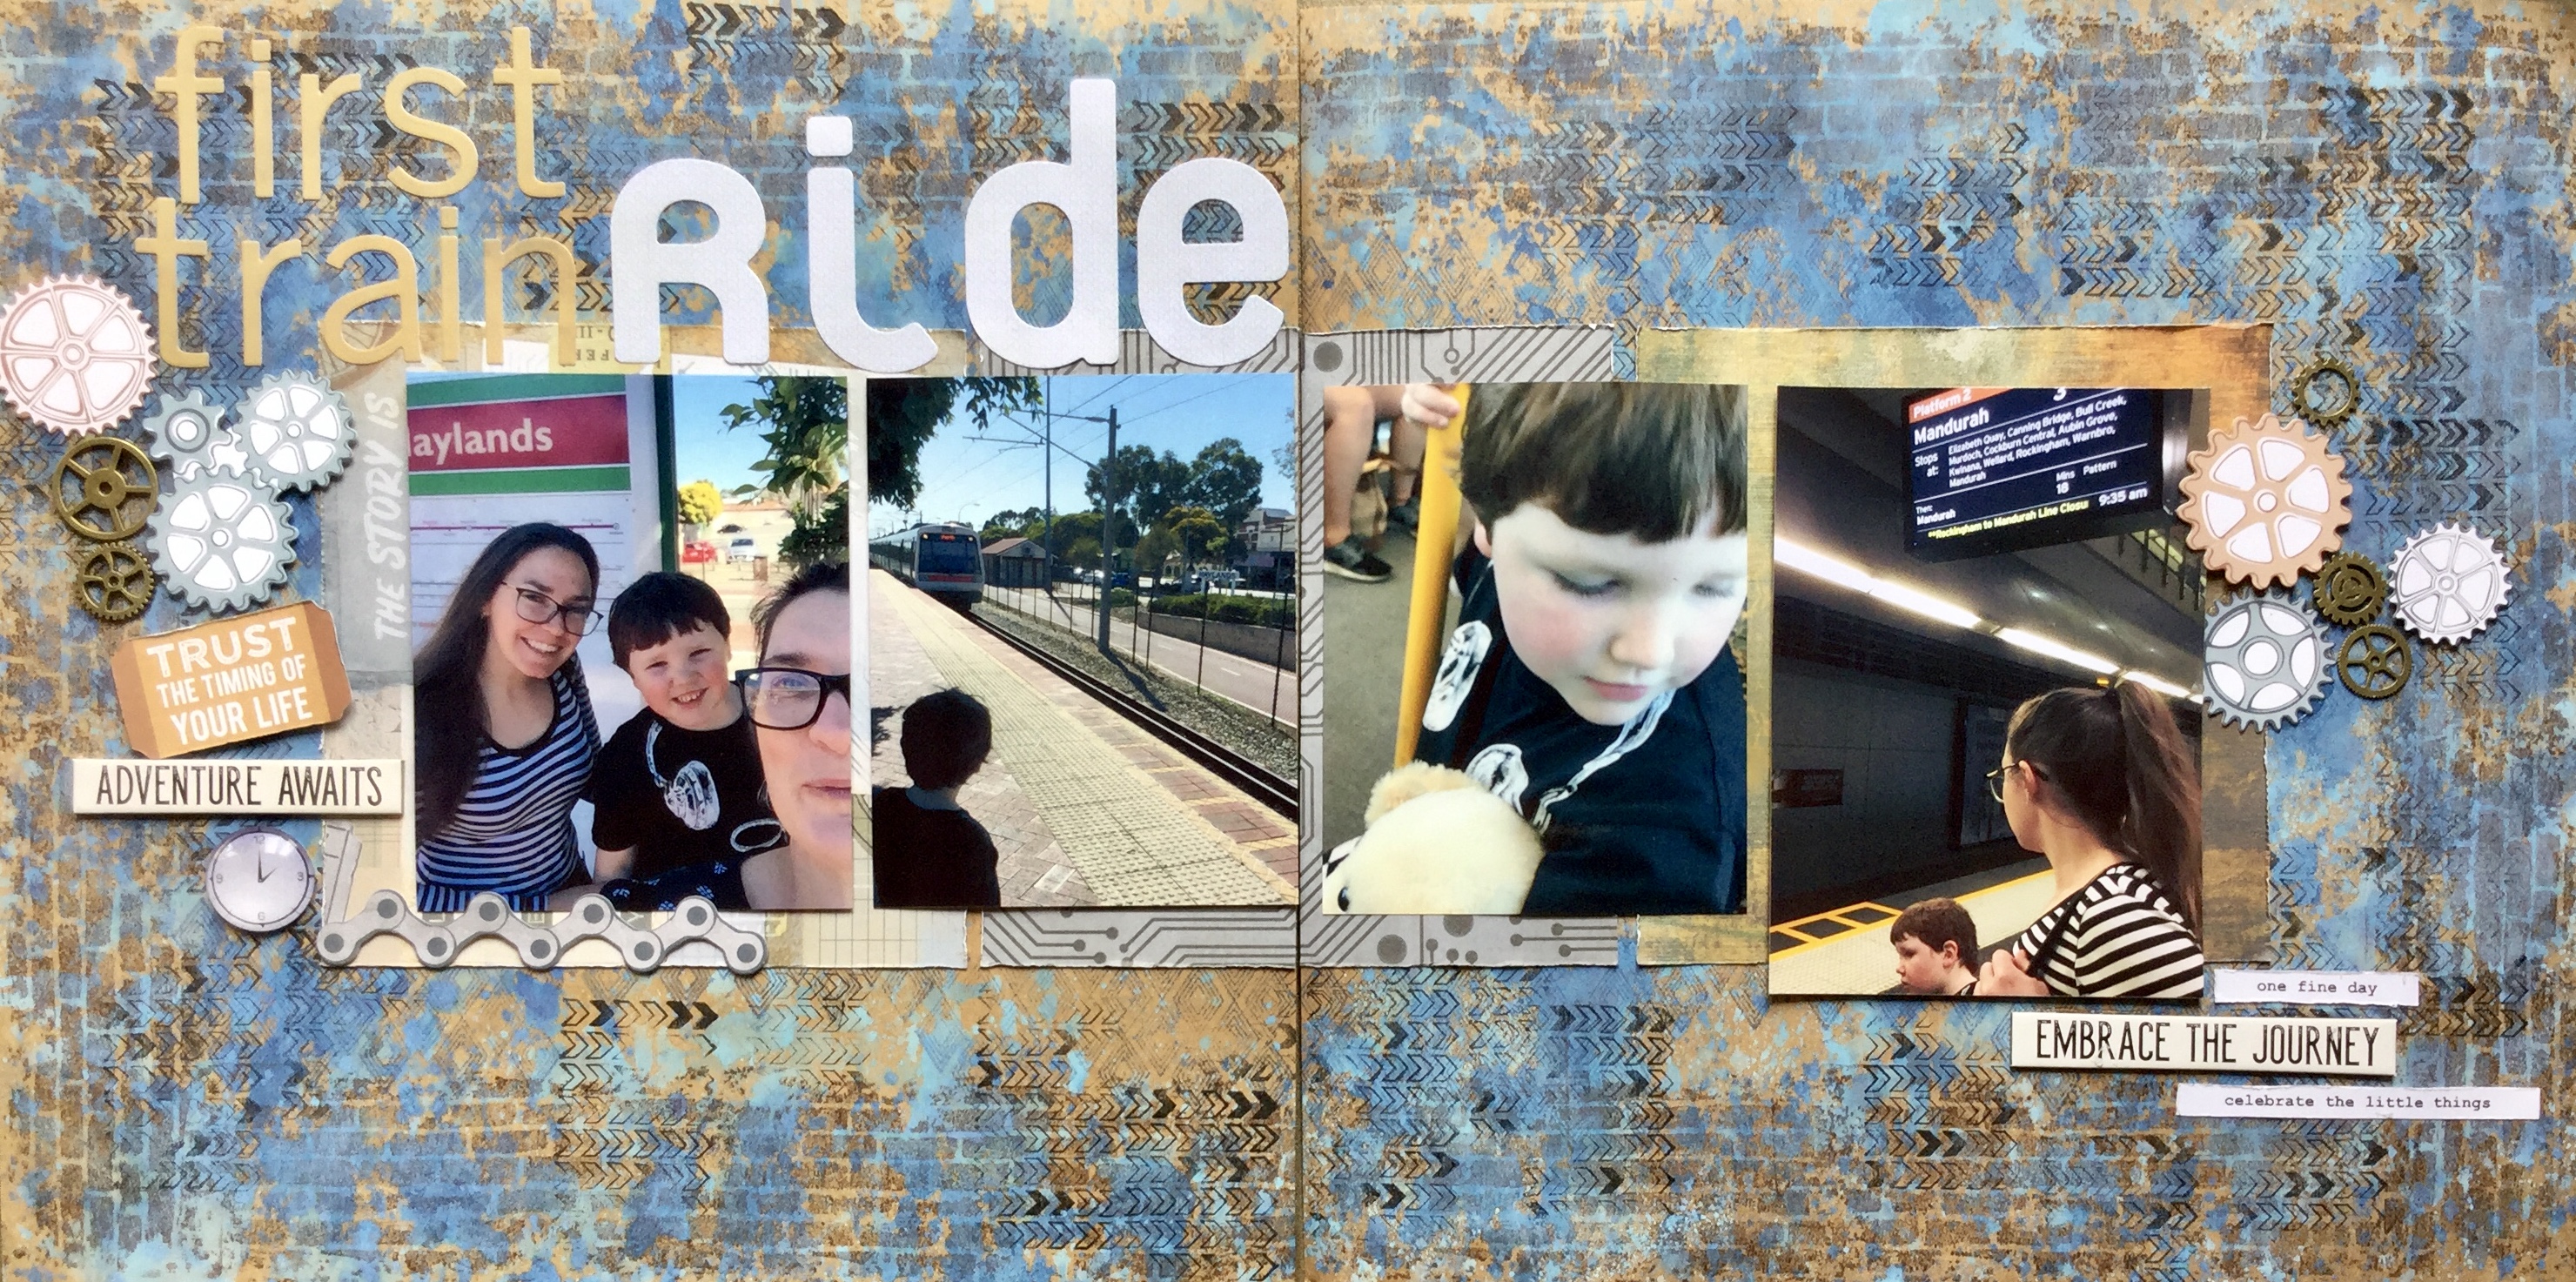
Layout #3. First Train Ride. Some more splashed around Oxide ink and lots of stamping to make the craft stock background. The patterned papers and die cut embellishments are from Kaisercraft.


2019-10-29 14.16.21-1

Layout #4. Round We Go, photos from a day at the Perth Zoo when we tried out the merry go round/carousal. Circle stamps to get that ‘mood and feel’, as Janet would say.


2019-11-03 10.59.22-1

Layout #5. more Zoo photos! Our zoo trip was not planned and we weren’t prepared for a day in the sun, so we bought very daggy zoo hats. Looking very fetching we just had to have a selfie taken.

At the Perth Zoo, there are many large, ancient, pine trees and I thought this cute decorative fake foliage, which I picked up for $2 from Spotlight, would make great pine trees on my layout.


2019-11-03 06.29.59-1

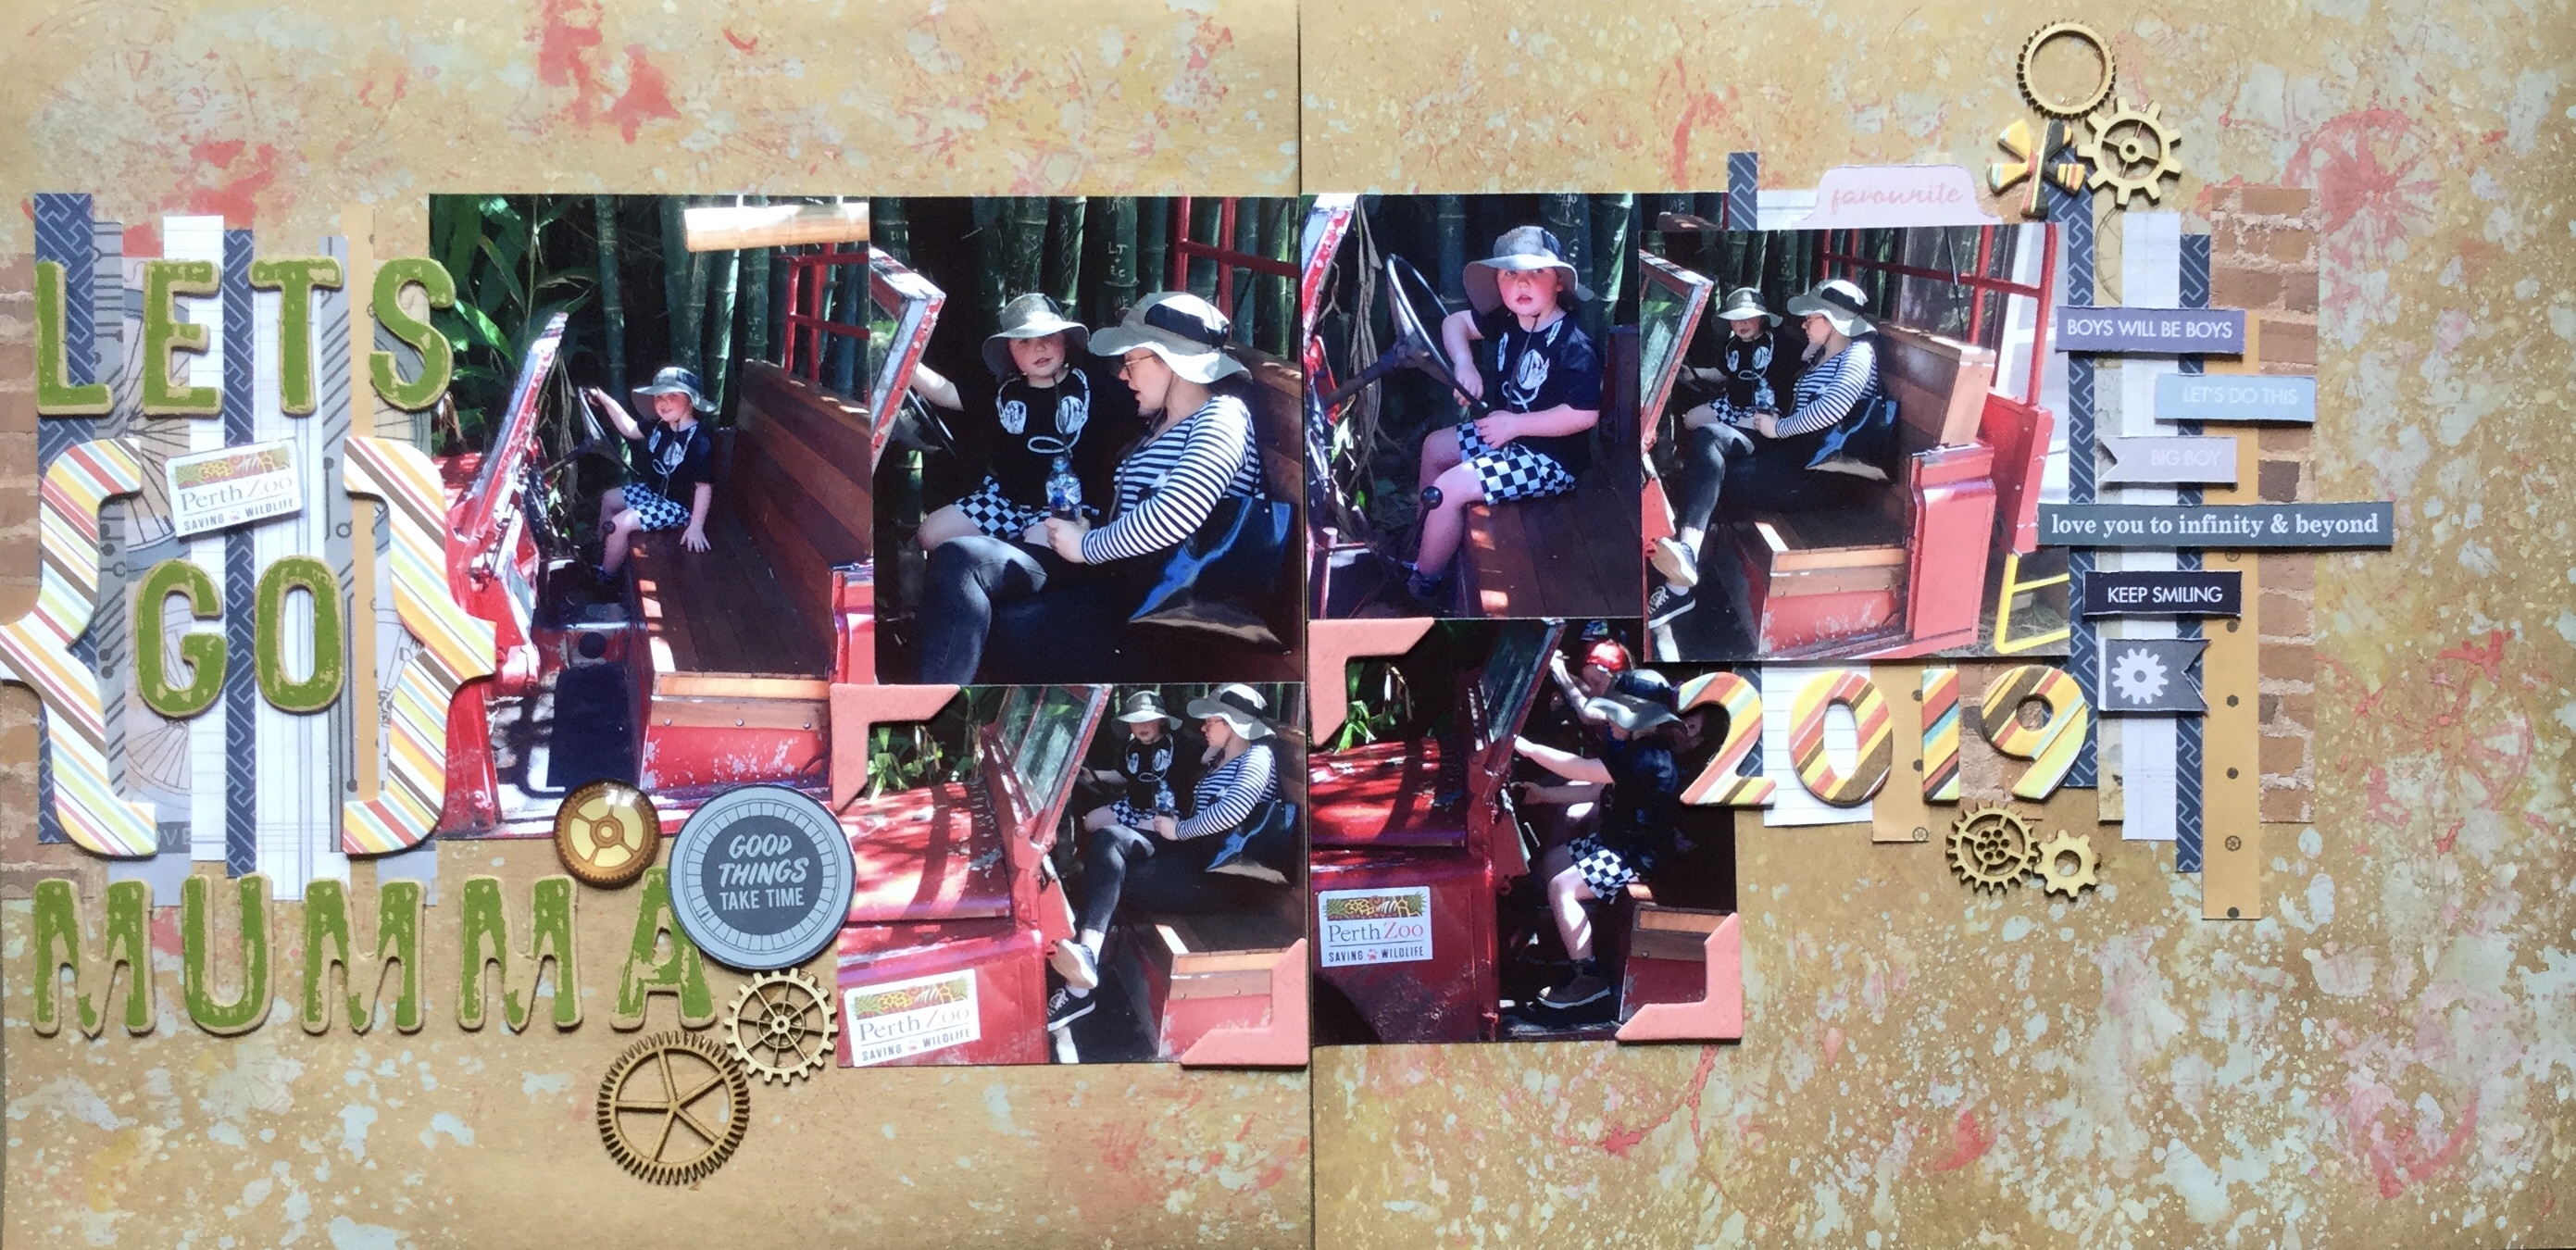
Layout #6. Lets Go Mumma, fun in a jeep at the zoo.

More splashing of ink and some stamping using a Uniquely creative metal die as a stamp.


2019-11-02 12.27.00-1

2019-11-02 12.27.06-1

2019-11-02 12.27.17-1

Layout #7. Amazing Hot Dogs. I think this one is my favourite, no mixed media. I like how the photos are laid out in a sequence of the event, cooking hot dogs on a campfire at home.

2019-10-29 19.22.54-1

And…that is where I stopped. I didn’t make the last layout, number 8, perhaps I’ll get to finish it during the summer holidays. Only three more sleeps and school’s out for me!

Here are some links to previous double layouts which I have shared…

Jan CKC 4 

CKC 2-3

CKC Always Enchant

Please leave a comment below or share with other creatives, remember you need to open the post by clicking on the title to access the comment box if you are on the home page.

Happy scrapping everyone  🙂


Lemon Tree…Very Pretty!

Morning,

Does anyone remember that old song where it goes ‘Lemon tree very pretty…’? When I looked at my photos of my citrus garden this song popped into my head and became the inspiration to my layout. This layout is all about pretty with lots of mixed media, flowers and foliage.

The background was fun to create with a layer of stencilling using a Kaisercraft stencil and texture gesso paste, some painting and splatter with Tim Holtz oxide inks and then sponging on some more ink using a Vicki Boutin leaf stencil.

2019-09-21 17.02.422019-09-21 17.02.472019-09-21 17.28.532019-09-21 17.29.052019-09-21 17.56.45

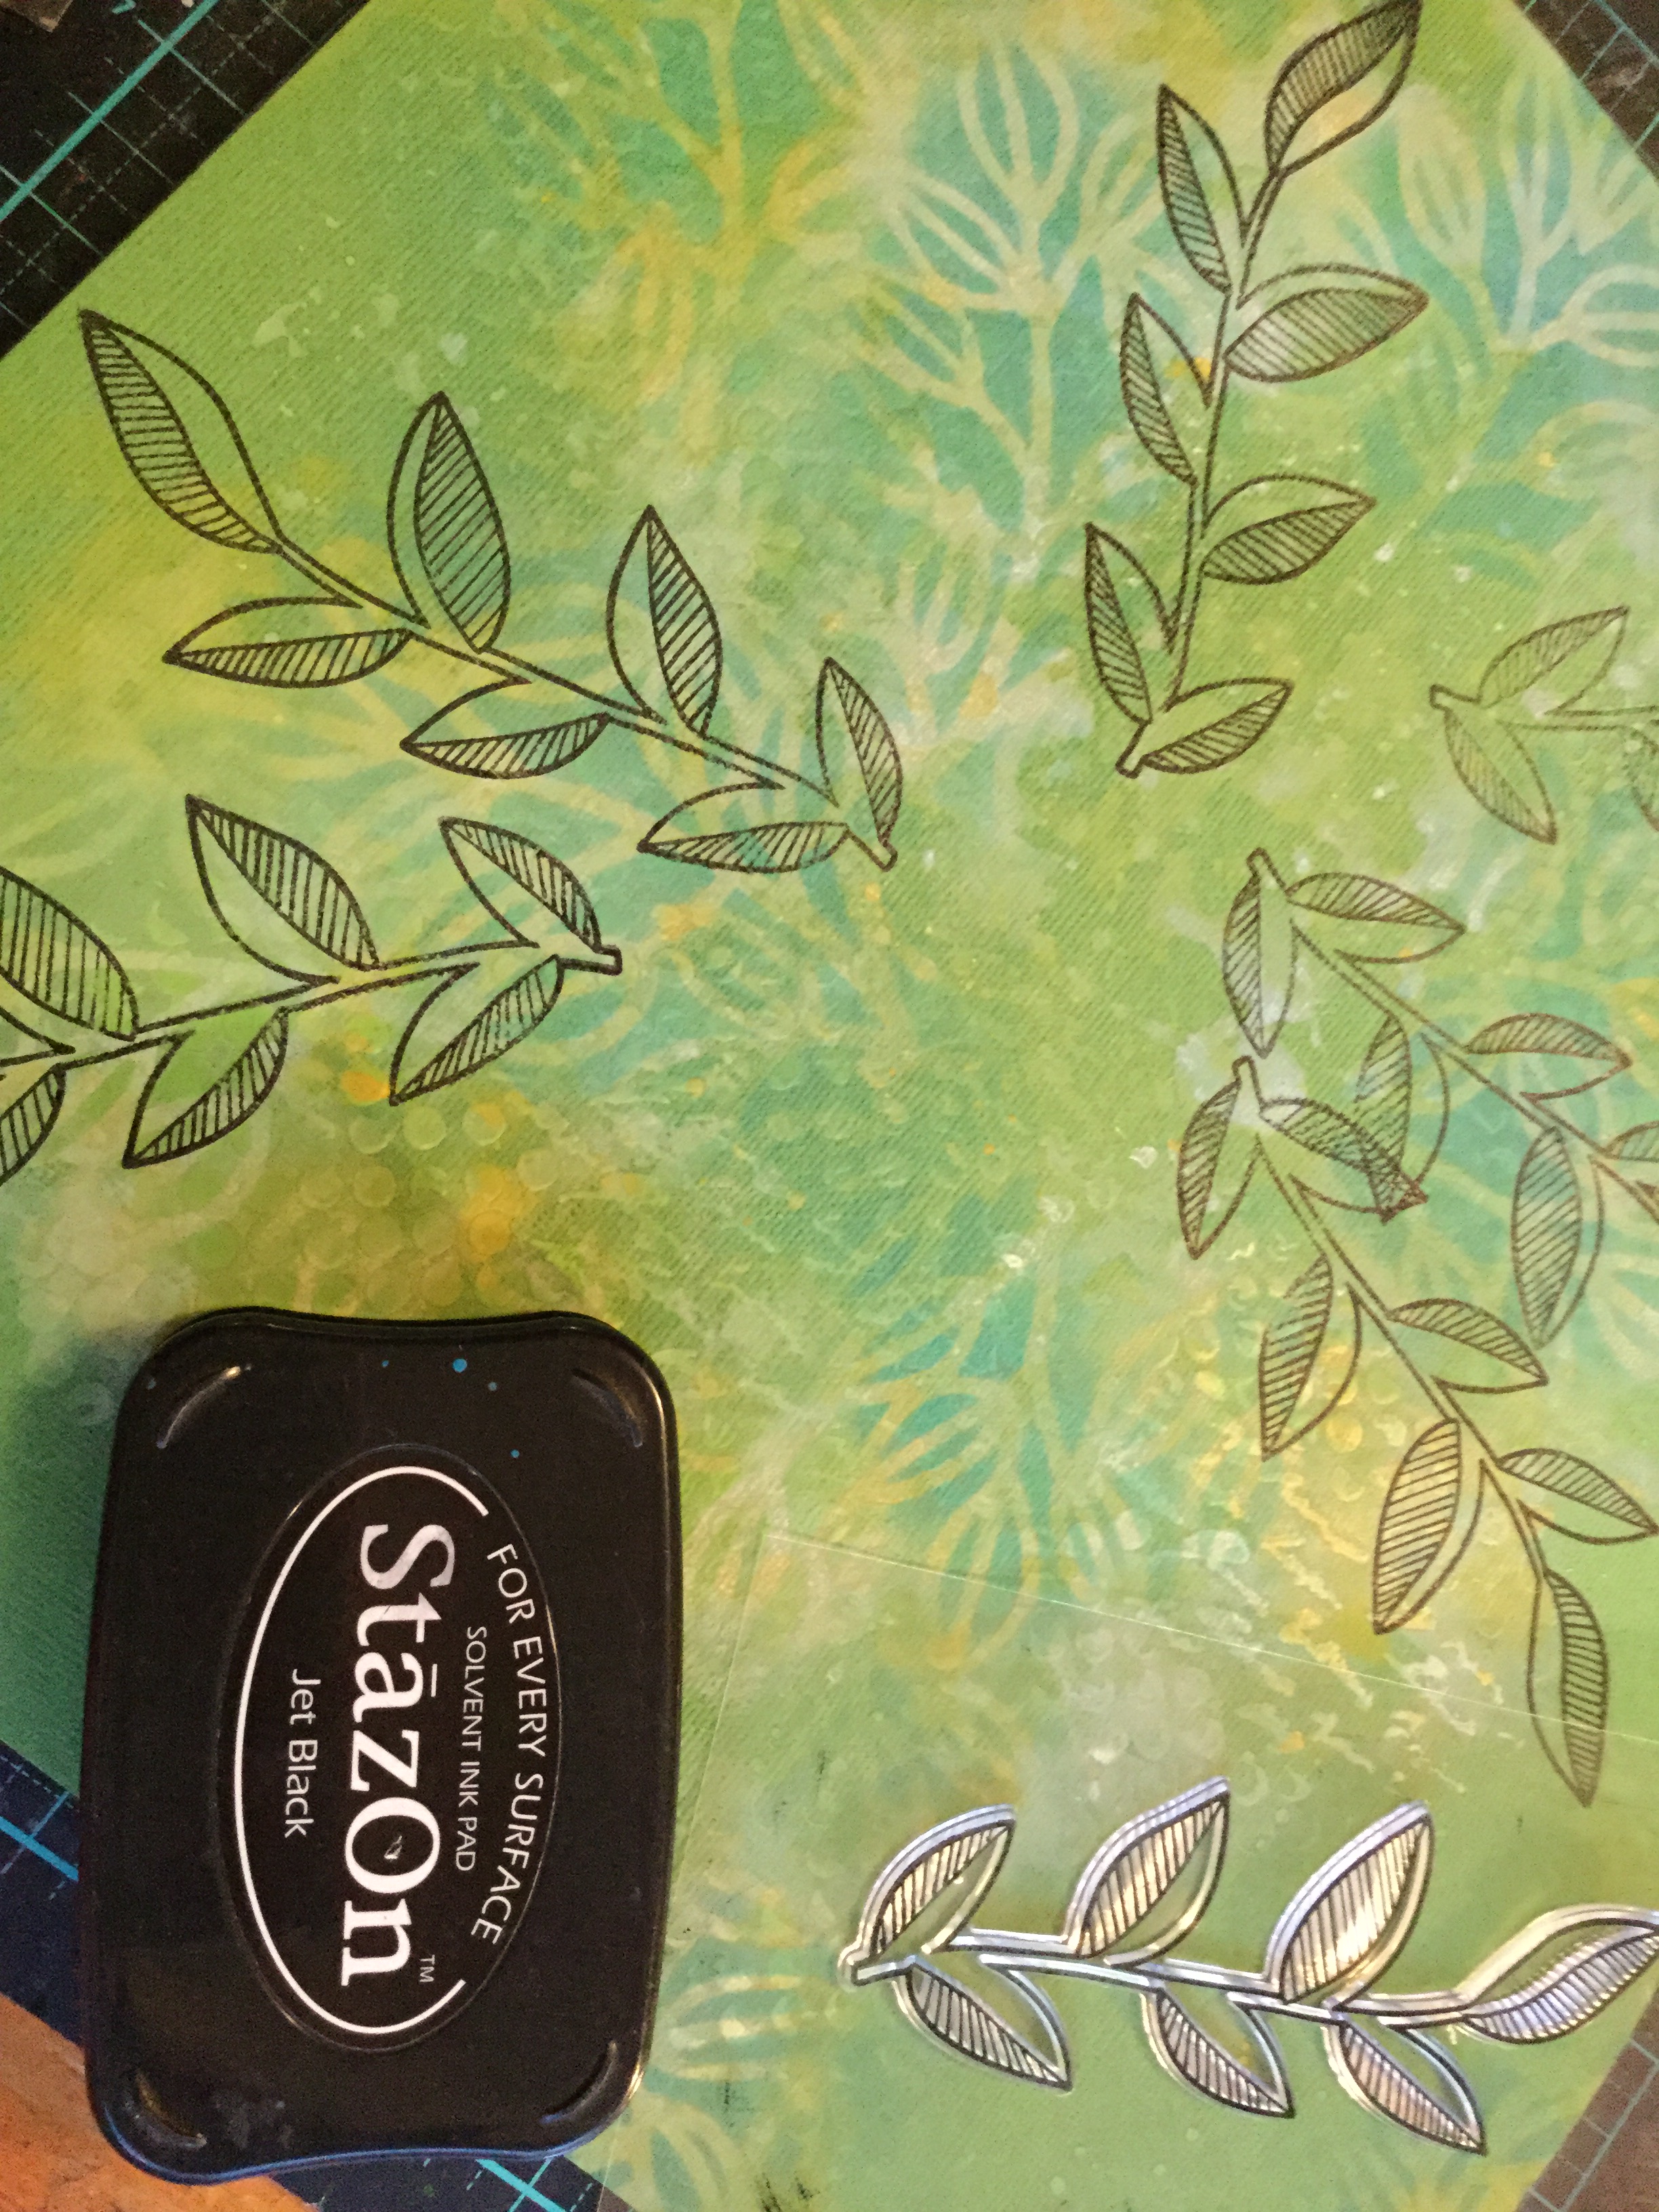
Next, to finish off the background, I stamped on some leaves using a Vicki Boutin stamp.

2019-09-21 18.09.49

Time to make some embellishments with more layers of oxide ink, Vicki Boutin stamps and some fussy cutting. It’s amazing what you can do with a scrap of white cardstock.

With my leaves cut, it was time to punch out some hearts. I pulled out a range of patterned paper scraps with different textures and patterns to keep things interesting, and even used the Vicki Boutin packaging!

Next, I dribbled some Heidi Swapp mustard color shine onto the background where I wanted my photo to be placed. I adhered my photo in place with some fun foam and glue and got to work adhering and layering my hearts and foliage embellishments. I added a Prima die cut and some stamped Vicki Boutin flowers. Then, finished off with some mustard coloured puffy hearts, a gold title of chipboard alphas and some white and yellow watercolour paint splatter.

I love how this turned out, it is so fresh with the mix of greens and yellows. A fun layout to create, though it was time-consuming…6 hours! I don’t usually spend this amount of time on a layout but I was chilling out and creating on a Friday night. Overall, time well spent!

2019-09-22 11.31.09-1

Fears! What spooks you?

Good morning,

It is a lovely spring morning here, the birds are tweeting, the golden sun is streaming low through the trees and I’m wishing that the school holidays were starting today! Unfortunately, we have one more week until I don’t have to set the alarm clock and will have the freedom to scrap every day if I feel like it. Who am I kidding, scrapping will be happening every day?

Anyhow, this layout share is about something completely different, no spring and no holidays. What I’m sharing is based on what I fear, with all the Halloween collections out now and the spooky paraphernalia in the stores, it got me thinking about spooks. For me, it is always the little creepy crawlies which do surprise attacks! For example, the other day I was outside enjoying and admiring the garden, the citrus trees are in blossom and hubby has been working on re fencing the orchard. I come back inside and I feel that creepy sensation of little feet crawling across the back of my neck! I do what any sensible adult does, I freeze. Then, I bravely try and flick the offender off my neck…really hoping that it is not a spider. Flicking success I think until I realise it’s on my arm! By now my heart is racing, I’m starting to panic, I’m telling it sternly to get off, it’s not doing that! Next, I’m screaming…it’s a baby pray mantis! I’m going to leave the story there, I’m pretty sure that you have an image in your head of what happens next, you know…the dancing and screaming!

So, back to scrapping. This layout is more like a story page, I have no images of the many times I have done the critter dance but I do have many stories I can tell about this insane reaction of mine to tiny insects (um…sometimes they are as big as my palm). I have left journal space to type up my story and add it in later, I may even add a tag/s with several SBC_sta-cms328_23365stories and slip them behind the journal mount.

Creating this layout gave me a great excuse to get messy with mix media and get out my favourite stamps from Tim Holtz, the Stampers Anonymous, Entomology set (CMS328). Ok, so now you will think I’m nuts, yep I said favourite. I love any papers, embellishments, dies and stamps which have insects, in fact, I kinda collect them. And…I have pet stick insects which I dote on, big suckers!

Let’s get down to the important stuff, scrapping. I started off creating my background using white cardstock and building up layers of Tim Holtz oxide distress ink. I’m trying to develop a grungy feel to my background, after all, I’m after spooky.

Next, some stencilling using a Kaisercraft 12×12 brick stencil. I’m going for a connection with house and home, so this was a perfect choice.

More stencilling, this stencil came in one of the Uniquely Creative kits. It creates a gritty, sandy, water like texture.

Now to add some details, I love this house plan stencil. It is quite intricate, including fine lines and text, so if you purchase it be gentle when applying the ink.

Next, some splodges! Nothing says grunge like paint splodges. I used a Kaisercraft stamp set and some purple oxide ink, purple speaks spooky to me and the Dusty Concord oxide ink has a lovely mottled, chalky effect. I overlapped the splodges to get more runs down the page.

Step 6! Wow, this background is taking some time. What spooky layout doesn’t need cobwebs? Another amazing stamp set from Tim Holtz, Stampers Anonymous, Tangled Web set (CMS346). This stamps beautifully, creating very fine, detailed lines.

The last step, grunging it up with a baby wipe. I mixed some texture gesso with some black Stazon ink (refill bottle), you could use any brand of black ink, I just grabbed what was handy on my desk. Use the baby wipe to smear on the gesso and wipe away excess. I love how this worked and had to stop myself from overdoing it.

After I dried off and ironed my background paper, I pulled out some patterned paper scraps to create embellishments. I had some AB Studio paper with text quotes which I cut apart to fit my fear theme. The quotes were actually about positives, never give up, fly high type of inspiration. I then used my new WRMK Clear Cut 2″ hexagon punch and punched a heap of PP hexagons. I distressed the edges of each but took ages adhering them to the page. I didn’t want to cover my lovely grunge which I had created…should I, shouldn’t I? In the end, most of it was covered.

I also pulled out some large Jillibean alphas (Farmhouse Stew collection), I love these, they are very versatile. It’s great to see that using large alphas and fonts is coming back in fashion, have you seen the gorgeous Ali Edwards ones? Devine. With these alphas, I inked the edges brown before foam adhering them in place.

2019-09-20 23.53.46

I needed a subtitle but didn’t want it too big or too small. I ended up using white glitter alpha Thickers which is on my bash (use it list), I am not really a glitter girl but seem to have a large collection of glitter Thickers. The white was too bright, so I applied some ink to tone them done to a subtle grey.

2019-09-20 23.34.03

Here come the critters!  Stamped, smudged with some distress ink and fussy cut (after I couldn’t find my matching die set which I own…grrr). I also stamped some critters straight onto my background.

Next, the final assembly adhering everything in place with double-sided tape, fun foam and tacky glue, adding my journal spots, quotes and critters. I love the end result, it was a lot of work, about 6hrs but it’s good for the soul messing around with ink and stamps. I do not usually spend this much time on a layout, it was a Friday night and I was home alone and just wanted to play with my supplies. No photos or sketches for inspiration, just all my creativity!

2019-09-21 10.56.47-1

Happy upcoming Halloween for those of you who celebrate it. I hope you are all creating Halloween pieces and layouts for the season, it looks so fun. For the rest of us who don’t celebrate, perhaps look at making a page about what you fear, it could help reduce the fear or phobia.

I would love to see what other spooky things you all create and welcome you to share your link in the comments. Remember if you are on the home page that you need to click on the title of the post to open the posting page to comment.

Keep on scrapping 🙂

Uniquely You!

Morning,

I have been getting messy with some mixed media and it has been so fun. It has been a while since I created a full-on mixed media layout, creating the background paper and the embellishments. Yes, it takes hours but who cares when you are getting messy, relaxing and taking some me time!

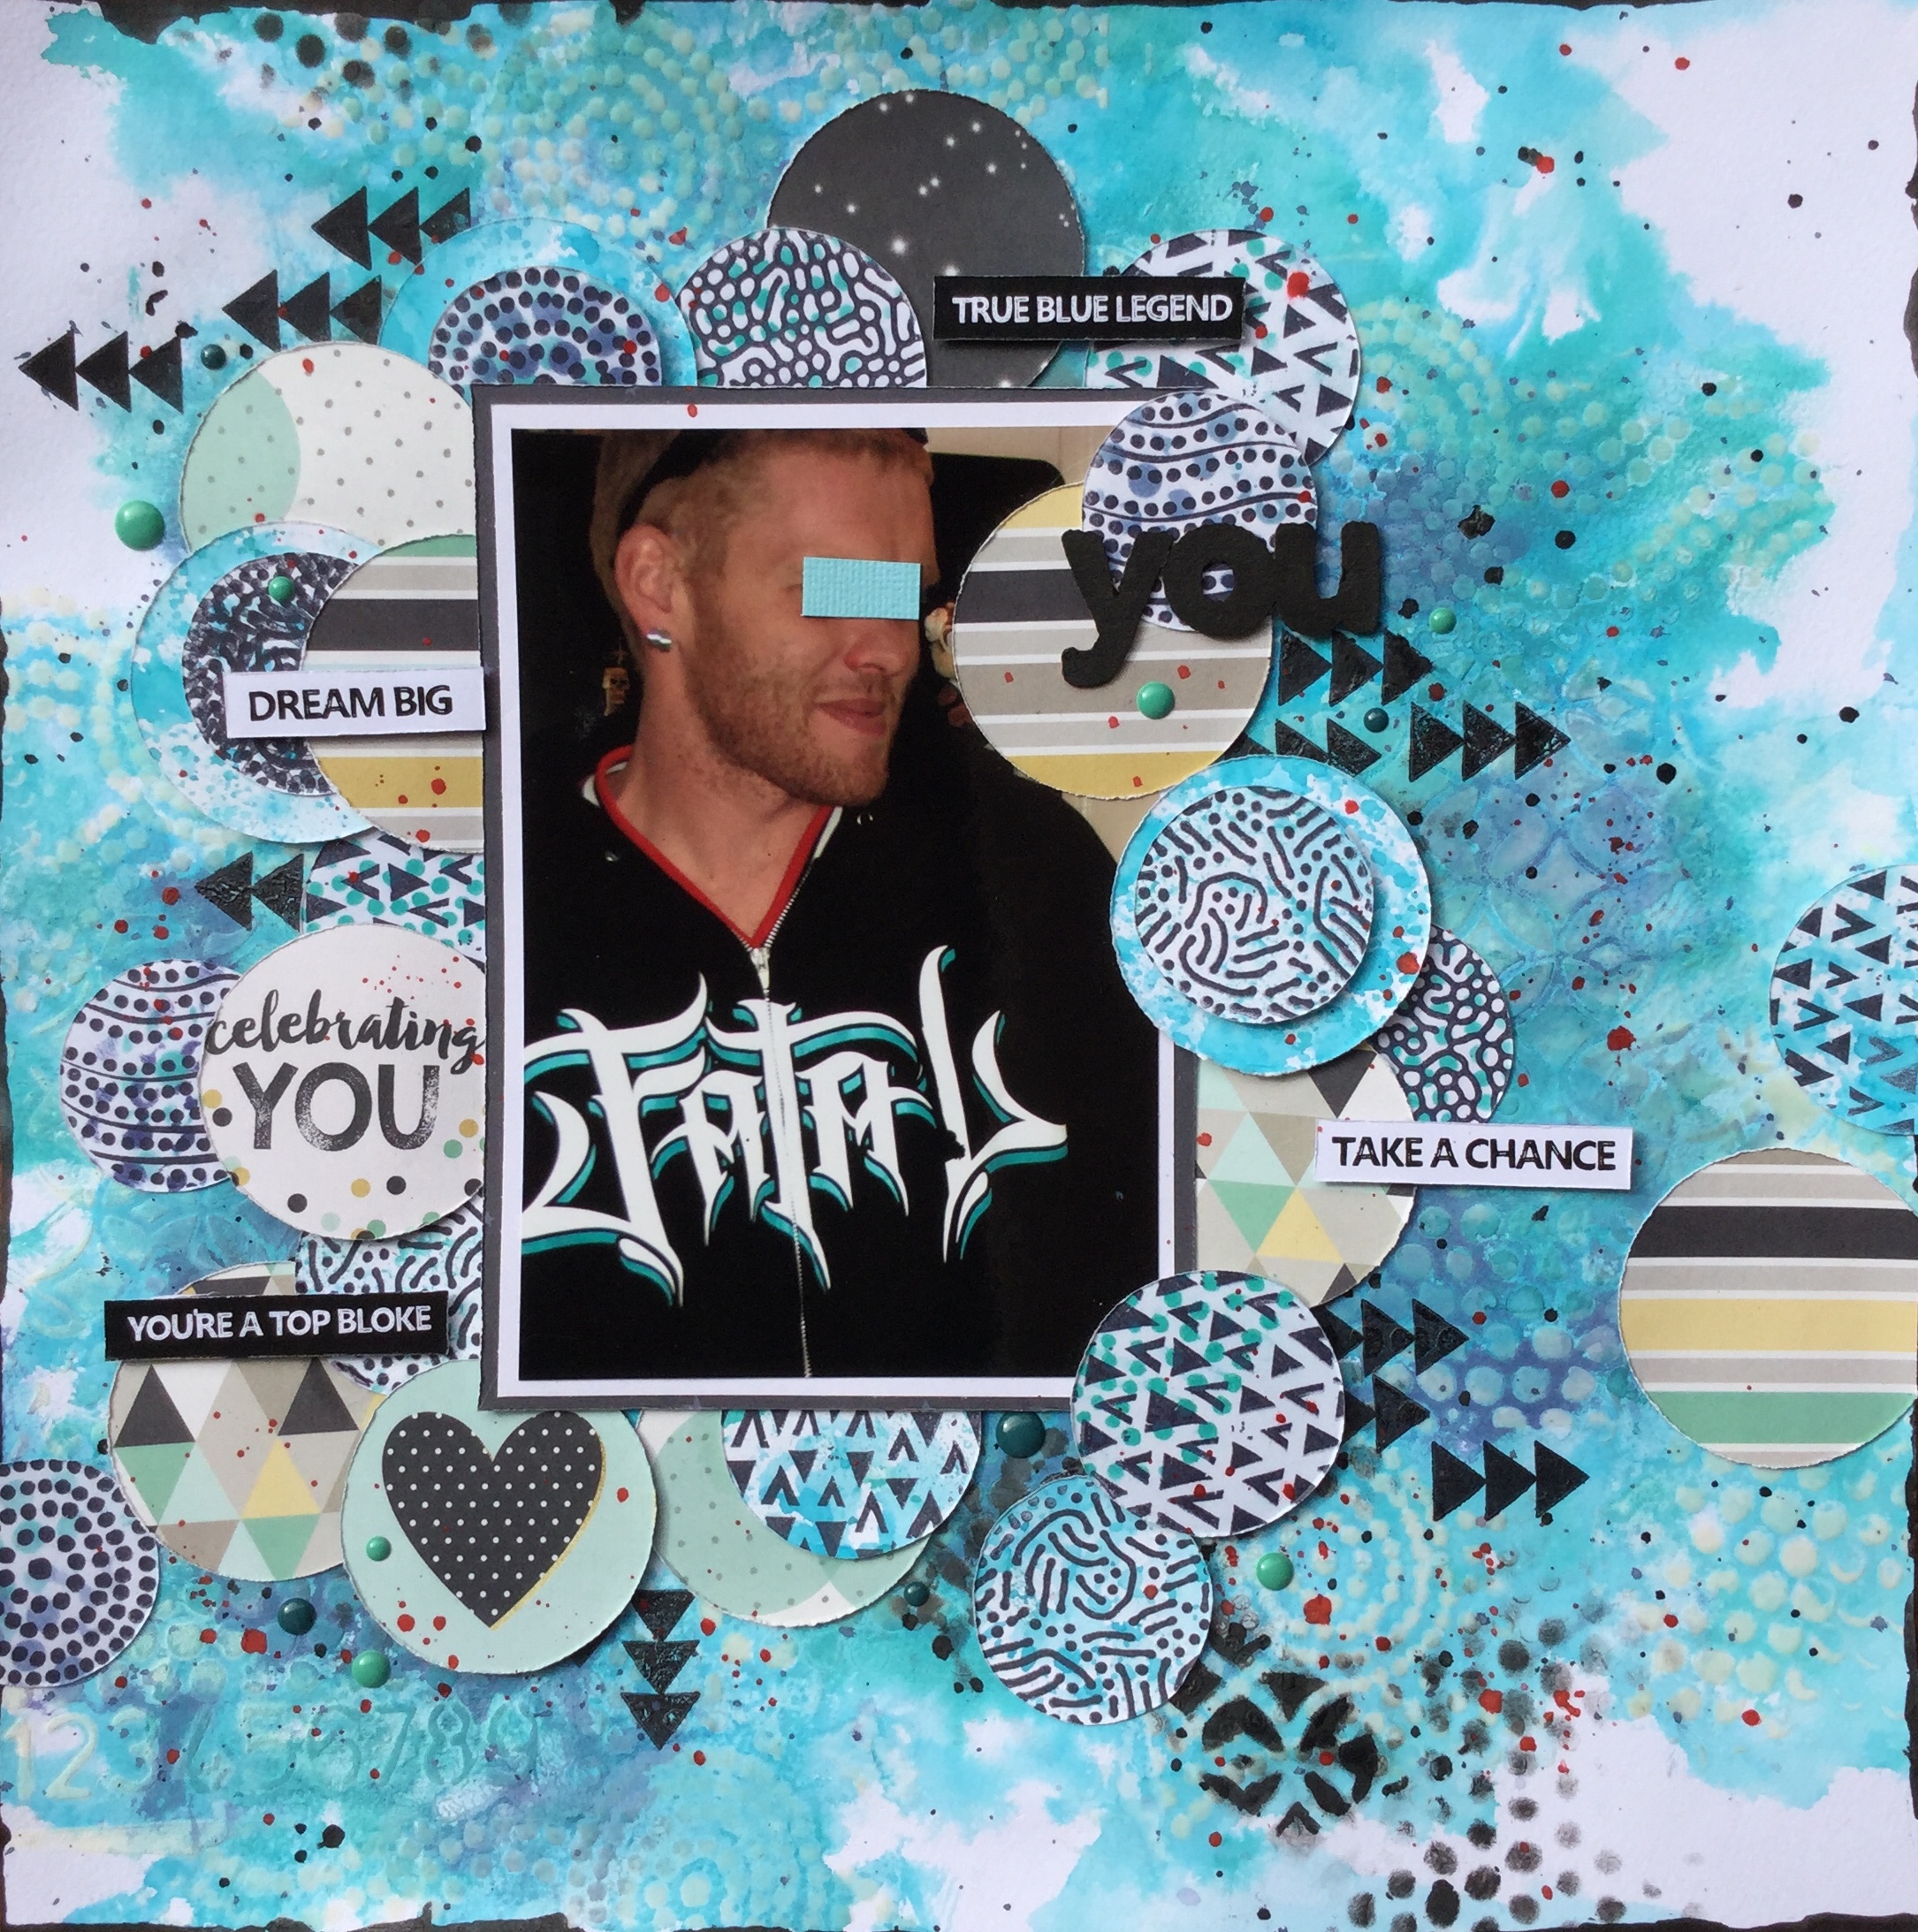
I had purchased this card kit from Uniquely Creative a couple of months ago and had broken my self imposed rule ‘ Everything new must be used ‘ rather than stashed. This Indigenous_Journey_Mini_Kit_-_Uniquely_Creative_2000xkit had been sitting on my desk, under a pile of supplies and when having a clean up I found the kit and broke it down, separating and sorting all the components. Now I don’t make cards but I loved the stamps and stencils in the kit, which is why I purchased it. The design of both is very Australian, using patterns similar to indigenous art. The booklet which came with the kit had a picture of a wonderful layout made by Tammy Klingner. The colours she had used just sparked and sent me running to find a photo which I knew would work well with both the stamps and stencils.

Here is what I used, I pulled in a couple more stencils to play with. The green stencil is a Kaisercraft but I’m not sure about the others, they may be WRMK. As usual, I’m pulling in some Tim Holtz Distress Oxide inks, love, love, love these. You can see Tammy’s layout in the first photo below which I am using as inspiration.

So, here is what I did…it was a long process. I started by using textured gesso paste and the stencils to create some texture on my background page.

While the gessoed background dried in front of the woodfire, I stamped out the circle embellishments onto white cardstock. Then I used the same stencils and some Tim Holtz Distress oxide inks to add some layers of colour and pattern onto each circle. A Little rub of Distress Glaze between layers fixes the ink in place.

Some blue oxide ink, a plastic bag and a splash of water and I have a lovely textural look to stamp more circles on and punch out.

I recently purchased some WRMK 2″ Clear Cut Punches, I had wanted some for ages but they are pretty expensive, close to $50 (AU) here. A 50% off sale happened and I couldn’t resist, snapping up the heart, hexagon and circle punches. It has taken me a while to master using them, at first I battled to get a clean cut and I ran some waxed paper through them to lubricate the mechanism. This seems to have helped, either that or I’m better at applying an equal weight distribution when punching. Anyway, I used some Simple Stories, Heart collection papers to punch the circle embellishments, the colours in this paper collection matched well with my photo.

With the gessoed background dried it was time to add some colour, more oxide inks were splashed around to build up layers of textural interest.

Some oxide Chipped Sapphire darkness to bring it all together. I love how the ink pools around the gesso and seeps into the previous inks. You may notice that some of the gesso took on a creamy yellow colour when dry, I was testing two different gessos. The yellowing didn’t bother me and worked to my advantage, as it matched in well with the Simple Stories papers.

Next, some stamping, more stencilling and a whole lot of fussy cutting! Those stamped circles took a while to cut, think I need to purchase some more circle punches.

Then, it was just a case of assembling, layering and adhering the circle embellishments. I used some fun foam and double-sided tape to create different layered heights. I added some black watercolour splatter and some small text quotes.

Even though I loved how it looked I felt it needed a little more punch and so I added some bright red watercolour splatter to pick up the thin red line in the hoodie from the photo. Then, a few enamel dots from the Simple Stories collection. The title came from the kit, a piece of wood veneer which I painted with watercolour paint.

IMG_9127

This was so much fun and I highly recommend the Uniquely Creative stamps and stencils, no connection, I just like their products. Do check out Tammy’s blog, I love her colourful style.

And, please do leave a comment, I would love to hear what you think about this layout…is it too much? Remember that you need to click on the title of the post to open the page to comment.

The next post will be another mixed media layout, stay tuned, I’m nearly finished creating it.

Keep on scrapping!


Heidi Swapp, Wolf Pack, even more, Layouts!

Hello all,

Here are a few more layouts I completed using up the Heidi Swapp ‘Wolf Pack’ paper pad. I am finding this collection to be very versatile, though it is stretching my mind trying to come up with layout ideas using the bear papers. Hopefully, something will spark and I will conquer the bear!

The first layout is of my eldest son. The papers are from Wolf Pack, but I used a range of embellishments which I found in my stash.

2019-06-17 21.58.46-1

Next up, a layout of my Step-Dad who has been busy renovating the verandah on their 40yr old home (which he also built). A bit of stamping and splashing around some ink on this layout.

2019-06-22 15.15.16-1

Some simple layouts, a layout of hubbies bonsai plant after pruning and a layout about a pesky rat which moved into our home for the winter!

I have made up another 5 kits (with photos) using the Wolf Pack collection paper pad. I’m not sure when I will have time to scrap them, as I have several projects on the go at the moment, but I will share when I have managed to finish and kill this ‘Wolf Pack’ paper pad.


Happy scrapping everyone 🙂

Heidi Swapp-Wolf Pack, more Layouts!

Good Morning,

Today I am sharing a few more layouts using the Heidi Swapp, Wolf Pack collection. In June, when I first got this paper pad, one of the FB groups put out the challenge to use up a whole paper pad. Now, the idea was to use an old one which SBC_ac-314693_96233you have had sitting around for a few years, untouched! I did not have any untouched paper pads, only brand new ones (birthday/Mother’s Day gifts) which is why I decided to use this paper pad. I am doing well, getting through the pad with 14 papers left out of 36. The ones left are mostly pine trees, wolves and bear papers, given that I live in a country with no wolves and bears it is a challenge.

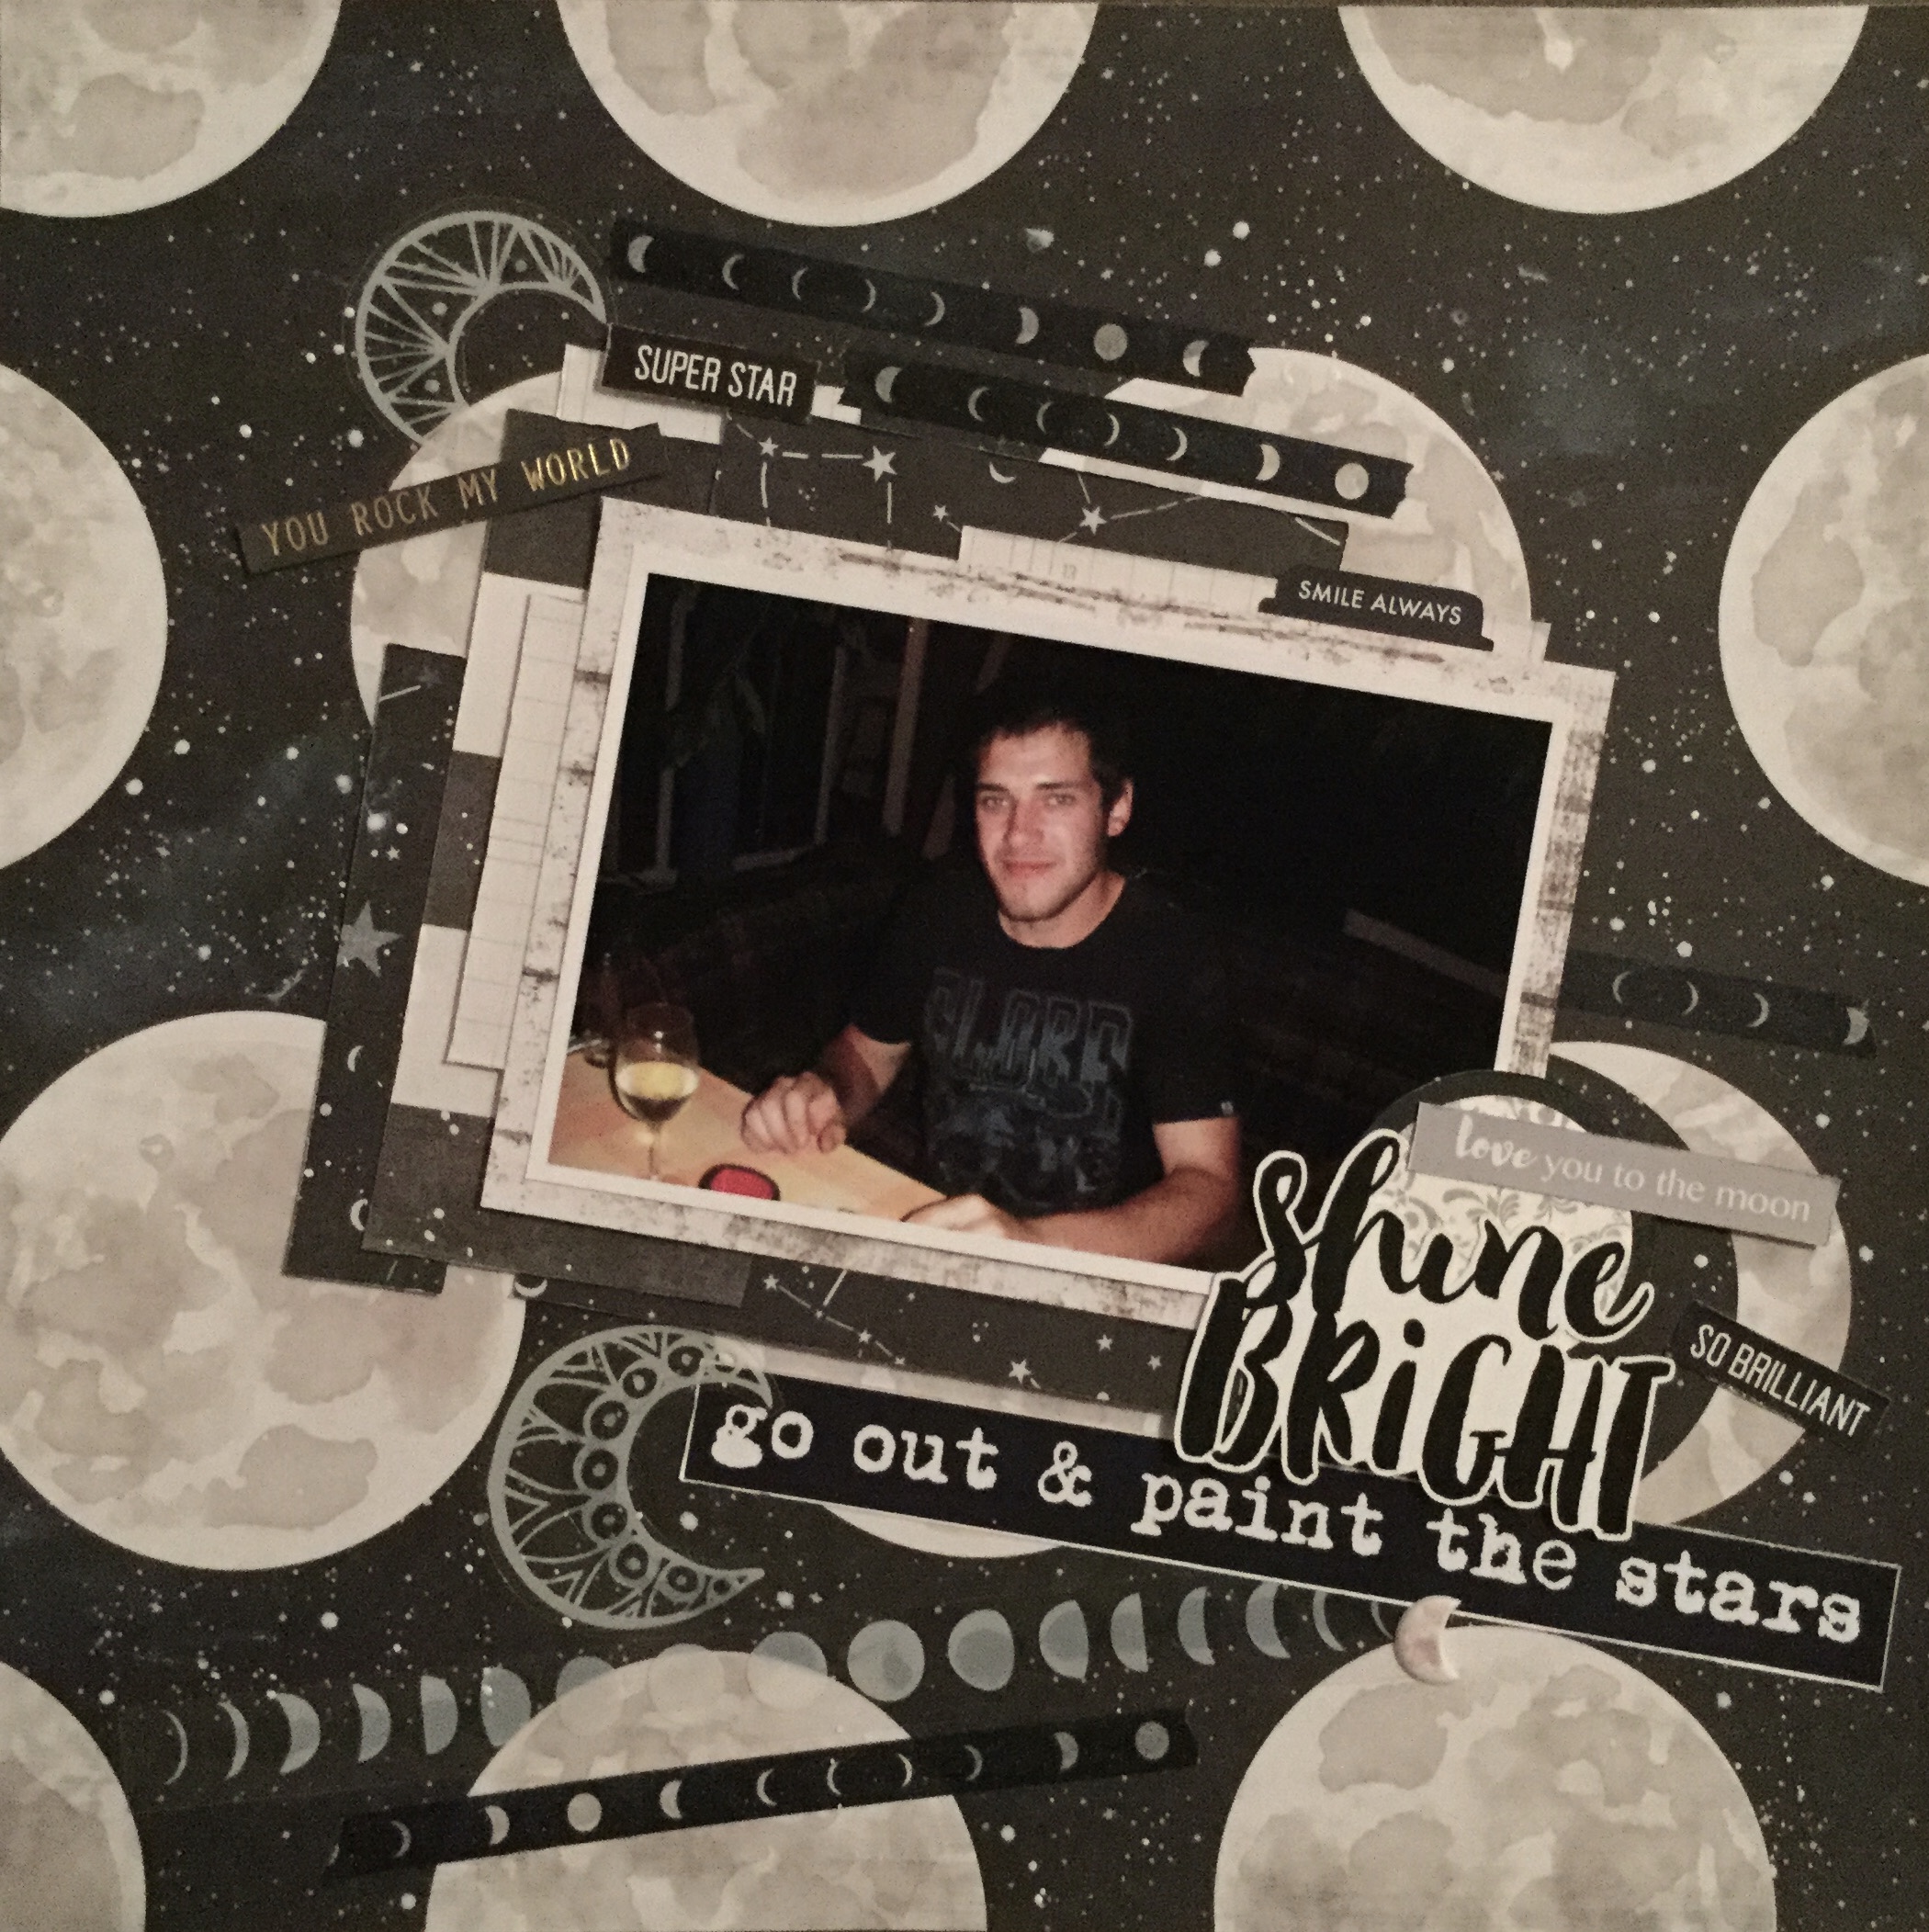
The first is Layout #3. I used the paper which looks like a starry night, it is the B side of the Tracks paper. On top of this, I stencilled white gesso using a Studio Light Grunge collection stencil. I blended the edges of the gesso to give it a milky way look. I then splattered white watercolour paint over the paper to increase the number of stars on the paper.

Once dry, I added different shades of blue Tim Holtz Oxide Inks which seeped into the gesso crevices (using water/brush) and blended into my starry night (using blending sponge).

Then, I mounted my photo onto scraps of the Wolf Pack collection papers and adhered it to the background.

Next, I used the stencil and oxide ink on white cardstock to create some embellishments. I cut this apart into little triangles and diamonds and layered them onto the page using foam and double-sided tape.

IMG_7829

The finished layout came together well with the addition of a title and a few acrylic stars.

IMG_8404


Next, Layout #4. This layout was very simple and quick, I used the map paper SBC_ac-314691_85259_200and added some colour across the page using the plastic bag smooshing technique. The Tim Holtz ‘Tumbled Glass’ oxide ink created a soft blue surface to work on, I then splattered some watercolour paint across the page in browns and blue.


Then, I worked on building layers with patterned paper from the Wolf Pack and assorted embellishments from my stash.

The final touch was adding the title.

2019-06-09 14.29.18-1


Layout #5. is my favourite so far. I wanted to find a way to use the wolf papers SBC_ac-314683_85243_200in the collection and finally come up with an idea when I came across some photos of my grandson eating some dessert.

I started by creating a framed background using two of the papers. Then I built up papers to mount my photos on and added the title ‘Wolf it Down’. No mixed media was used in this layout.

A subtitle was added using part of the cut apart sheet and then lots of text quote embellishments and some Wolf Pack puffy stickers.

The finished layout ended up just how I wanted it, messy and fun.

IMG_7927

June 2019 CKC Layout #2.

Hi all,

Today I am sharing my second layout using my June CKC kit. This time I am using a lovely photo of my eldest son with his dad sharing some vino. My son works at the local winery and part of his job entails sampling different wines in production. He brought a few bottles around to get our opinion, hubby was more than keen to participate…bring it on!

Selecting papers from my kit for this one got a little crazy, I thought I would challenge myself to use the Dear Lizzy unicorn paper in my kit, how, I had no idea. Then, I thought about how easy it is to overdo the drinking when the wine is free, the happiness and joviality that occurs when you share bottles with family and friends, and the possibility of what might happen. So, here we go…my crazy layout! And yes, I may have been sipping a little wine while creating. 

First, the background. I had a go doing a little forgery of one of the inspiration papers, a simple technique of highlighting text on the paper with markers. Then I smooshed on some Tim Holtz Mustard Seed Oxide ink using the plastic bag technique and a paint brush. 

On top of this, I applied some Lindy’s Moon Shine Mist, this added a little teal/blue colour and some brassy gold shine. Then I painted on my rainbow using watercolour paints, only using three colours to replicate the rainbow on the Dear Lizzy paper. 

Then, I selected a scattered star stamp and some oxide ink and stamped stars across the background. 

Next, I layered two pieces of my patterned paper in a square format and adhered it to the page. This is to mount my photo on. Then I fussy cut out my embellishments from the American Crafts paper.

After fussy cutting all the embellishments, I added the title which I normally do at the end. I was concerned that it wouldn’t all fit on my rainbow and that I would have to start the whole layout again. Luckily, I managed to fit my very long title on the rainbow.

IMG_7815

Then, I started adding embellishments and the photo mounted on some patterned paper and banding strips from my kit, adhering them with foam tape and double-sided tape.

The finished layout turned out quite quirky with lots of colour and a fun, jolly theme.

IMG_7823

Share links to your work in the comments section, remember that you need to click on the title of the post to open the page to comment. Already on the posting page, just scroll straight to the bottom and add your comment to the reply envelope. I would love to see what you are working on at the moment. Are you joining in with this month’s Counterfeit Kit Challenge?

Happy CKC scrapping 🙂


June 2019 CKC Layout #1.

Good morning,

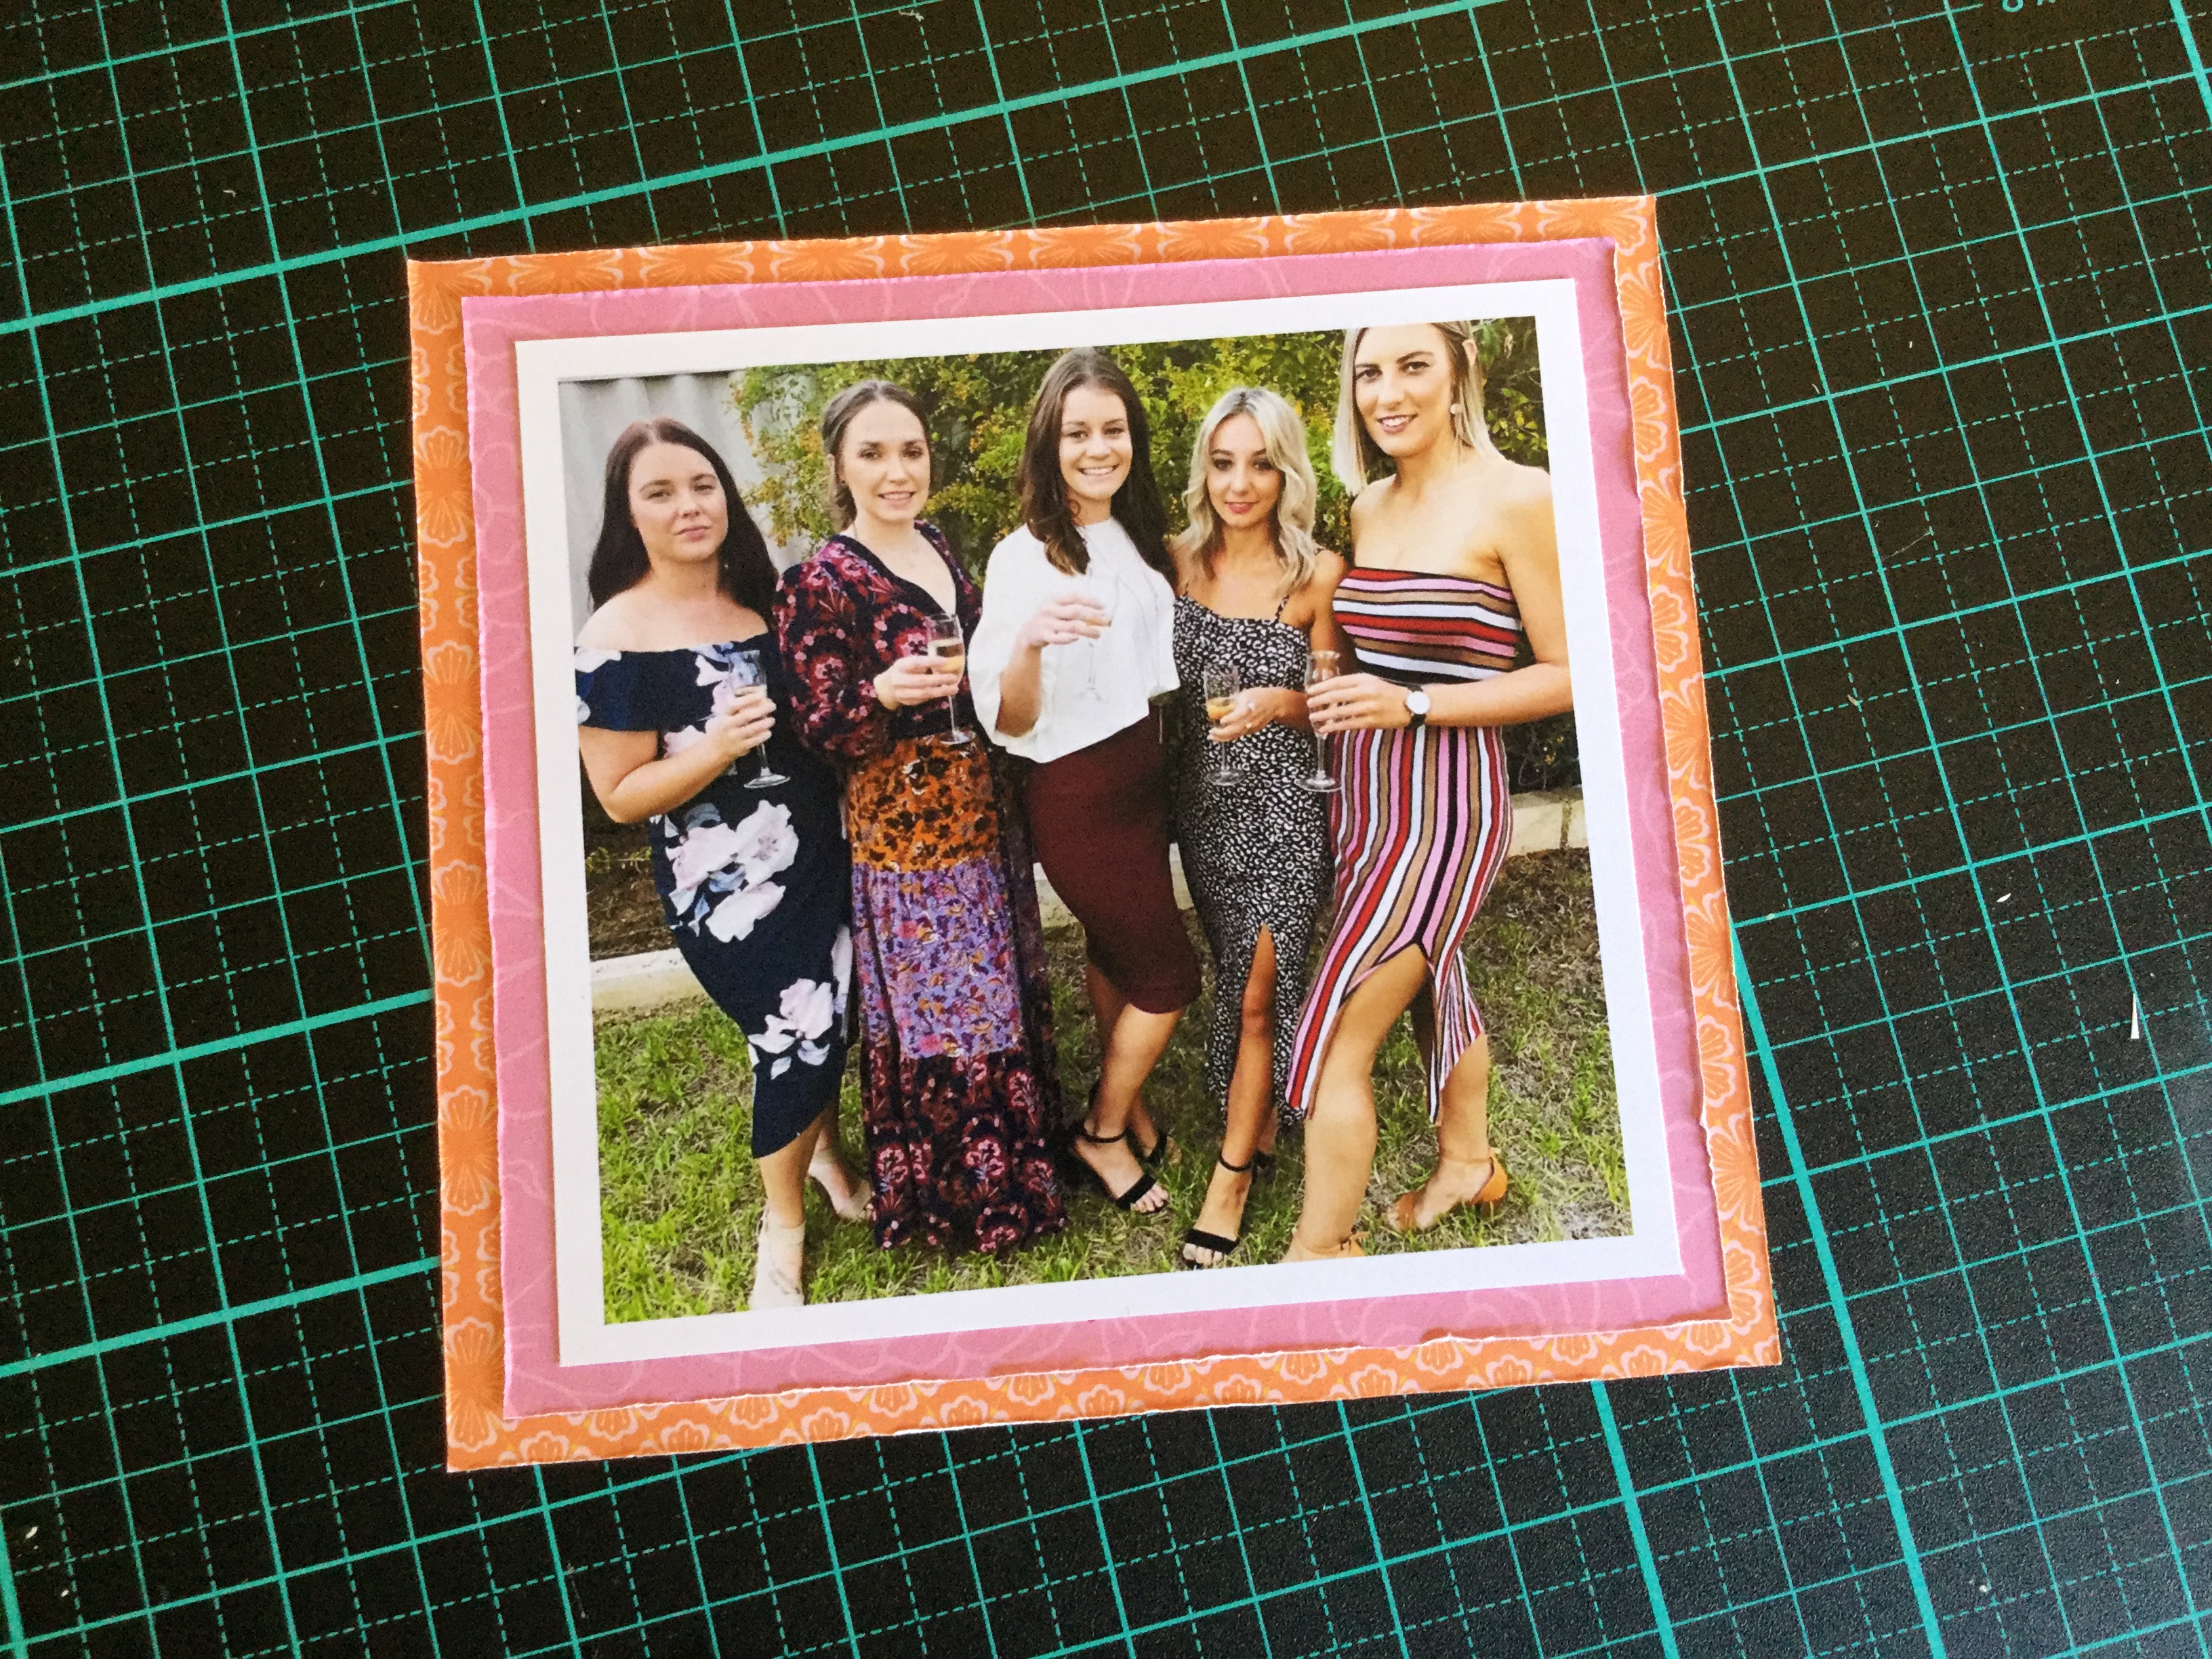
Here I am sharing my first layout from my June Counterfeit Kit Challenge kit. The photo I am using is quite recent, it is my eldest daughter and her friends ready to head off to their friend’s wedding reception. They all look so beautiful in their outfits but I especially like my daughter’s dress which has a very distinctive 70s style. I wanted to highlight that free and fun style, somewhat hippy look, within my layout design.

I carefully selected the papers and embellishments from my kit, based on the colours and patterns of the girl’s dresses, and the environment in which the photo was taken (there was a lot of grass green).

2019-06-03 11.24.35

I began by constructing the background using watercolour paints and the plastic bag technique, smooshing on each coloured layer. Then, splashing and splattering paint on top. At a later stage, I realised that I needed to add more paint to my background cardstock if it was going to peek out from beneath the love hearts.

I used the American cut file love heart sheet, filling each space with the quilted patterned paper from the Horizon, Pink Paislee, which matched the colours in the photo.

I adhered the hearts onto my background with double-sided tape.

I mounted the photo onto three layers of patterned paper from my kit and adhered it onto the layout with foam tape.

2019-06-03 12.19.55

Then I fussy cut motifs from the American Crafts cut apart sheet. I then arranged and adhered all my embellishments onto the page, including the simple, gold printed title, Beautiful.

I love the end result, the paint and embellishments really pick up the mood and feel of the dresses and the happy occasion. It all works well together and has given me a taste for venturing more into cut files, even if it is a little time-consuming.

2019-06-03 13.27.18-1

Make sure you check out what other scrappers have been creating with their June CKC kits on the Counterfeit Kit Challenge FB community or on their blog.

Keep on scrapping 🙂


Heidi Swapp, Wolf Pack Layout Fun!

Hi everyone,

I recently treated myself to some scrap goodies for Mother’s Day and my birthday, amongst what I purchased was some of the lovely masculine Wolf Pack collection by Heidi Swapp. It’s a gorgeous collection with lots of potential and versatility, I saw myself SBC_ac-314693_96233being able to create layouts about my sons, daughters, grandson and Christmas. The lovely outdoor pine forest, mountains and starry nights would work well for our traditional, annual, Christmas tree hunt. The other papers, a mix of contemporary and cultural patterns in black, white and shades of greens, and the wood grain can be used for recording many special events or moments.

For this layout, I chose to use three of the collection papers, the Zodiac, the wood grain (B side of Mama Bear) and the black and white bold stripe (B side of Woodsy). I also wanted to use the washi tape and the very cute puffy stickers.

To start with I used some texture gesso paste and a Kaisercraft stencil (Distressed Dots)  on my background, a mix of stripe and wood grain paper. The stencil gives a lovely grunge effect.

IMG_7651

After drying of the gesso, I applied Tim Holtz Distress Oxide inks. You just stamp the pad on a smooth surface, mine is a piece of black acrylic, and add water to the ink, then paint the ink onto the stencilled gesso. The fluid ink runs into all the crevices of the gesso and blends together beautifully.

While that dries I got to work on mounting my photo. I used the banding strips trimmed off the papers, each strip has a print motif on it of one of the other papers in the collection…wolves, bears, etc. Because they are little strips and I am using them as edging mounts, you can’t identify them as bears, etc.

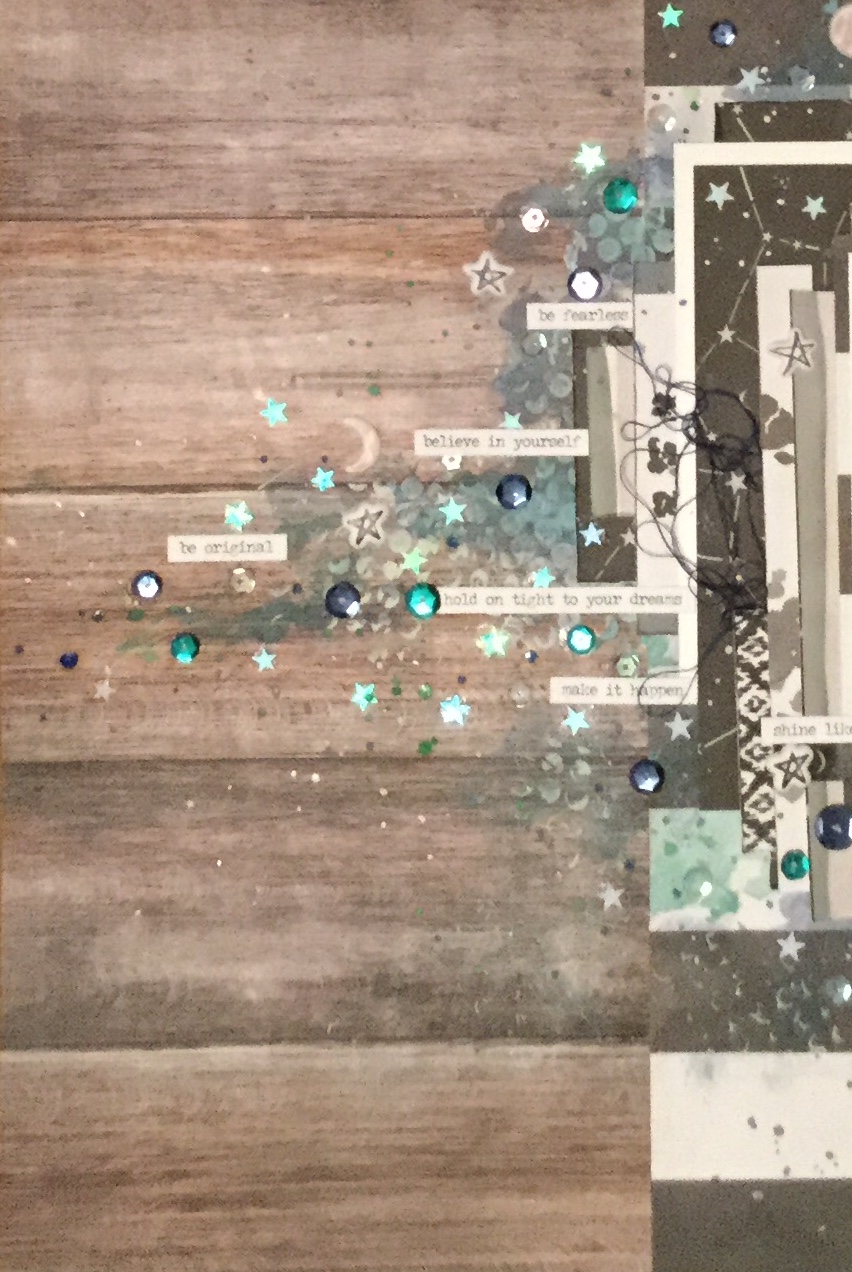
Next, I mounted the photo onto the background and began to embellish the layout. Even SBC_ac-314687_85251_0though the papers are quite masculine and I am using a photo of my teenage son, I couldn’t stop myself from adding some sparkle and shine to the layout. The Zodiac paper features the night sky and astrology motifs and I wanted to highlight this in my design. I used a variety of sequins in crystal, navy, aqua and green to decorate and enhance the layout. Then, I splattered on some watercolour paint in white, green, dark blue and brown.IMG_7659

The final touch was to add the puffy star stickers, some moon washi tape and some cotton thread bunches, then a few Tim Holtz quote stickers and a little extra splatter.

I decided not to add a title, the layout was to capture my son at this stage of his life when he was full of dreams and possibilities for the future. The quote stickers were appropriate and told the story, a title would draw the viewers eye away from the photo.

IMG_7660

I love how this turned out and it was fun to create. I can’t wait to use the rest of this collection. Who else is using the Wolf Pack collection? Share links to your work in the comments section, remember that you need to click on the title of the post to open the page to comment.

Happy scrapping 🙂

Finish or Fix?

Hello,

Well, in my part of the World there has been very inclement weather, the type that makes you want to stay inside in front of the fire, and that is exactly what I have been IMG_7696doing. When I haven’t been working I’ve been snuggled up reading, scrapbooking or sorting. The sun has been beaming sometimes but it has been bitterly cold and so, I am more than happy to sort and clean spaces.

My studio (aka son’s old bedroom) was one of the areas targeted and I spent a lot of time going through some sets of shelves, looking for completed layouts (yes, I have been known to shove them into spaces to file on another day) and working out what exactly was in some of those pizza boxes. Do any of you have a pizza box problem? I have real dilemmas over keeping them or not keeping them. They are fabulous for storage (as long as you label and remember what the label means) and I have at least two dozen empty ones under my desk…someday I might need them. Not one of them has ever had pizza in them!

Anyway, I’m off track. I found a pizza box labelled ‘layouts to finish & file’. Great I thought, more completed layouts to pop into albums, I have been filing layouts this week.IMG_7602 Nope, there was three finished layouts and a dozen not finished! And…they were old! Not just a little old, big old, like 12-15 years old! So, I’m sitting on the floor looking at these layouts and I laughed at how terrible some of them were, and I cringed and questioned what was I thinking? They were terrible, there was no design thought, no embellishments on many, no style what so ever and certainly no mixed media. They were seriously old school and I could see why I hadn’t been interested in finishing them. Hmm… what they did have was photos, not all of them great either but still images of family history which needed to be rescued. So, after pondering on how far I had changed in scrapbooking technique and skill, plus attitude (Yep, at one stage in my life I did not like or see any benefit in scrapbooking, I even complained about having to do it (in my workplace), I was a stamper/artist. My husband loves to remind me about this, now that every spare minute is spent on scrapping.), anyhow,  I decided to finish or redo the layouts.

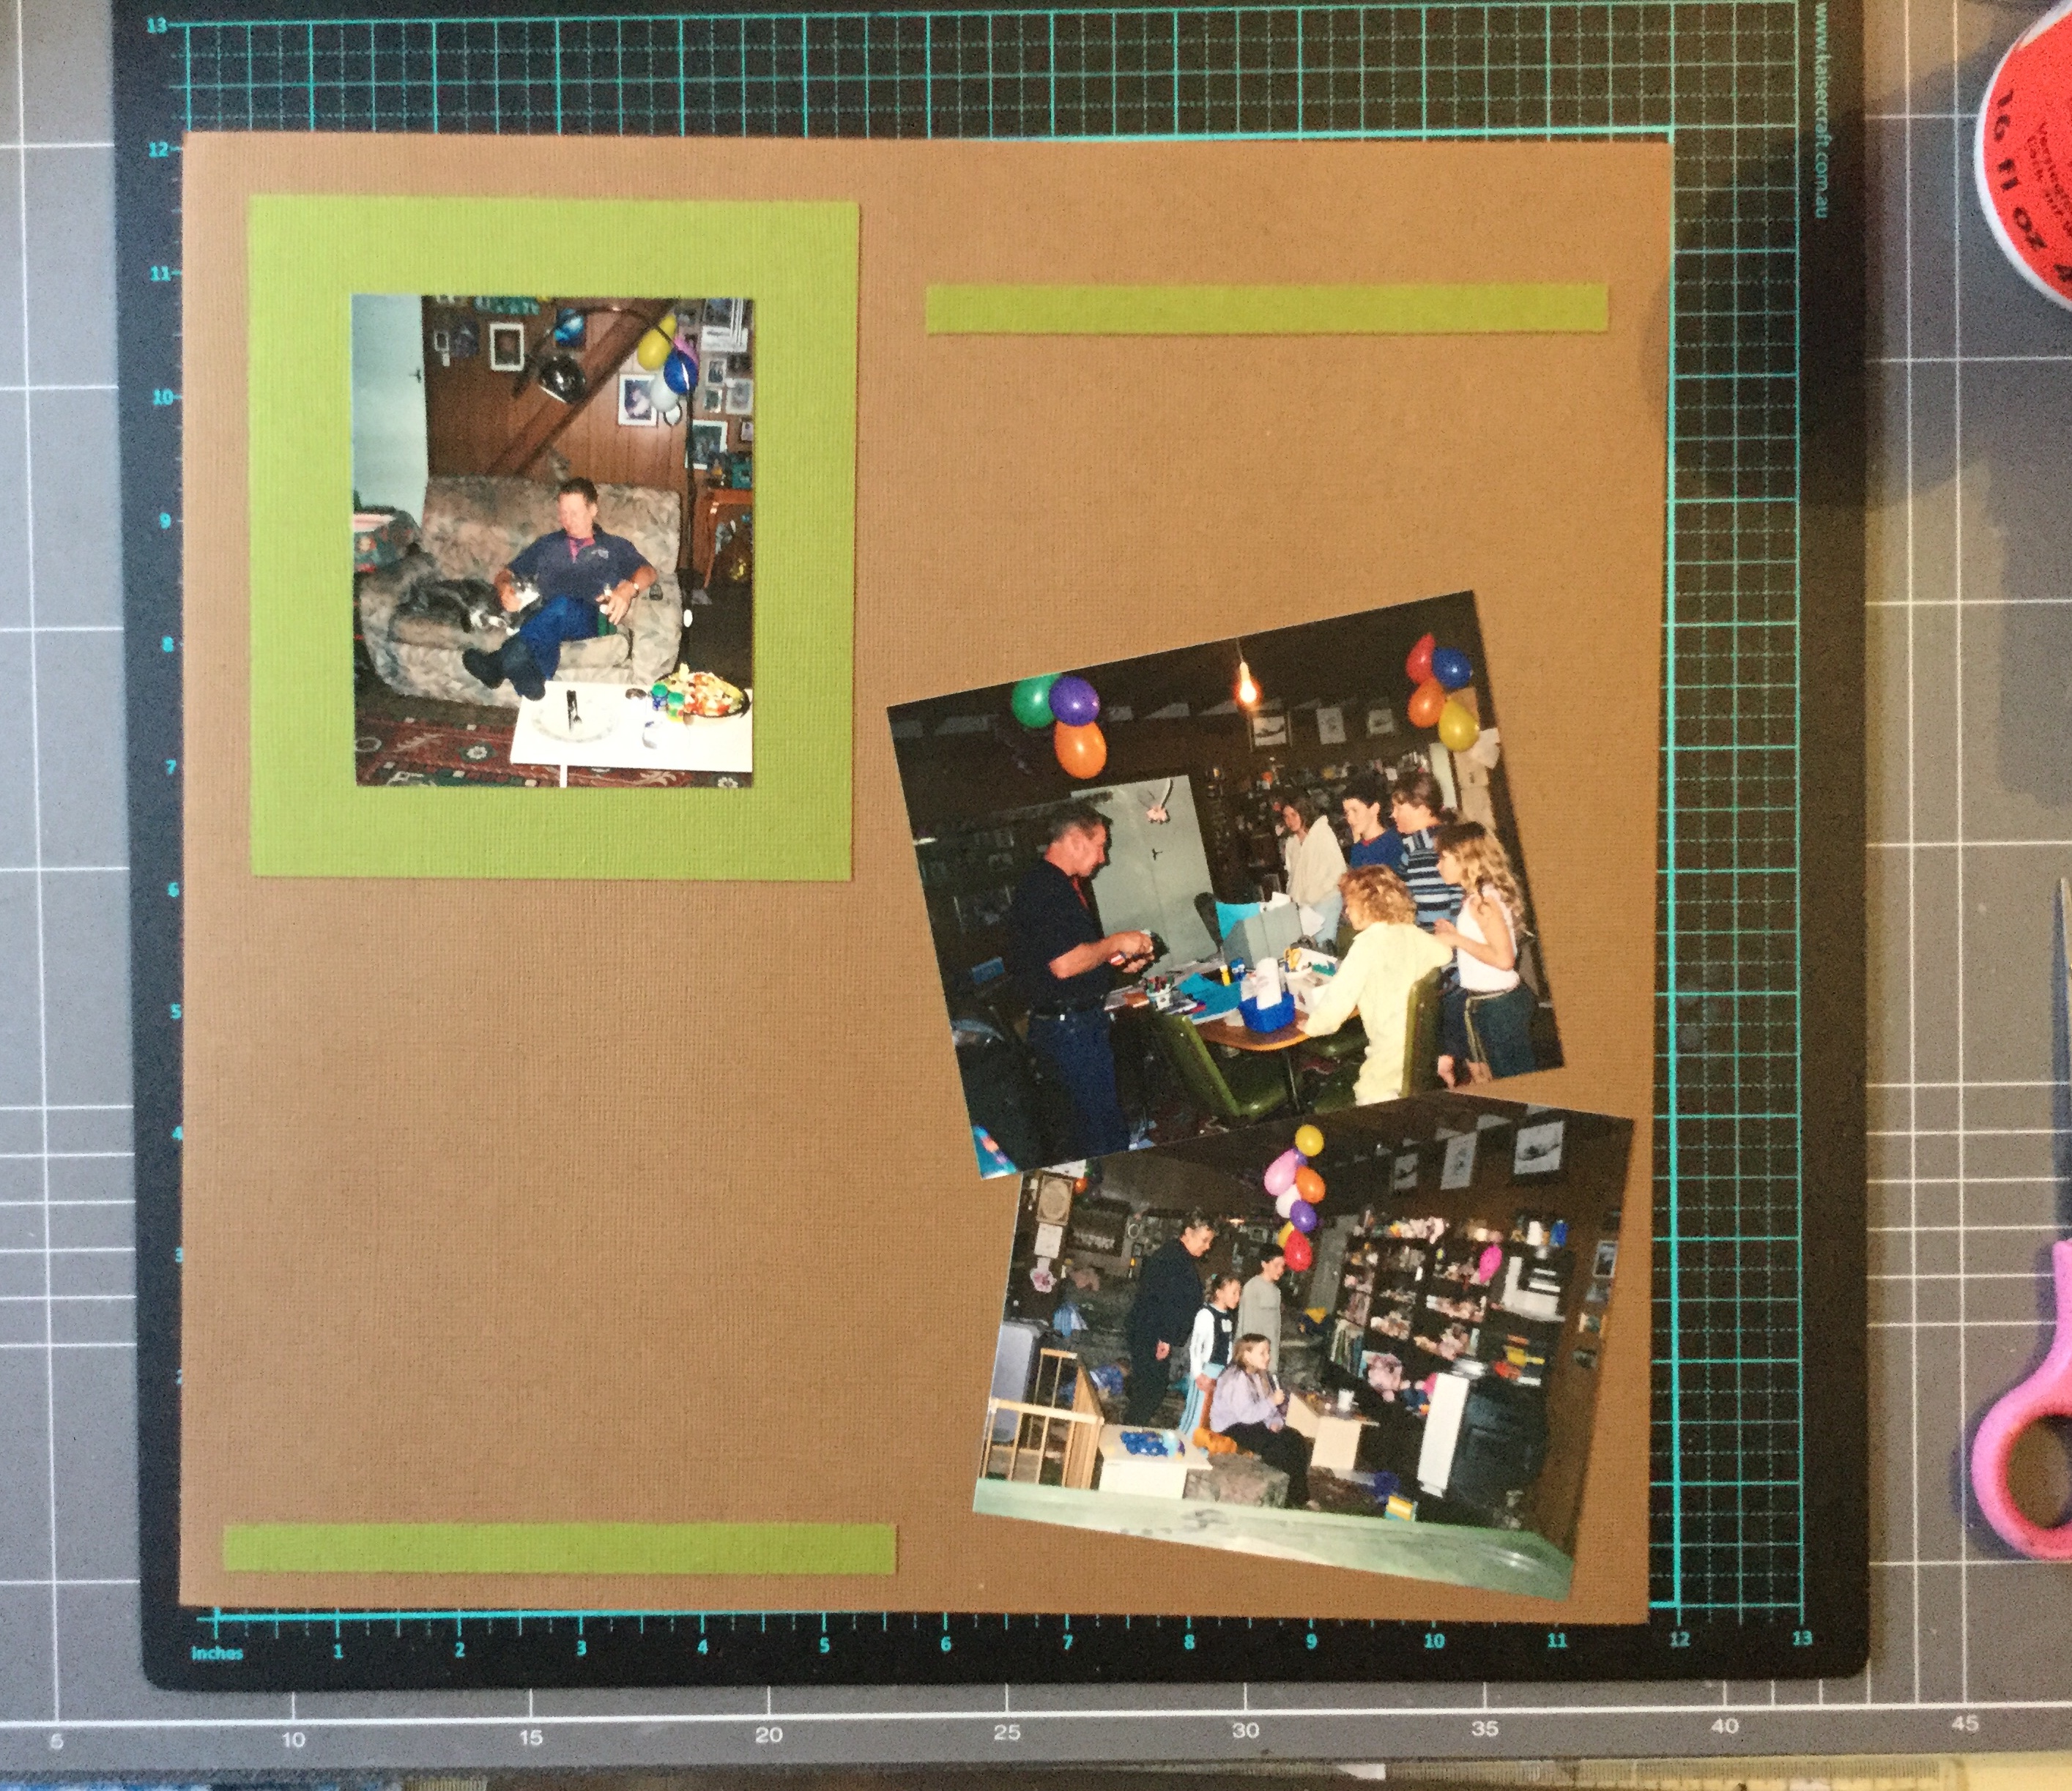
Here we go, with much shame, I present layout one out of the pizza box, unfinished and ugly. A creation with a very seventies colour scheme and very busy pictures filled with my family. You can see that it is so uninspiring, I think that olive green and brown was selected based on the seventies furniture and walls in the photos. It does have a nice frame on the main pic.

IMG_7591

So, here is what I changed and what I did. Basically, I took it apart, thinking that I would use some of the cardstock in the new format. I did use a little but not much. I must say that the double-sided tape used to adhere the photos were strong, it was hard work getting it apart. I wish I knew what brand tape I had used.


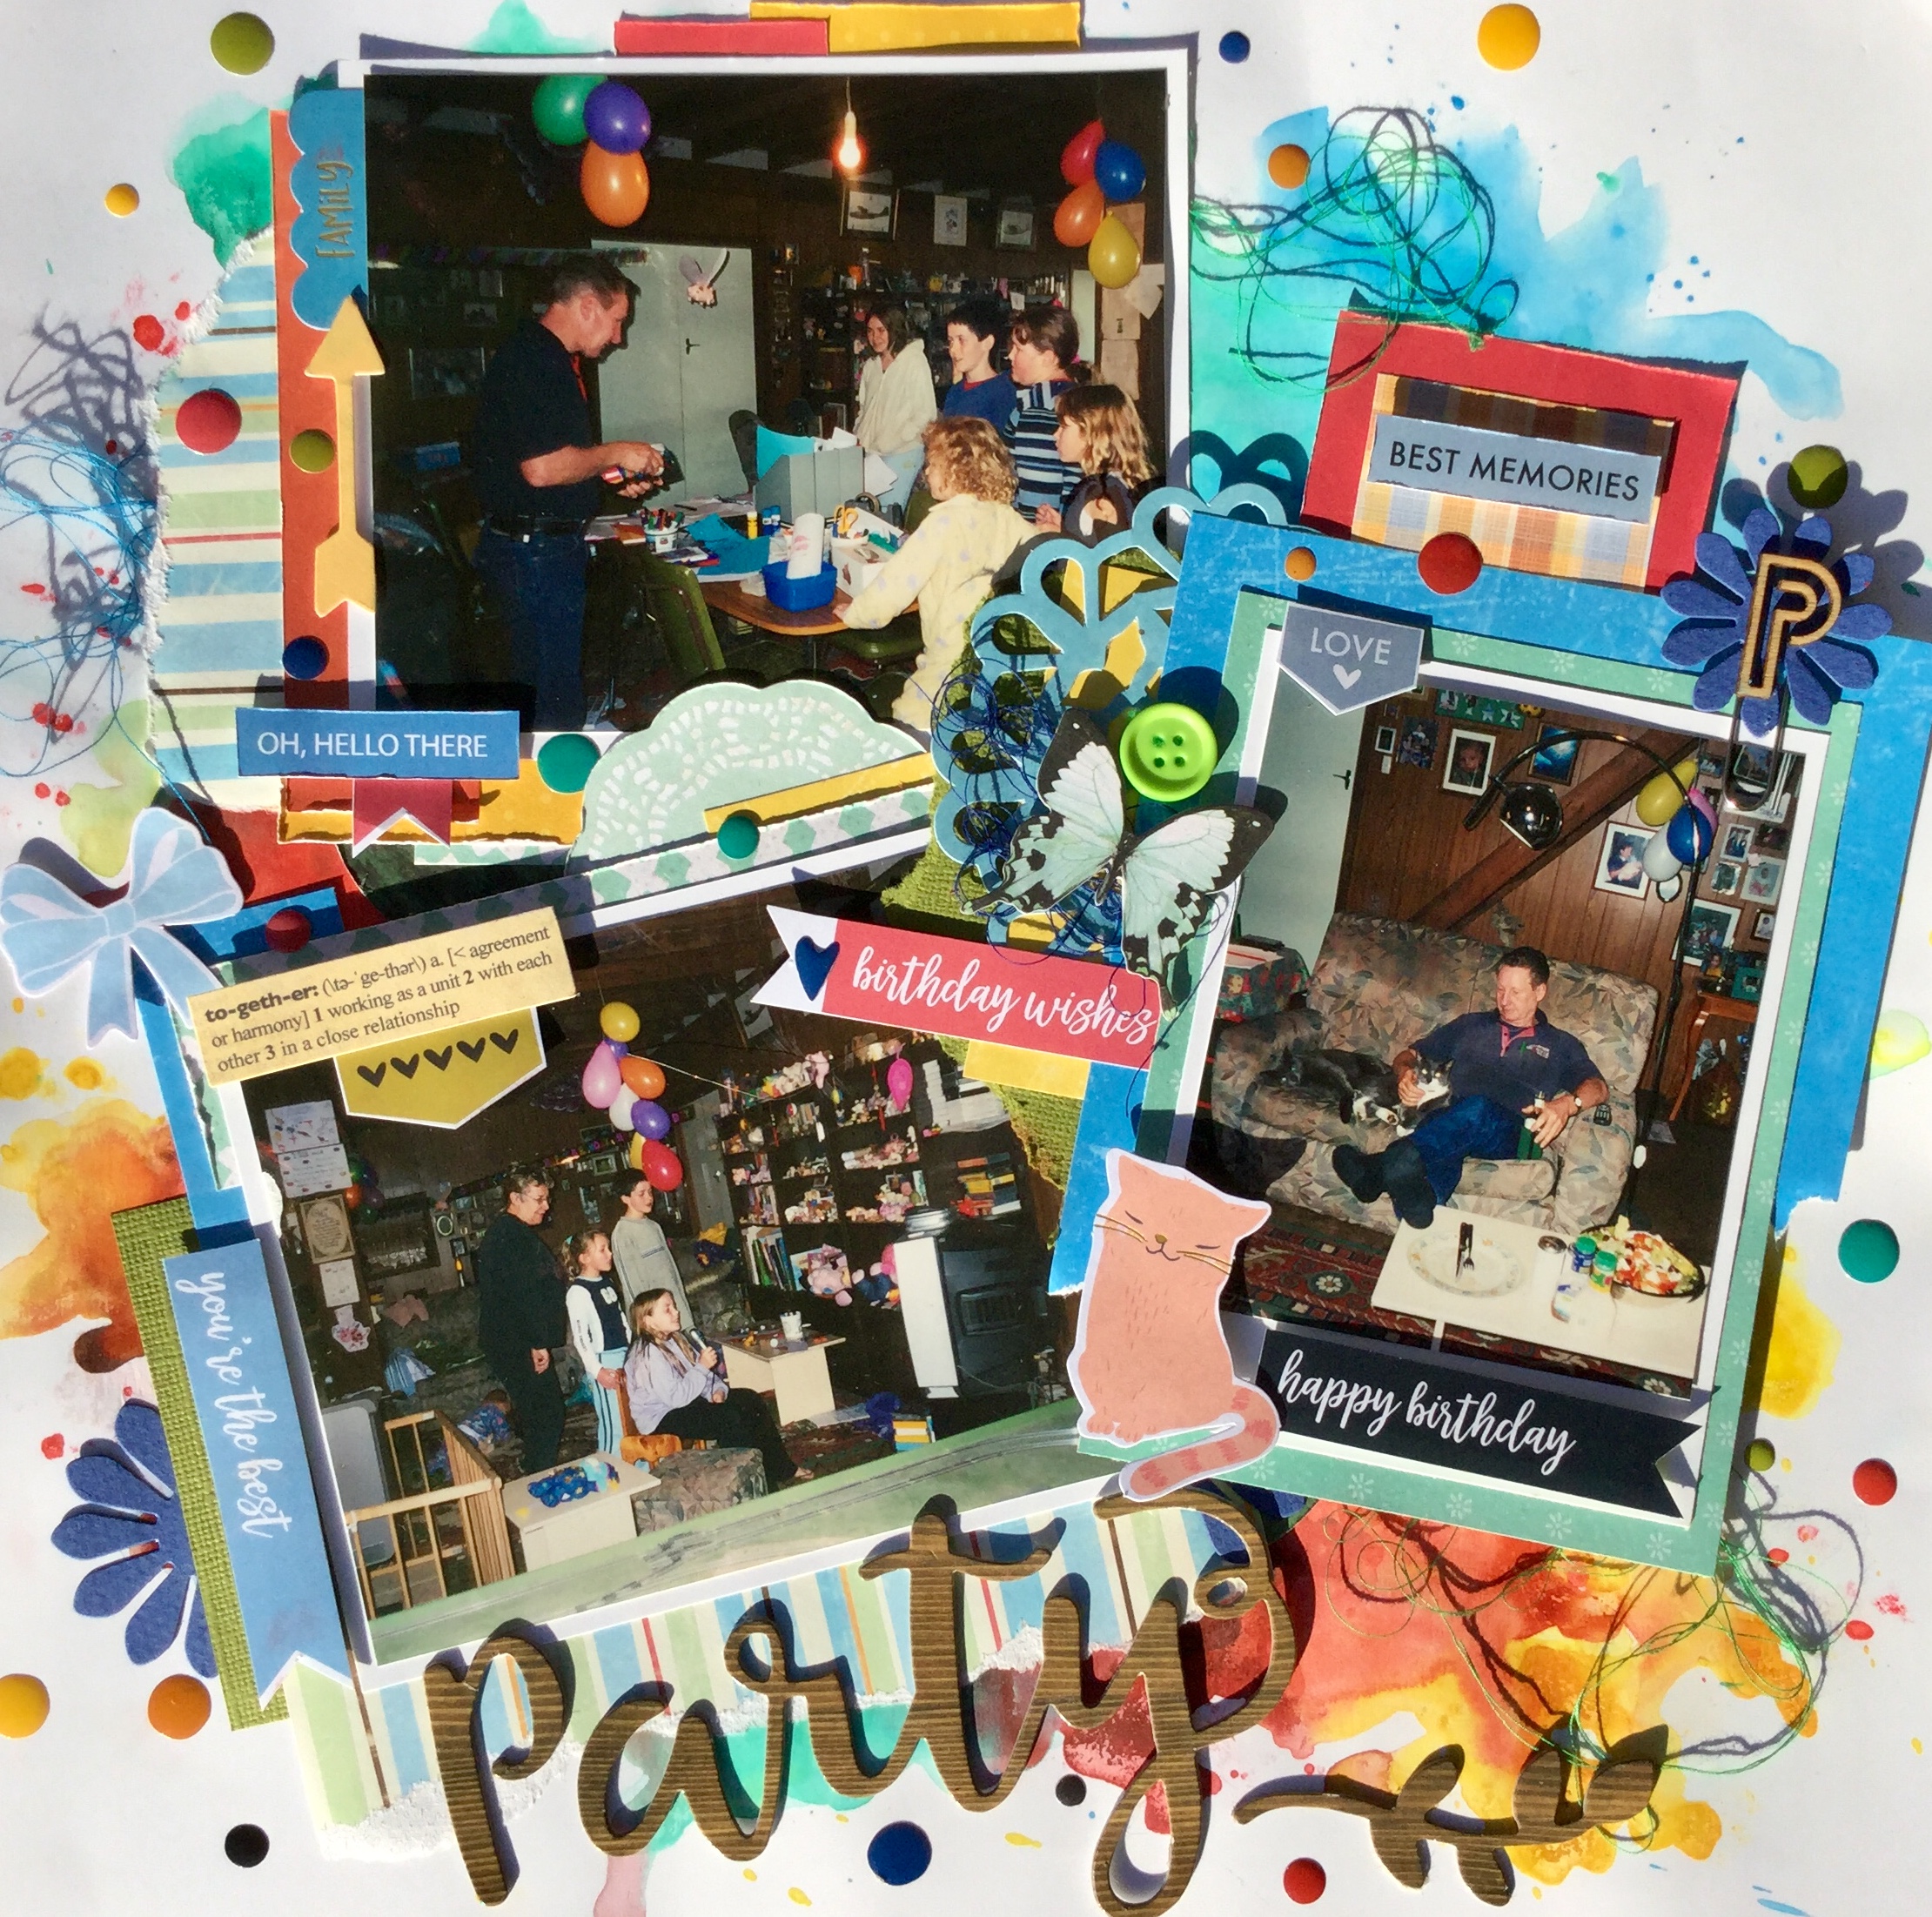
I started with some mixed media, I wanted to get some colour in the layout and used the party balloons pictured as inspiration. I was after a fun, chaotic, party feel. I applied watercolour paint to my white cardstock in a circular pattern, trying to create a border around my photos. Some of the paint was applied with a brush and some was flicked onto the cardstock. I ended up having to extend the colour further around the edges, so it was peeking outside the photo edges.

Then,  I worked on each photo, matting them and building up layers of patterned paper (scraps from previous layouts) and adding some embellishments.

IMG_7594

I have been binging on YouTube and watching the HipKit Club team whilst I am cleaning and scrapping and decided to add some thread to my page.

The finished layout is messy, fun and bright and over-embellished. Some may think the simple, clean line which was in the original version was better, I like the fun messy look. Most importantly, I had lots of fun creating it and this layout will finally be put in the family album.

IMG_7698

One finished and eleven more to go.

Happy scrapping 🙂

Just for Fun! Layout Share.

Good morning all,

Just popping in to share a few layouts after my Mother’s Day and birthday splurge. It’s hard not to buy a product when the sales are on and splurge I did. There are so many lovely scrapbook and stamp collections being released at the moment, for those of you not in Australia you may have had them in your hot little hands for a while, but us Aussies have to count many sleeps until they arrive in the stores here.
So, let’s look at what I bought and how I have been using some of it. Following my self imposed challenge to use the new product that comes through the door and mix it up with old products, I have been busy.

#Smile layout

The background paper is part of the Mintay Berrylicious collection, I purchased the 12 x 12 paper collection because of the beautiful woodgrains in the collection. There is also some paper in the collection with frames which I just had to have, plus some gorgeous florals. I didn’t really have any interest in the cutesy berry and cat motifs in the collection.

The other papers used for the layering came from two 6×6 pads which I have had for quite a while, the Jen Hadfield, Warm and Cosy collection and a TLC paper Stackz wedding collection (this is years old). The embellishments and titles are a mix up of product, sorry I can’t supply brands/collections.

IMG_7569

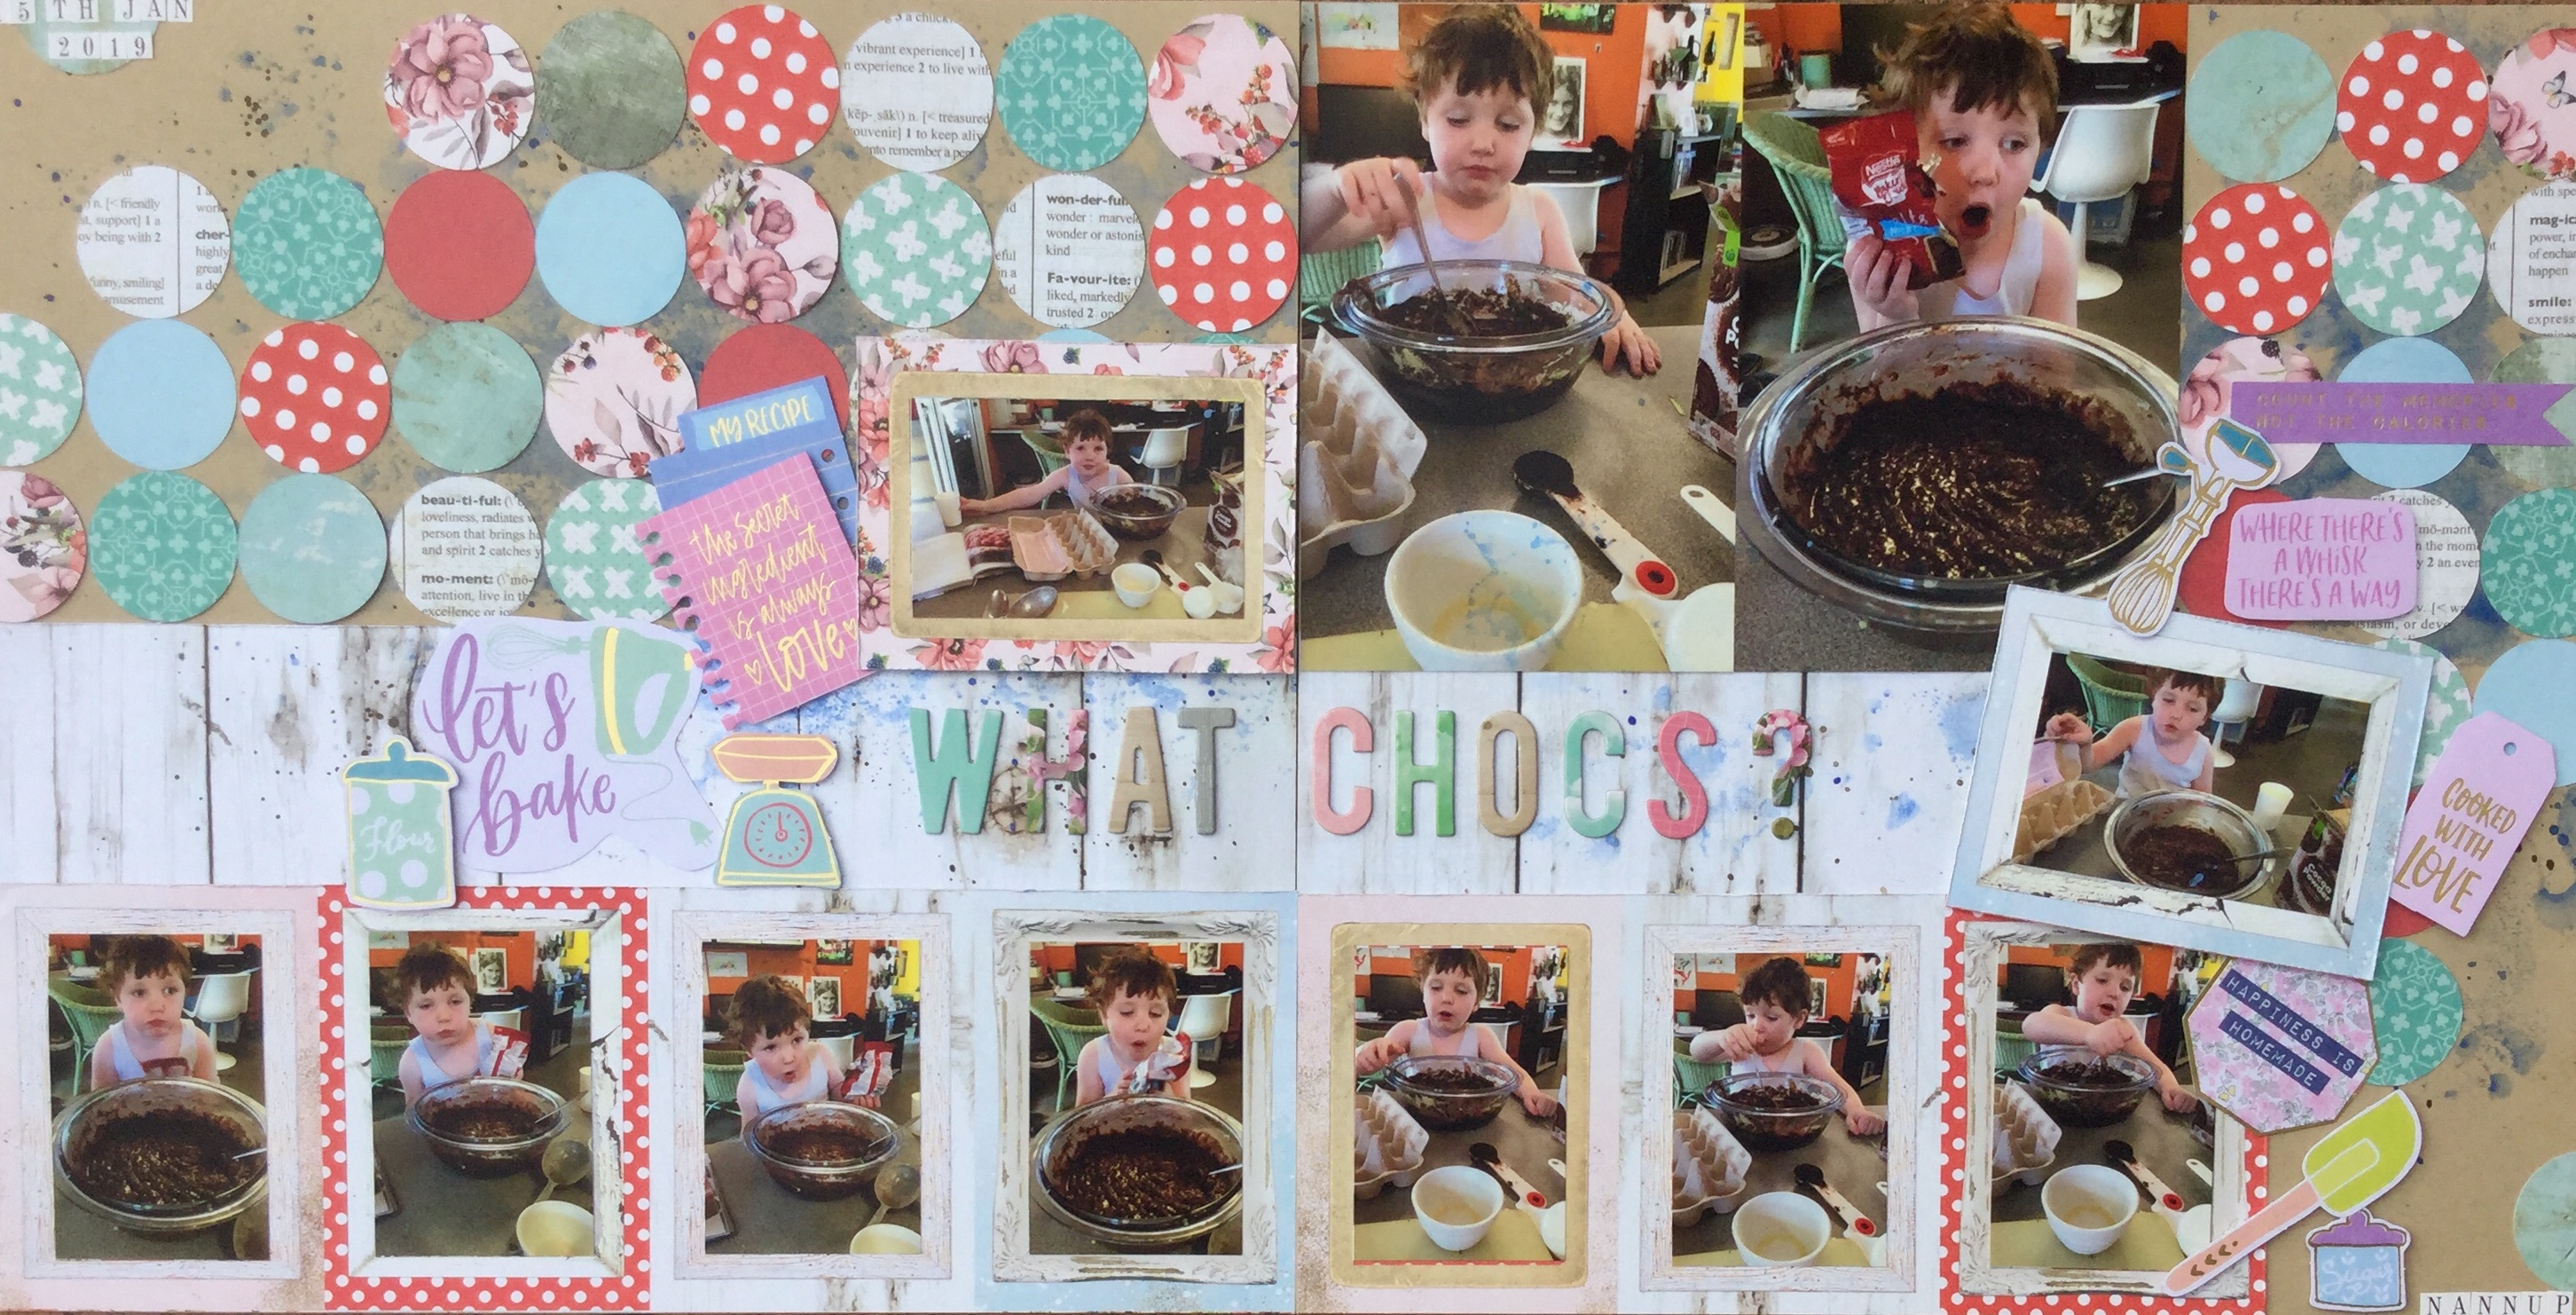
What Choc?

For this layout, I used four of the Mintay Berrylicious papers, a red and white polka dot, the lovely white/grey woodgrain, a pink floral and that frame paper which is perfect for 3×4 photos. I had some fun splashing around watercolour paint and smooshing it on using the plastic bag technique.

IMG_7562

Beautiful Happiness

This layout background is from the Mintay Wilderness collection, can you see a theme going here? Yep, I am in a woodgrain obsession, I love it in every grain and colour. The B side of this paper is a cut apart style print of wolves, pine trees, and backpacks. I bought a few of this page, so I can fussy cut those images and use them with my son’s hiking/backpacking layouts. There is a whole lot of embellishments happening here, using up my stash. The layering papers are from another very old, 6×6 TLC Stackz.

IMG_7573

Bedtime Chuckles

This background paper is from the gorgeous themed Echo Park, Lost in Neverland collection. I loved most of this collection but only bought 6 different papers and the sticker sheet. I did buy 3 sheets of this night sky paper called Straight on ’til morning, as I thought it was really useful for those lovely sleeping babes layouts. I have splattered on some extra stars here, using white watercolour paint. The star and feather paper quote are also from the collection. This old photo of my son and I makes my heart sing, he is about to turn 31, but I still remember his cheeky chuckle.

IMG_7559

Together

Look, more woodgrain! Plus, check out that photo, my son is so muddy and dirty he doesn’t look like he belongs to me, haha. So, very cute, they had spent several hours making mud pies and they also stamped their handprints in mud on the outside fibro wall of the house. Those handprints never washed off and had to be painted over when we moved out of the rental.

The background paper is from the Carta Bella, Welcome Home collection. the layered papers are again a mix of the TLC Stackz and Jen Hadfield, Warm and Cosy 6×6 pad.

IMG_7556

Tick, Tock!

The next one has very little new product but uses up a mix of older products. I did use the JillibeanSoup Rainbow Roux Expoxy Stickers, cute hearts, which I had bought. These photos make me smile, last year when our grandson needed to stay with us for a few days my son had to babysit him one night when we had to attend an event. We came home to this, my son asleep on the floor, squashed between the lounge and coffee table, and our grandson asleep on the lounge. My son said “He wouldn’t go to sleep. I just wanted him to sleep so I could watch a movie.” No movie happened for either of them!

IMG_7548

The last one,

Thanks Dad, uses a new stencil I purchased, it is a Kaiser Craft 6×6 stencil called Distressed Dots. I like how grungy it is, it will be very versatile and I will use it a lot. I love investing money on products when I know I will get my money’s worth.

IMG_7545

Well, that is it for today. On another note, how fun is it scrapping old photos? Gosh, I have been enjoying looking back and reflecting on how things have changed, and not just the people but our culture itself, how we live and what the expectations are. For many of us, my age, you fell in love, you found somewhere to live and you had the bare basics. When I look at some of these photos above I notice the terrible furniture and the make do with what you can find or have. We had very little, zilch, we threw away our jobs and took a chance on moving to a better place for our son. We borrowed, begged and sourced what we could from the local Op shops, etc. We had no designer expectations, nor did most of society, we worked hard and slowly saved money to purchase new furniture, white goods and appliances. Today I marvel at the expectations of young couples and the expectations and pressure placed on them by society, the availability of stuff and the incredible change in what matters the most…the necessities have changed. We got by on love, working hard and setting goals, friends and family didn’t judge you, they supported you with the expectation that is was supposed to be tough when you are starting out as a family. We were so happy, we didn’t even notice the furniture!

Which brings me to another thought, do you cut out those parts of history in your photos? I must say that I was tempted to crop down some of these photos to focus on the people. Many of the photos are cluttered with objects, have poor lighting or show offending items, like cigarettes, but if we remove those bits are we removing history? I stopped myself from cropping them, my grown children do like to see where and how they lived in the early years. They are sometimes amazed at how little we had when compared to now. So, these layouts may not be social media perfect but they do record life.

Happy scrapping 🙂

If you would like to share your thought leave a comment by clicking on the post title and scrolling to the bottom of the page. Post your comment in the reply envelope, I would love to hear your thoughts.

April 2019 CKC Layout #1.

Hello,

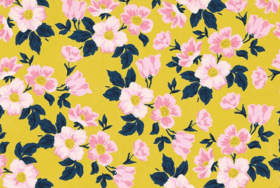
My first layout with my April Counterfeit kit is based around the Forgery on the Fourth challenge where you make some of the kit supplies. As I mentioned earlier, I had included a few black and white papers which had some similar patterns and motifs to the original March, Hipkit Club kit. This Maggie Holmes paper img_6704.pngwith a yellow background and flowers is really striking in the Hipkit Club kit and makes a bold statement of springtime. I wanted to try and turn my black & white floral into this vibrant mood by simply colouring it in. I decided to use coloured pencils and markers.

First I coloured the leaves in using a navy marker and then worked on the background, first using an ochre pencil and then working over this with a deep yellow pencil. It gave it good coverage and created a mustardy, warm yellow.

Next, I coloured the flowers using a pale pink Copic marker and added the darker pink to the flowers by blending in some rose pink coloured pencil.

I really liked the result, I felt that I had created the same mood and feel which the original had and got busy selecting the other papers for my layout. As usual, I looked for the colours in my photos to help select the papers from my kit.

This layout features photos of my daughter’s navel piercing, an odd thing to scrapbook, you might think? She certainly did! Let me say, that she sent me the photo of her new addition and was very proud to have finally gone through with the piercing. She had worked hard to get into shape, having lost over 24kg, through joining a gym and healthy eating. It was one of her goals to have a navel piercing on a belly good enough to show off!

Back to scrapping…

I wanted to use some of the sprays included in my kit and selected the distress ink. It proved too strong for the look I was after, so after wiping away most of it, I used some white acrylic paint to soften it into dreamy pink clouds and swishes. Then, added some blue splatters of ink.

I had just watched Janet Madison’s latest layout sharing video and was reminded about her using up scraps to create a border frame. I liked the idea of including all the patterned paper I had selected to form the outside border of my layout and quickly put it together.

I liked how the frame looked but when I added my pink mixed media cardstock everything just screamed…NO! I really didn’t like it, I needed something to stop the two clashing. I rummaged through my kit to find something to fix it and pulled out some gold washi tape. The gold tape did improve the clash slightly but  I didn’t like the result, it reminded me of old ladies who go cruising in leopard print shirts and gold lycra hot pants!

Things were not going well. I moved onto mounting my photos using the patterned papers, roughing up the edge of each layer. These I liked and I spent quite a bit of time trying to create layers on my background to place them on without creating more clash. It wasn’t quite working with my forged yellow flower paper being so bright. I decided to stamp some foliage onto the background to draw the viewers eye away from all the brightness.

After lots of fiddling around and indecisiveness, I thought  I should snip off a piece of the forged paper and use it to fussy cut some flower embellishments. This layout was taking a long time.

At last, things began to work for me and I managed to complete the layout using a selection of embellishments from my kit. It did not turn out like the layout I had envisioned, the use of the gold washi tape forced me to include some gold die cut embellishments. Surprisingly, this didn’t work out so bad, as the navel belly bar is made of gold.

IMG_6746

A lot of messing around and not super happy with it, but it is finished.

Time for number two layout…with no gold in sight!

RTS & CKC Mar. 2019-Layouts #9 & #10

Hello and happy St Pats Day,

Today I am sharing the last two layouts I made using Janet Madison’s RTS 4 for 4 series unnamedtechnique. You can view all of Janet’s videos for the series on her YouTube channel, RTS (Record the Story) Scrapbooking. As usual, I made some changes along the way, something Janet promotes…there is no one way, make it your own!

You can see the collection of papers I started with on my last post, I chose very feminine papers from my March Counterfeit Kit Challenge. Using the 4 for 4 series you end up making 4 layouts using 5 patterned 12×12 pieces of paper cut to different sizes and then working on a cardstock background. The leftover scraps are used to make cards with, something which I haven’t tried yet. Years ago, when I first ventured into papercraft, cards were my main focus. I even sold them through several businesses, was commissioned to create them, taught classes on stamping and cardmaking, and had tutorials published. Now, I just can’t get enthusiastic about making cards, though I do ooh and aah over all the new stamp releases. However, I agree with Janet that we should all be making our own gift cards, we have the skills and loads of scraps to use up!

Layout #9 (for CKC, #3 for RTS-4 for 4)

For this layout, I selected a very light, shell pink cardstock for the background. You can see the patterned papers cut to Janet’s specified sizes, I used a mix of old and new papers. A lovely raspberry pink floral, a text (a recent purchase, Jilliebean – Reap the Grain) and a strip of mint, criss-cross kisses. The butterfly and flowers die cuts are from Tim Holtz’s idea-ology salvaged elements, and I chose a few tags to include from my stash.

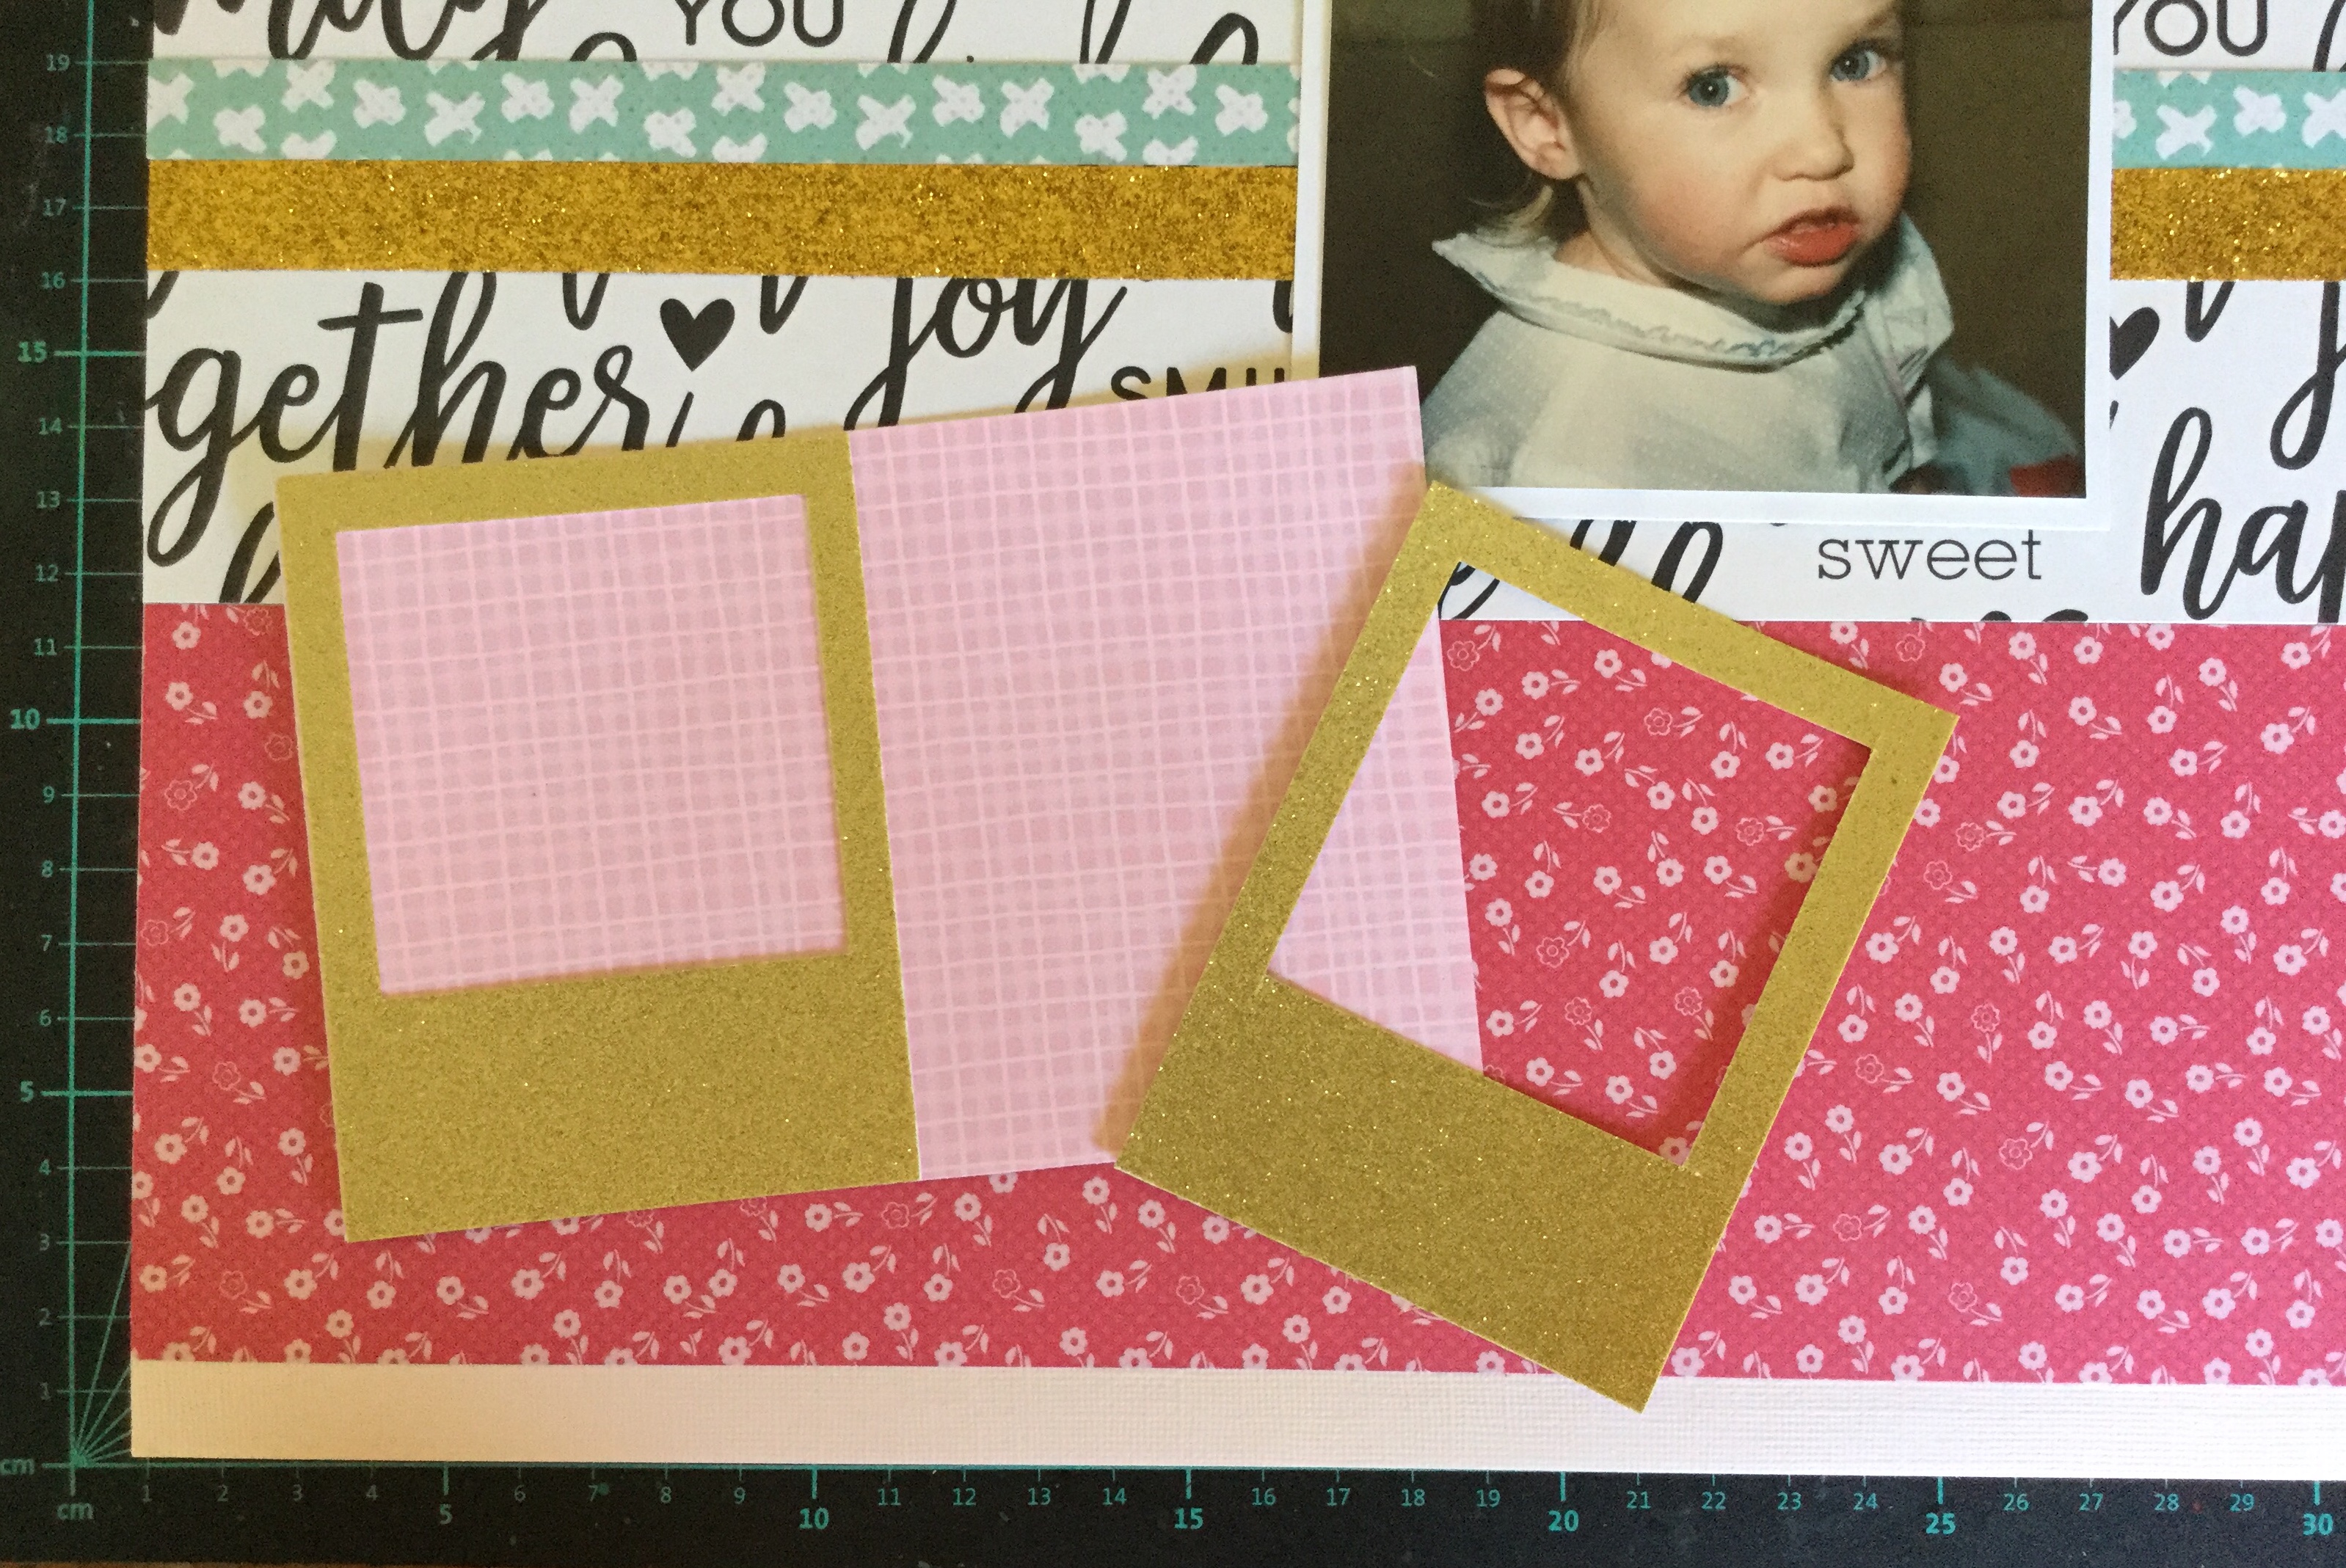
I put the background together first. I had an issue with the text paper, it probably wouldn’t have bothered most people but I do suffer a little from perfectionism. If you read the text you can see that there are some words and quotes which don’t fit with my photo. My photo is a 4×4 of my daughter by herself and several parts of the text refer to more than one person…see how picky I am. There is the terms: You & Me, Family, and together. I couldn’t work with this and needed to find ways to cover up these terms. The first thing I did was add the mint criss-cross strip across the term ‘& Me’, it didn’t quite cover it all, so I add a strip of gold, glitter washi tape. Problem solved!

IMG_6426

Next, I needed to deal with the large words, ‘Family’and ‘together’, on the right-hand side. Fortunately, my photo would cover this area, but it did mean that the placement was different from Janet’s recommendation.

I then thought the photo needed to stand out more from the background and added a white cardstock border. I wanted to include my handmade gold frames in this layout and mounted them on some scrap pink checked paper. They would do a good job at covering up the text on the left of the layout, and be substituted for the absence of photos. Janet’s #3 layout uses 3 photos and I only had one.

IMG_6431

I had wanted to use the teal glitter Thickers from my CKC kit and thought I needed to get some teal colour on the page, as my papers did not include this colour. So, out came some distress ink and a cheap stencil. I focused on stencilling over the areas with the inappropriate (for me) text.

Next, I went to work adding the embellishments strategically placing them to cover up those annoying words. This took me quite a lot of time, I moved things around a lot and it just wasn’t working for me. I also stamped on some distress raspberry pink, little foliage images to try and pull it all together, around the clusters. A few tiny punched out red hearts and flowers were also added.

I’m not completely happy with the end result, but as Janet always tells us ‘the friends and family looking through the albums will not notice’. It is us that is far too critical of our own work. We need to learn to…let it be, let it be!

IMG_6471


Layout #10 (for CKC, #4 for RTS-4 for 4)

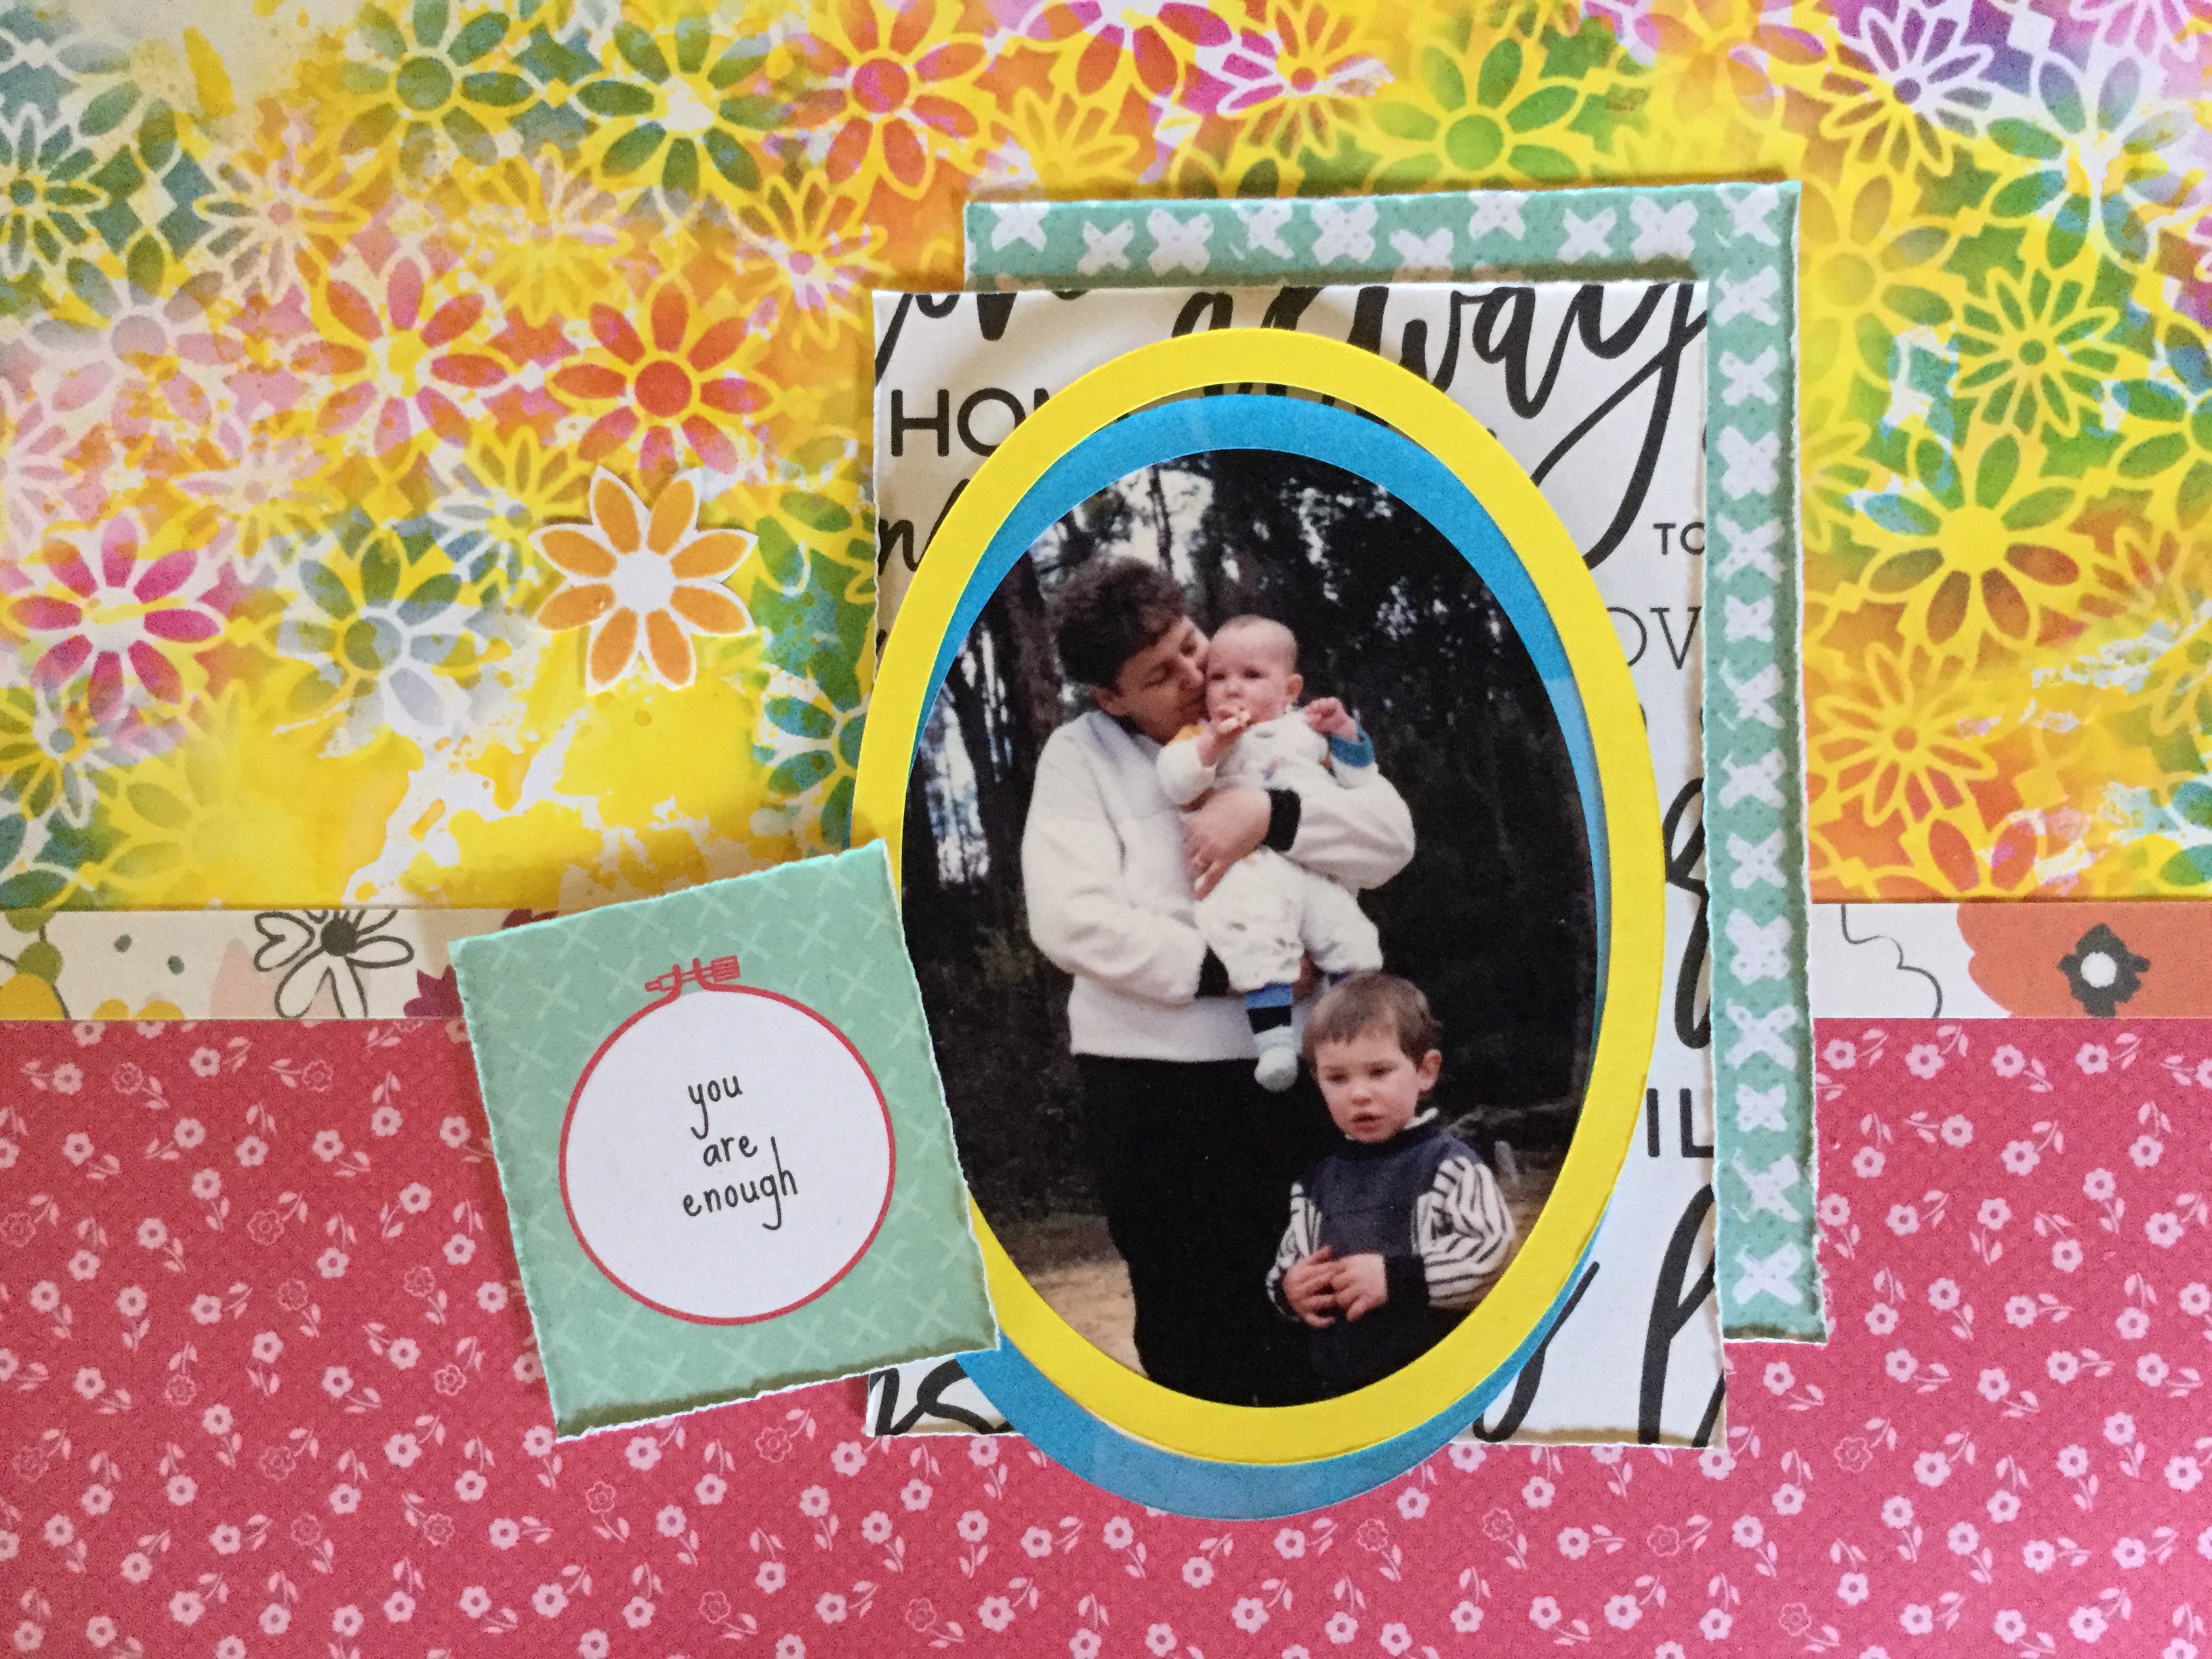
So, this layout starts out with me scanning and enlarging the photo I want to use. Like my previous layouts, it is an old photo of my daughter which was once framed and hung on our hallway wall. The papers used are the same as Layout #9, except for a little strip of the large flower print (used in Layouts 7 & 8). I chose a few tags and a daisy die cut from my CKC kit and decided to work on white cardstock so I could splash around some ink.

I pulled out my favourite oxide ink, Mustard Seed, it creates an amazing golden yellow, and I used the plastic bag technique, activating the ink with water, to create a vibrant background.

Next, I wanted to include some stencilling on the background, picking up a few of the colours form the ‘LOVE’ tag. I put a few washi tape strips along the base of the page and then got busy stencilling on some simple shaped flowers using a range of distress ink colours. They blended beautifully, creating an almost rainbow coloured effect. I also stencilled a strip of white cardstock to use for some embellishments.

Time to fussy cut out those flowers.

Now, I needed to create some frames from scraps to cover the rough edges and bits of white left around my trimmed down photo. As, previously, I used the old Creative Memories cutting system, it was a quick and easy option.

IMG_6454

Then, I mounted the photo and frames onto the layout using foam tape.

IMG_6458

Time to build up the layers of embellishments, both handmade (stamped & stencilled) and purchased. A mix of flowers, tags and enamel dots. Then some Thickers for the title.

The end result is a very, bright, colourful layout, a lot more intense than I envisaged. Another layout in the album, happy scrapping everyone.

IMG_6459

Uniquely Creative Feb. Challenge

Hello everyone,

I finally found some time to scrap, my new job is taking up more time than I like and there is so much marking when you start off a new school year. I needed a break and decided to crack open the Uniquely Creative February kit which arrived on Wednesday. It is a glorious kit, so much colour and interesting mixed media. A tropical/summer kit based around the Kaiser Craft ‘Paradise Found’ collection. PK599I am loving the papers, all that greenery, yummy teals and beautiful, bright hibiscus flowers. The problem is I don’t have any tropical photos, no tropical island holidays for us yet! Though, it did give me the opportunity to remind hubby about how he mentioned he’d like to go to Fiji, the perfect reason to holiday…to use up scrapbook paper.

Because I was struggling for photos, I decided to work with some summer holiday beach photos. I had just finished using the December Uniquely Creative kit, an ocean-themed kit, which I had managed to make 8 layouts with (adding in extra cardstock) and still have scraps left for another couple of layouts.

I had a gorgeous photo leftover of my daughter sun baking on one of our favourite holiday beaches. We have amazing beaches and coastline in Australia. It is from a holiday we went on about ten years ago, this beach has pure, fine, white sand that squeaks when you walk across it.  I thought it would be the perfect photo to use with the Uniquely Creative February kit and Sketch Challenge, as it has hibiscus flowers on the beach towel.

I started off making the background, using the ‘Ocean Air’ paper, I added some blue watercolour paint smooshes and splatters.

Then, I selected the ‘Salt Water’ paper to cut out the large circle in the sketch layout. I didn’t want to lose the shells on the edges of the circle, so I cut around them and kept them attached.

IMG_5739

The lovely hibiscus die (add-on to the kit), worked beautifully to create a halo effect around the edge of the circle. I was thinking about the sun and sunbeams, as I glued them into place. I cut them from the white cardstock painted with the yellow and orange watercolour supplied in the kit.

I used some hessian border and patterned paper to make the vertical stripes in the sketch.IMG_5745

Next, I mounted the photo on white cardstock and rough up the edges. Then, I added a layer underneath of the ……. paper. You can easily tear this paper into the shape you need by adding a line of water to soften the fibres of the paper. It creates a lovely torn, tatty edge.

Finally, I added a range of embellishments from the kit around the edges of the circle and photo. I fussy cut a few extra shells from the leftover ‘Salt Water’ paper and attached them with foam tape. I added some of the sisal fibre threads for a little more textural interest. I used white cardstock paint with blue watercolour paint and the supplied ‘paradise’ die to create the title.


IMG_5772

Not a bad effort, I think it works well with the photo. Now to use up that tropical foliage and hibiscus papers…keep scrapping!


Jan. CKC #4 – Step by Step

Hello again,

I am sharing my fourth CKC Jan. kit layout, this one is a double page spread. It’s been a while since I’ve done a double page layout, with this one I wanted a vast page to mimic the outdoors. The photos I am using are from last year when I met up with my Dad and we got to spend some time together. This doesn’t happen very often, as he lives 400km away and he is often travelling/prospecting which can easily stretch the distance to 4000km or more! On this day we decided to do a little exploring together and went to check out one of the South West regions caves. Because we went underground I started the layout off by creating an earthy coloured background.

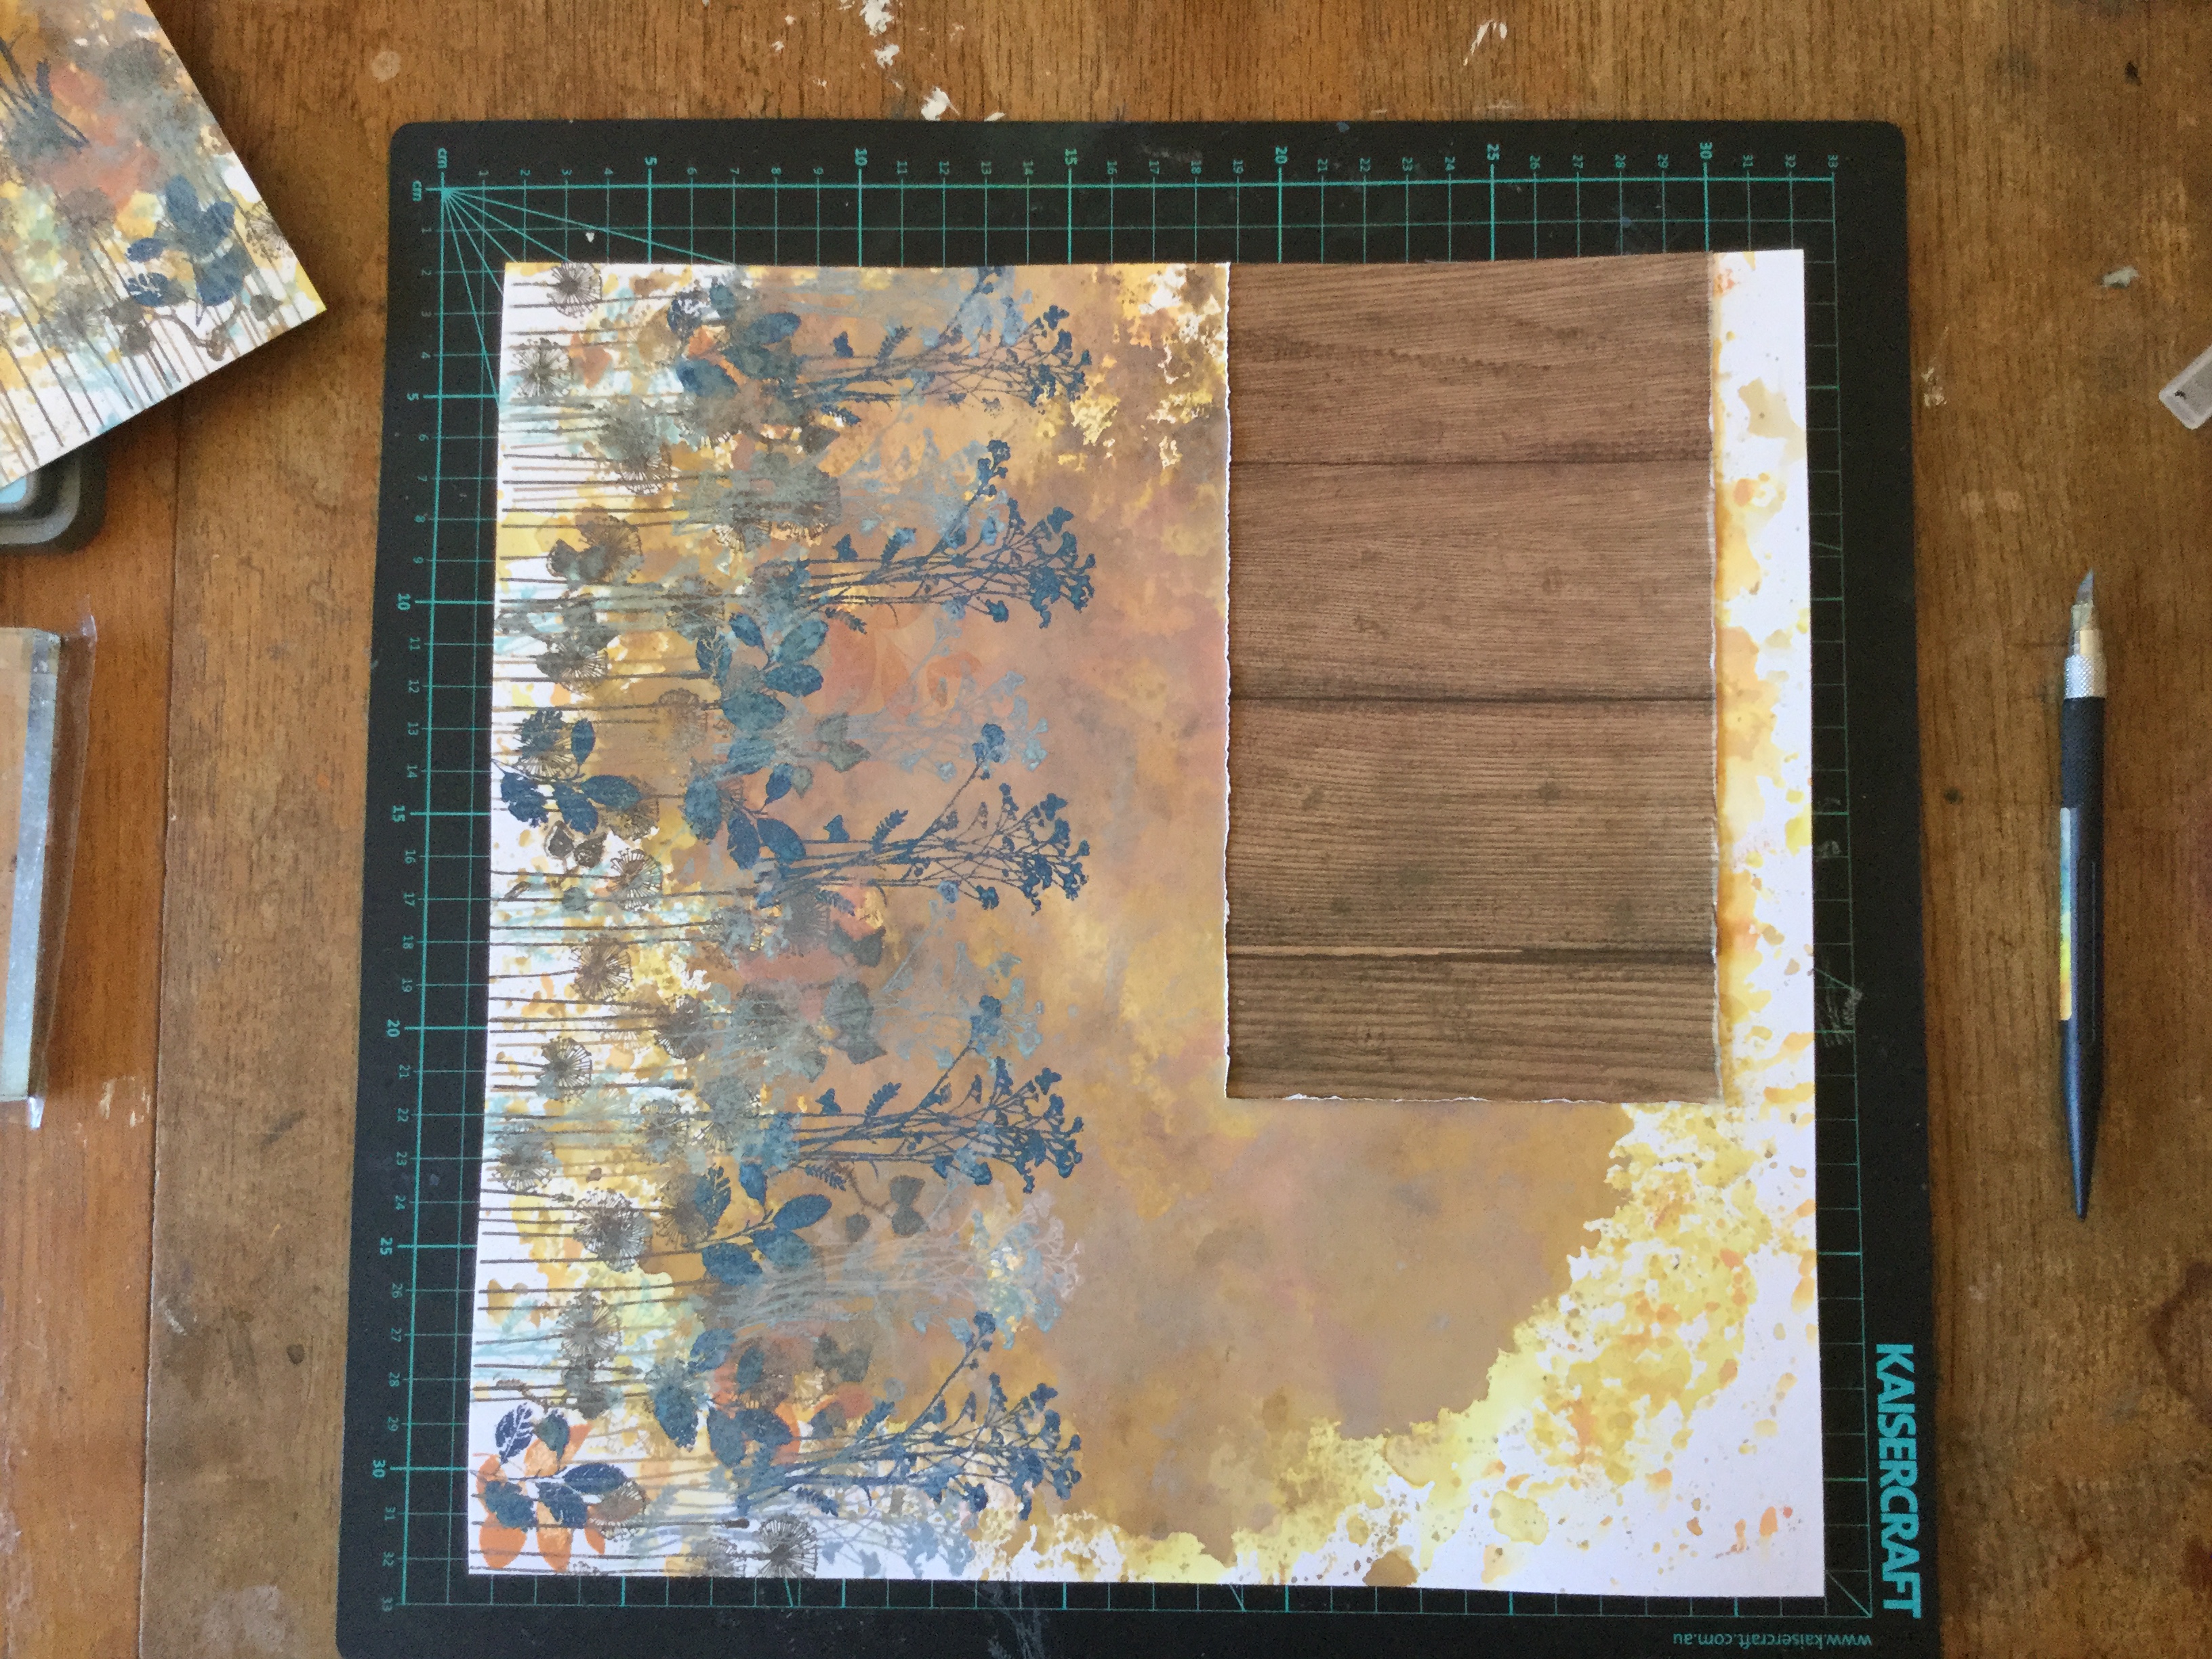
On top of my earthy background, I built up layers of stamped foliage using some colours which I pulled from the Felicity Jane kit. Some smokey blues and teals. You can see that my cardstock had become quite warped from the mixed media/water application. I just press it, between two pieces of white paper, with an iron to reduce the warping. It usually results in a smooth surface, though sometimes you may need to dampen the back of the cardstock with a spritzer.

Then, I mounted the main photo with several layers of paper. I tried to use up the last of that Christmas paper.

I added some papers to the background. This is where things got interesting, after img_5408looking at my photos I wanted to emphasise the sense of going down into the earth. I decided to cut around the stamped foliage with a scalpel and slip some of the photos behind the cuts. Dah, Dah… walking down into the cave.

img_5413

I roughed up the edges of the cuts to add a bit of texture. Then, I got busy adding embellishments and sticking down my photos. I cut some foliage and text dies using my Big Shot Sizzix and added some enamel dots.

I felt some areas were lacking something and looked a little unfinished, so I stamped on some more leaves to fill the gaps. Then, I added the location and date using some foam alphas. I am pretty happy with the end result, though it is quite busy and somewhat over embellished in my usual style.img_5426

img_5429img_5430img_5431


Summer Holiday Upskilling

Good morning,

I hope everyone is well and finding some time to get creative. I have been super busy during my holidays and have not had a lot of time to paint or scrap. Every holiday I try and sneak in a little skill building in the Arts. This holiday I have spent a week at the Albany Summer School learning about coloured pencil technique with Marie Haass and contemporary ink practice with Leanne White.

It is such a joy to spend time with others who are passionate about art and getting creative. As a group, we all had such a great time and shared our knowledge. Within the coloured pencil class, there were some very talented artists with only a few beginners to the art of drawing but many students had not really used coloured pencils as an artistic medium. Most of us had only used coloured pencils as children or during the recent meditation colouring book craze which seemed to take over the World! So, we were all very keen to participate and upskill ourselves.

Marie Haass has had years of experience working as both an artist and teacher, she has lectured many students during their university studies. She was an excellent teacher. She is very welcoming and encouraging and reads and recognises the talents of her students. Marie adjusts her teaching style to suit the student’s needs, she works one on one with each student and doesn’t hold people back but lets them explore the medium through a series of activities and observation drawings. It was really a fun experience listening to Marie share her knowledge and life experiences, we laughed a lot and shared lots of our own stories during the five days.

We started off learning about blending colour pencils and applying a variety of pressures to create a vast range of colours and techniques. I and a few others occasionally img_5438(well…often) got reminded to start off with light pressure. I struggled somewhat with this, being a girl who loves strong bright colours, I found it challenging to hold back! Then, we moved on to observation drawing, our subject being onions! Yes, who knew that onions could be so interesting and prove quite challenging.

img_5323

Next, we worked on a piece using shells from the Albany beaches. Shells up close are fascinating with the range of colours and patterns they have. We also had to include some shell chocolates within our image, I was the only student to score a prawn chocolate! Everyone enjoyed the challenge and it was a great way to put our blending skills and pressure skills into play.

In the contemporary ink class, Leanne White took us through a huge range of ways to use ink. Leanne is a very talented artist who illustrates children books using a range of mediums and has worked as a professional artist and teacher of the arts for many years. She is located where I live, right in the middle of town, it was funny that I travelled all the way to Albany to participate in one of her classes.

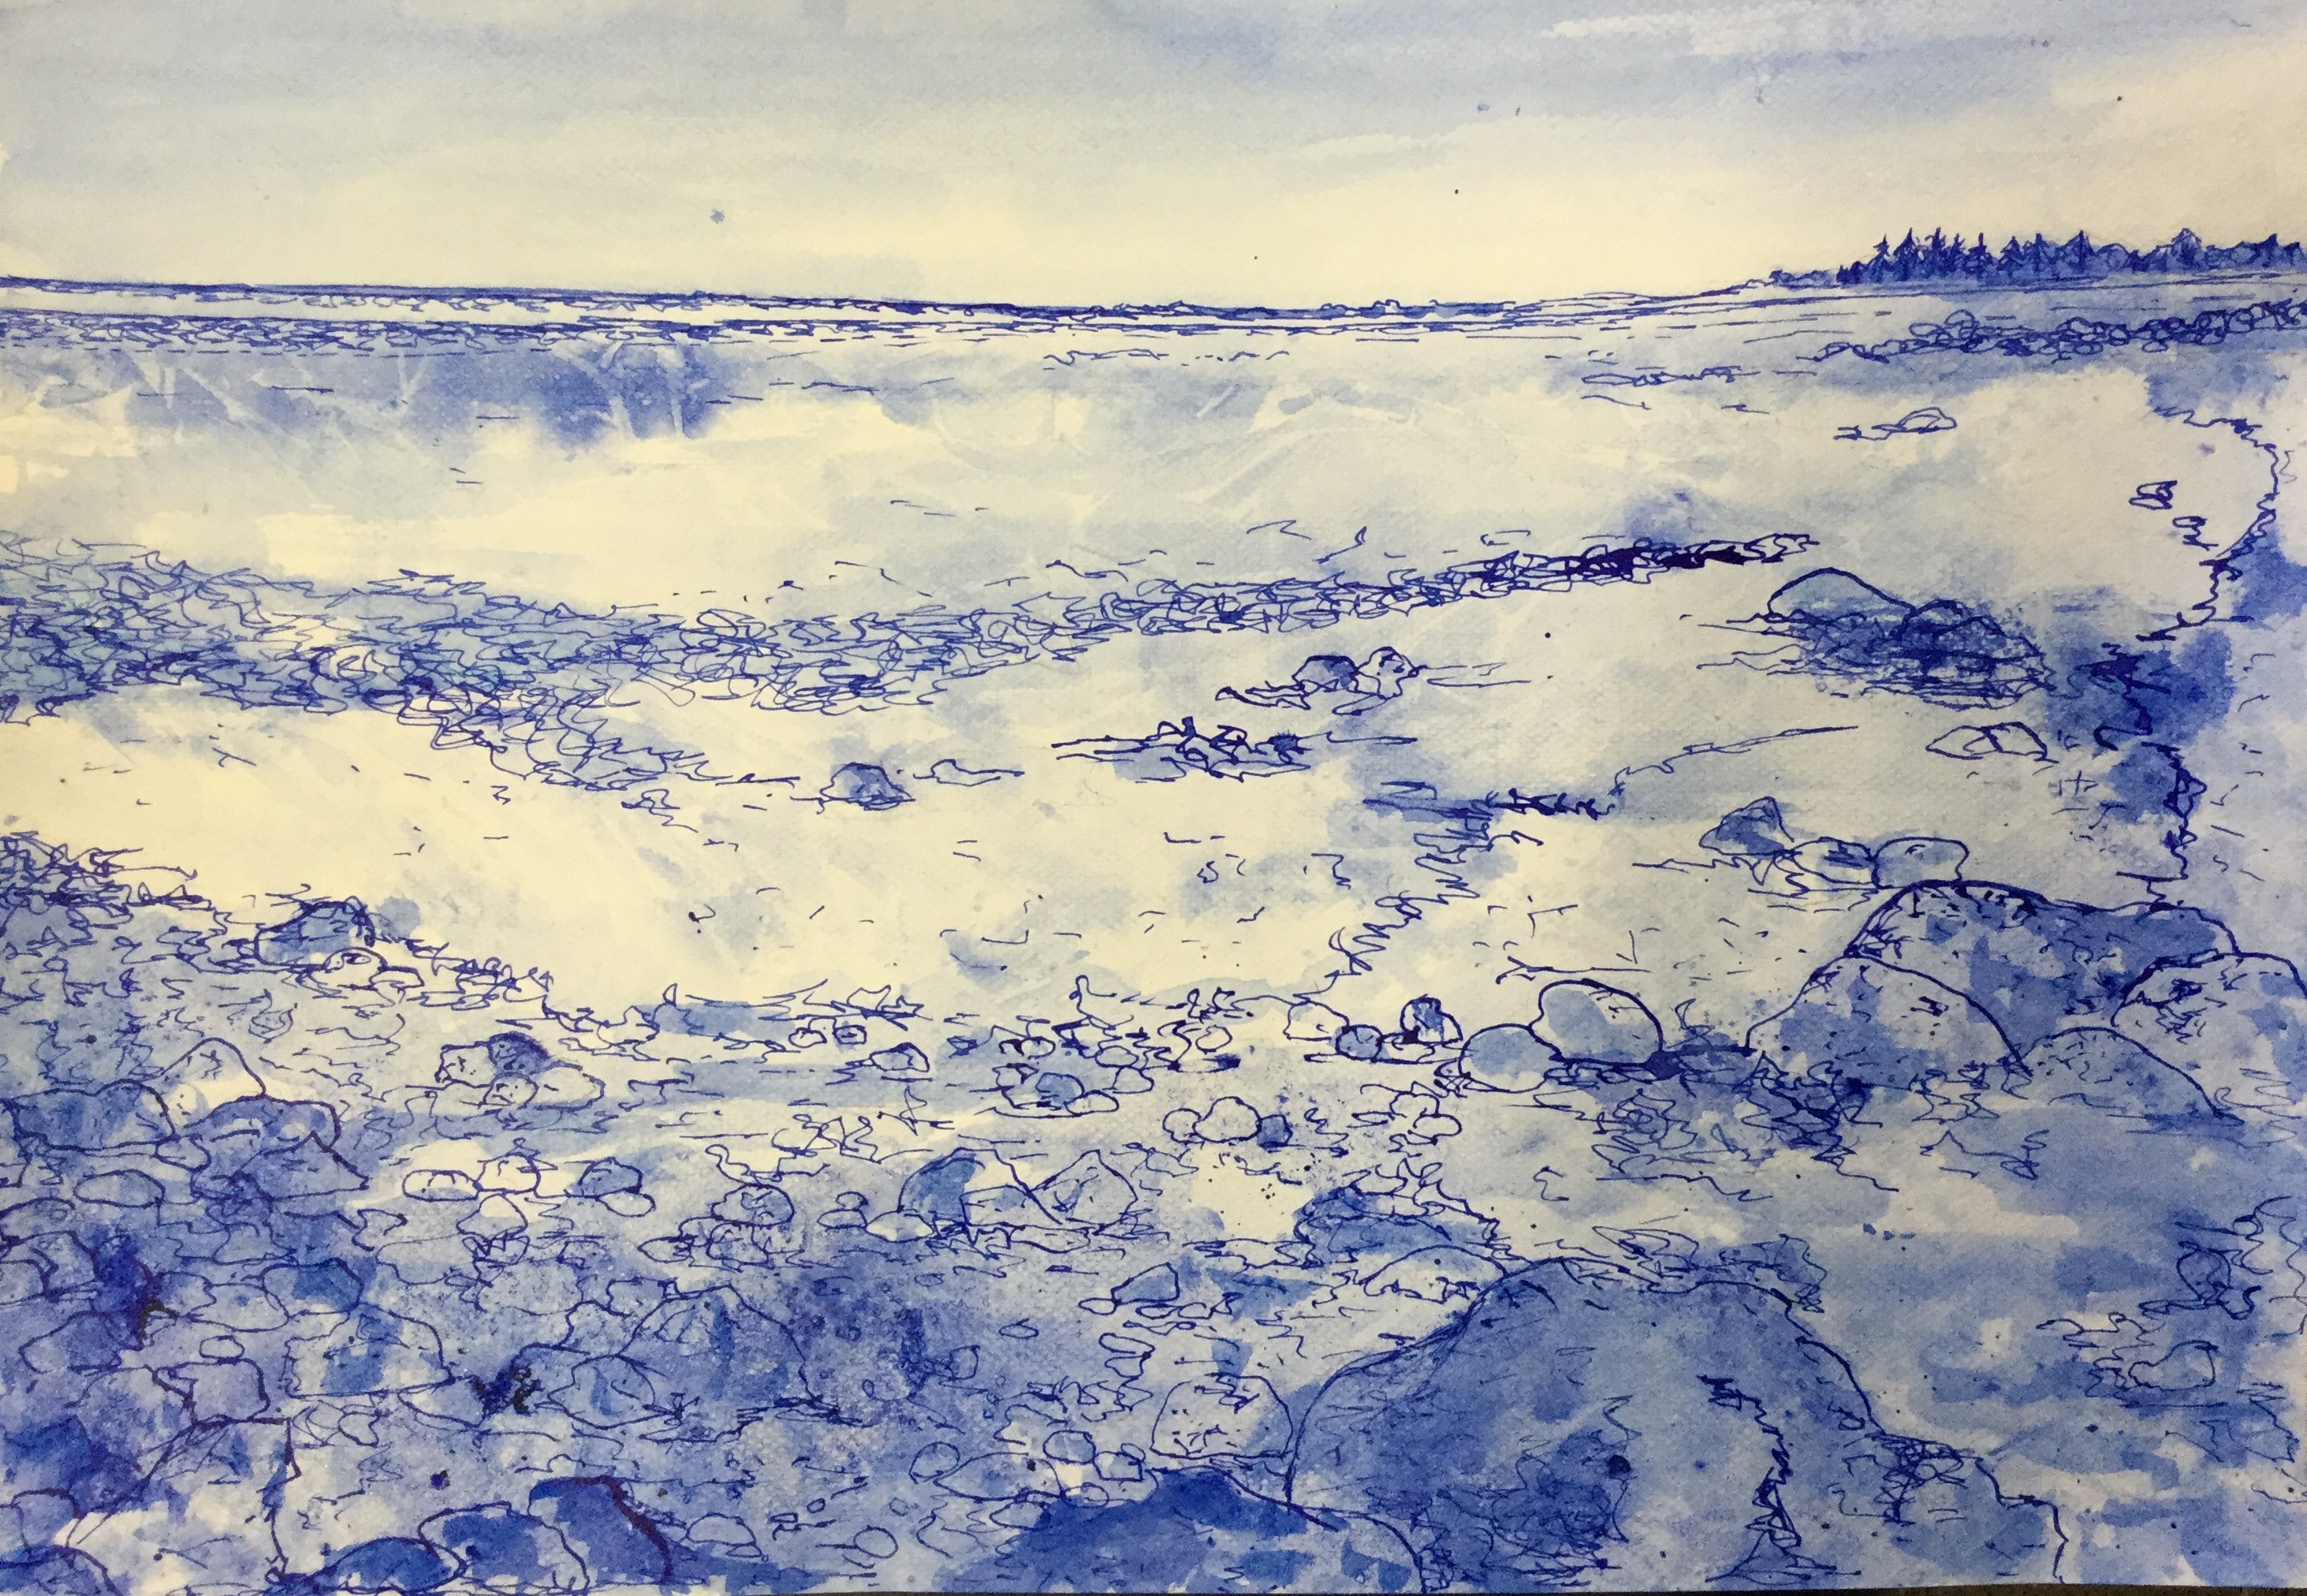
We explored a huge range of inks, bottled ink, ink crayons/pencils, ink pens and mediums and different papers. After three days of play and experimentation, we were img_5357encouraged to get creative and work on some final pieces which incorporated all our new knowledge and skills. It was a lot of fun, I used my mixed media obsession and splashed around a lot of ink and colour. Once again, many of us shared our knowledge and skills, and in the process taught each other different techniques, where to buy supplies at the best price, and we made some great friendships.

Now, to use these new skills in my scrapbooking. I am thinking that I could perhaps hand draw some coloured pencil embellishments and make some more amazing backgrounds incorporating various ink mediums. Oh, the possibilities!

Keep on crafting everyone 🙂

Jan. 2019 CKC – Forgery #1.

Hello again.

Here is my first layout featuring my forged paper. I had decided that I wanted to scrap a funny photo of my grandson playing with playdough. He had made a playdough man and his mum sent through the photo for us to view. As boys do, he was being silly when Photo Dec 09, 6 32 13 PMposing for the photo, so the quality is not great. It is a little blurry but does capture his cheekiness. Let me just say that the playdough man is magnificent, a work of art! Well, I may be biased, it does have all the important elements of a human which is the goal when you are four. It was the playdough figure which triggered my idea for the forged paper. The playdough feet are rough circles, much like the black and white circle paper featured in the Felicity Jane ‘Hannah’ kit.

I decided to create my own circle paper to use as a background for the layout. It was a simple process of loosely tracing circles onto to the white cardstock using an Artline permanent marker. I used a washi tape container to trace around.  Then, I painted some of the circles with Tim Holtz Oxide inks in colours which matched the theme and photo. Unfortunately, the so-called permanent marker did bleed around the edges when it interacted with the watered down ink. After the first bleed, I was a little more careful when applying the ink.img_5233

Then, even though I liked the look of the painted circles I thought it needed something else. I pulled out a Fiskars geometric diamond stamp which was similar to one of the papers in the Felicity Jane kit and stamped the image across the page. Still not happy with the result, I decided it needed more colour and wanted to reduce the white space. I used the Tim Holtz micro glaze to protect my inked circles. I love this product, the tiniest amount makes the inked area waterproof, stopping any colour shifting and allowing you to add colour over the top. After rubbing on the micro glaze I applied the blue watercolour paint.

Next, I selected some patterned paper and coloured cardstock to mount the photos. I prefer to use several mounts on each photo, something which has gone out of fashion these days. In one of the photos, you see the wooden floor in their house, this inspired me to mount the photos on a background of woodgrain paper from my kit.


As I had mentioned in an earlier post, I didn’t have a scallop washi tape to include in my kit. I img_5250decided to substitute this with a strip of polka dot paper trimmed down to create a scalloped edge. I attached this to the edge of the woodgrain background.

Including embellishments that reflected the Felicity Jane kit had me troubled. Flowers, love hearts and a bike didn’t really go with my photo choices. I hummed and hawed over this, what to add? Then I decided to go with it and added a few flowers, a tag and the die cut word awesome. I’m not super happy with the result and would have liked to reach for some other embellishments but I was trying to only use things from my kit.

Anyway, it is another layout completed and I did meet the goal of forging some elements for the challenge. Happy scrapping everyone.

img_5255