CKC – Sprinkle, Sparkle Layouts!

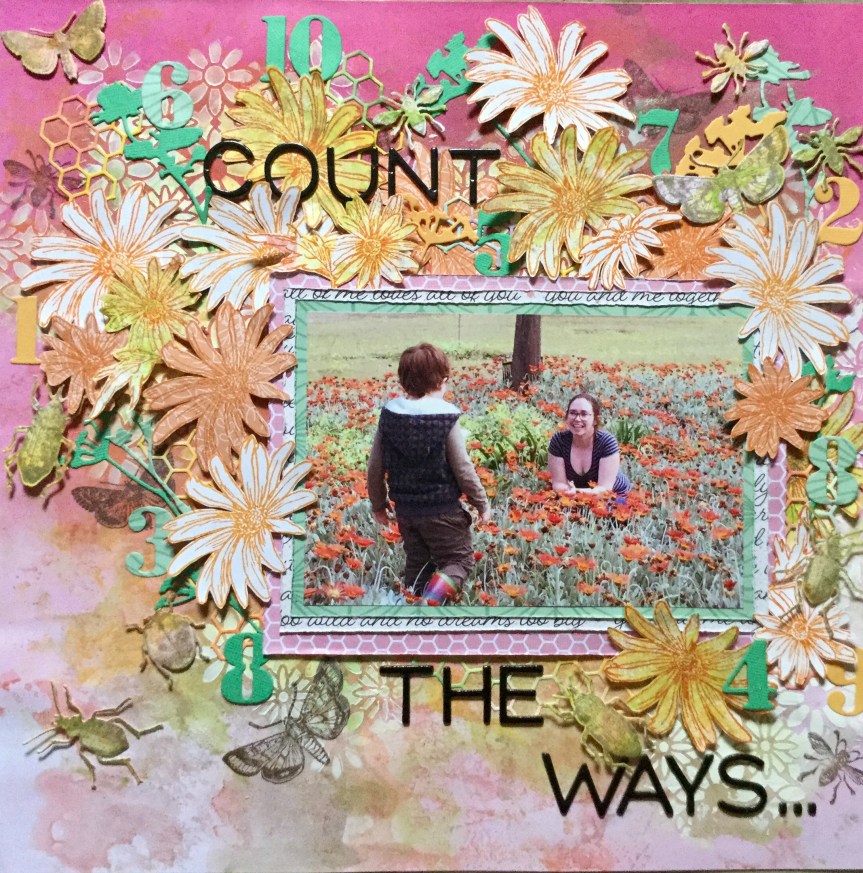
Morning, here are my two layouts which incorporate some sprinkles and sparkles for the Counterfeit Kit Challenge number one. The first layout features my cheeky grandson at 9 mths, the quality of the photos was not great. They are a little blurry but I used them anyway, as they captured his cheeky personality and a happy moment in time on an adventure. The layout itself was fairly quick, some smooshing of oxide inks for the background on a lovely indigo cardstock and a strip of star paper. Then I sprinkled on some gold watercolour paint and mounted the main photo on layered, distressed edged papers. Some fussy cut stars, Citrus Twist Kit cut apart embellishments, enamel crosses, a wood veneer painted star and it was finished!

IMG_4516

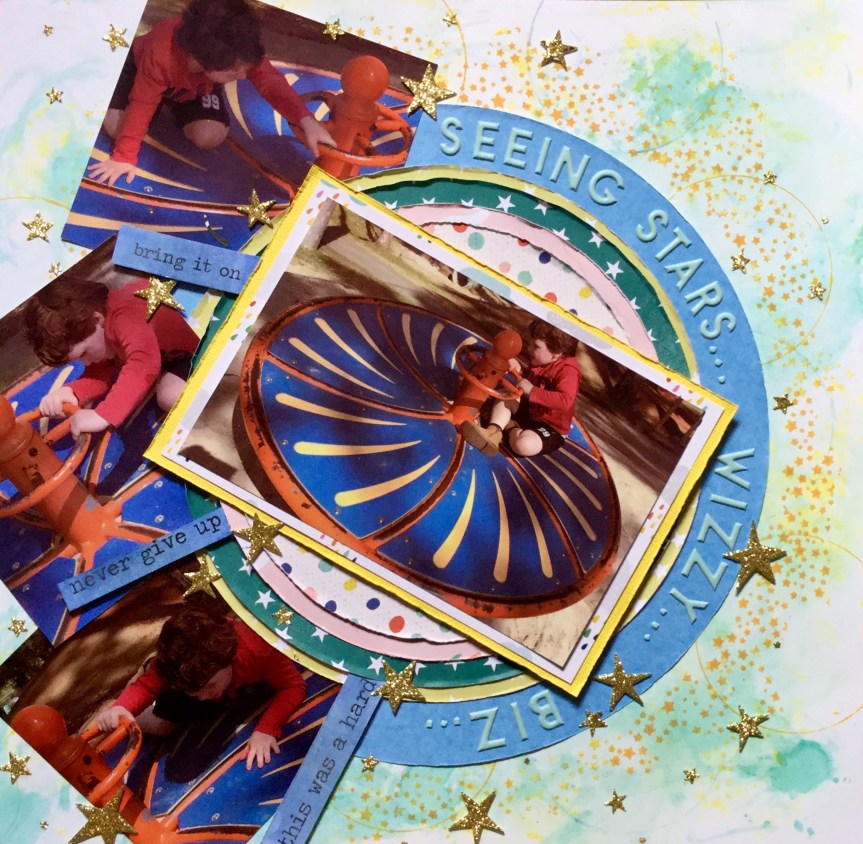
The next layout has sprinkles and sparkles, this one also features my grandson. One of our favourite things to do at the local park is play on the wizzy dizzy. We always laugh so much and there have been times when Nanny and Granddad fall off! In these photos, Master Four is trying to do it all himself which is no easy feat. My choice of layout design links to the shape and movement of the featured playground equipment. I liked the idea of building up circular layers and creating that sense of being dizzy by ‘seeing stars’.

The background was created by splashing on oxide distress ink mixed with water and then blotting it off with a tissue. Then I used the inky tissue to apply some soft, swirly, whispers of colour. I wet the inky tissue and rubbed it around the page in a circular motion. Next, I raided the kitchen, to add some wine glass circles of ink, a little forgery inspired by the Vicki Boutin patterned paper in the original Citrus Twist Kit. This was topped off with some splashes and sprinkles of watercolour paint.

Step two, another kitchen raid…use a bowl to guide my stamping. I wanted a circle of stars swirling around my background. I used my new Carabelle Studio art stamp which has a really delicate sprinkling of stars. I didn’t use a block with it, so I could bend and manipulate the stamp to fit the curvature of the bowl.

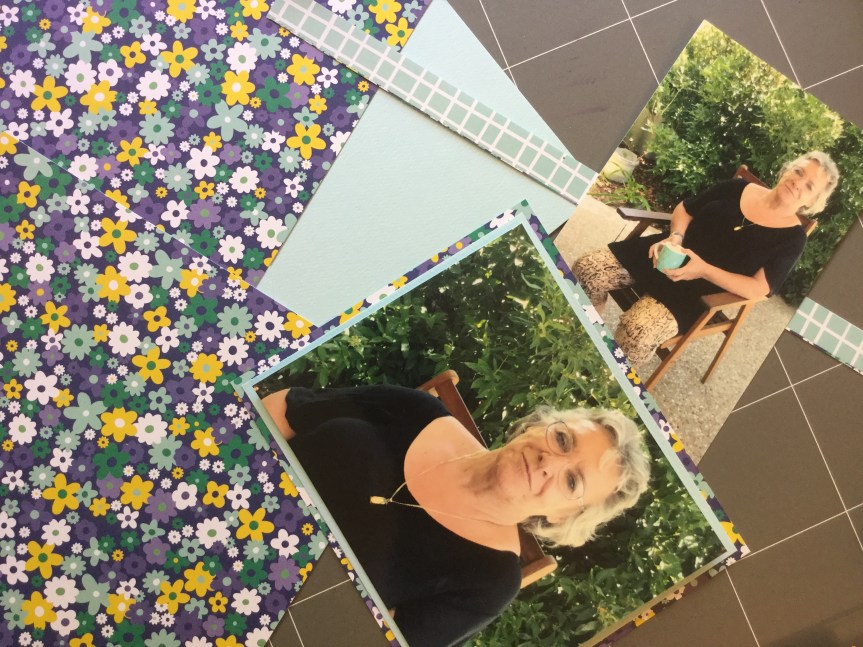
Third kitchen raid…crockery to cut my paper circles! I also dragged out my old Creative Memories cutting system to cut the smaller circles. Because I was layering the papers, I could use some of the papers which didn’t fit my theme/photos or any layout I was likely to do in the future. For example, the white swan paper, swans where I live are black!

I slotted my 4×4 photos in between the circle layers, intentionally making them topsy-turvy to match the theme. It would have looked better with smaller, 3×4 photos but I was too lazy to print any more photos. I mounted the main photo on another paper which didn’t fit the theme, the rain clouds, but the little pops of raindrop colour did match with the other papers.

Next, I added the title and got busy with my Sizzix cutting out sparkly, gold stars with glitter cardstock. I used my new Tim Holtz thinlit die which has a great range of star sizes. I attached the stars with foam tape and glue. Then, I popped on a few handmade text quotes. Finished!

I am pretty happy with this crazy, dizzy, topsy-turvey layout. It does achieve the feeling that I was going for and was fun to create. Happy scrapping everyone.

IMG_4515

CKC November Layouts #2 & #3

More mess with inks and watercolours…

Yes, I keep playing around splashing around the colour to make some gorgeous backgrounds. The funny thing is when we do this we often cover it up with our photos and embellishments. Sometimes, for me, I get a little regretful when I have to cover up all the pretty colours. Yesterday, was one of those days.

I was working on two more layouts using my Counterfeit Kit Challenge collection. The first is a layout of my grandson, I am still trying to complete his baby albums. Because the photo is very soft and pretty, I thought the colours in this kit would work well. I began by creating the background using oxide inks, layering the colours and adding a little stamping. The stamp arrived two days ago and my rule is when you purchase anything you must use it! The little stars helped soften the edges of the paper and fitted with the CKC embellishments.

Then, it was a simple process of mounting my photo with a range of patterned papers, each piece was distressed around the edges with my fingernail. Next, I decided to have a go making some thread bows to embellish the layout. I used the fork technique from here. It worked very well and was quick to do.IMG_4419

Adding the embellishments took very little time, I used some forged flowers, stars (wood and paper) and an old, chipboard heart. I think it pulled together well, the pop of pink softens it and draws in the skin tones in the photo. It is kinda girly for a boy, but you can get away with that with baby photos.

IMG_4421

Layout #3 is another grandson page when he is a little older and hanging out with his favourite person…Granddad.

More colour was splashed around, this is the one where I didn’t want to cover it up. I used some old heart stamps in this one. See, the yellowed acrylic block…yep, the stamp is so old, it fused to the block! Note to everyone: do not be slack and leave your cling stamps on any acrylic blocks for long periods of time! Pack away properly and use your stash, its been years since this stamp was used.

I used a whole heap of the FREE Citrus Twist Kit cut apart die cuts on this layout and a few of my forged pandas.

Overall, it came together well. I like the embellishment cluster and was pleased to find some way to incorporate the pandas. Thank goodness for cute kids.

IMG_4428

P.S. Sorry that the images look cream, the cardstock is a crisp white. I am struggling to get a decent photo, with white it (iPad) always seems to cast yellow or blue light whether I’m inside or out.


CKC Layout #1 – Ma

Good morning, yesterday I had a lovely time playing with my Counterfeit Kit. I got messy with some inks and watercolours and pulled some inspiration from this months focus website, Citrus Twist Kits. They have an amazing design team and I spent a little time pouring over the Creative Team Gallery. Wow, some beautiful work to inspire us CKC scrappers.

I really loved some of the page formats used in the October DT layouts. The work of  Nathalie Desousa with her flourish of diagonal flowers made me drool. I decided to see if I could use this inspiration on one of my layouts, using the forged flowers and my CKC papers.

I started off getting messy, building up a background on my white cardstock using some Tim Holtz Oxide Inks and some watercolour paints. In the first layer, I stamped some hearts using a very old, cheap, foam stamp. Then, I layered on the beautiful purples and added some splatters. I dried each layer before adding the next. Next, I pulled out my handmade foam branch stamp and used the beautiful, Dusty Concord oxide ink. I am in love with this colour, full strength you get a dark, dense plum image and activated with water, it creates a musty, dreamy lavender (see the lightest purple, layer 2).

Next, I selected papers to mount my photo. This image is of my mum from last summer (2017) at my grandson’s birthday party. I am one of those lucky daughters, whose mother is their best friend. She can be relied upon to listen to any vent, laugh and cry with me, share guidance and advice, and drink champagne! The photo is quite neutral, you could put any coloured papers with it. I decided to select a floral with some green tones and a bold hit of purple. IMG_4398

Then I spent time fussy cutting flowers form some patterned paper and trimming up some of my forged flowers (FREE cut files from Citrus Twist). I die cut some leaves to add a pop of yellow and jade. It all came together quite quickly after that, building up the layers of flowers, die-cuts and some wood veneer leaves. Then, a few enamel dots sprinkled around the edges of the flowers, title and date.

I love how it turned out and am surprised how the colours worked together so well. I would not have selected to use that colour range in my daily scrapping, the CK challenge is a great way to push you out of your comfort zone. Thank you, Nathalie Desousa, for your inspirational layout design. If you would like to see how Nathalie created her layout check out her video here.

IMG_4409

Mixing Challenges! ACC & CKC

Hello everyone. Today I am sharing a layout which I did in a Cyber Crop with Anna’s Craft Cupboard community group on FaceBook, last weekend. It was a lot of fun and had a challenging theme, Old School, which opened up a whole lot of creative thinking and making. Each challenge was based around a learning subject area or using an Old School style of scrapping, using up supplies which have gone out of style in the world of scrapbooking. This layout was my attempt at the Math challenge, your layout needed to include numbers!

Because I was participating in the  October Counterfeit Challenge Kit I wanted to use the papers and embellishments from my kit. I also wanted to use some of my recent purchases, if I buy something new I make sure I use it and not stash it away. What arrived in the mail two weeks ago was the new Tim Holtz Entomology die which matches IMG_4214
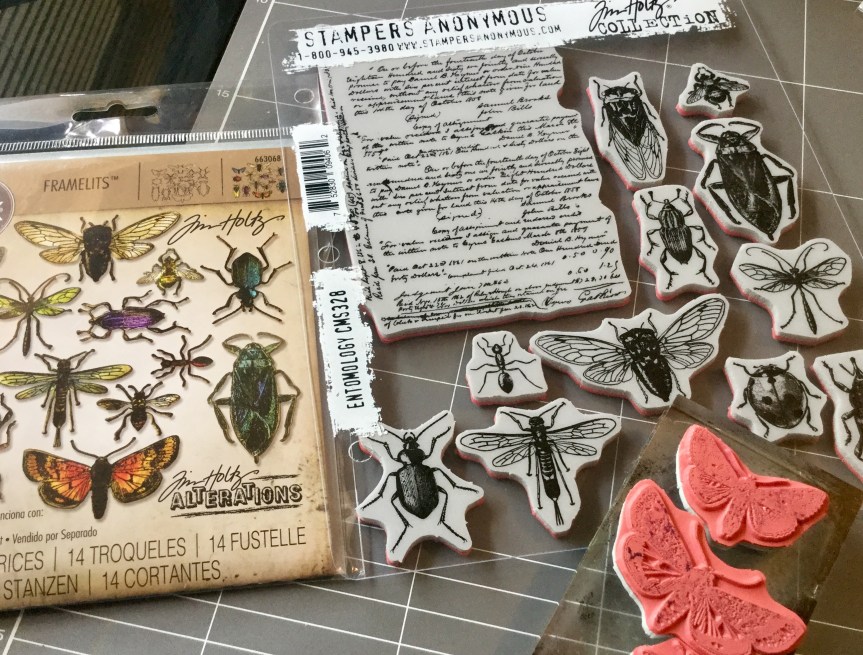
with the stamp set (released earlier in the year). I had been waiting for months for the release and then for it to arrive in Australia, it is amazing! The die is spot on, there is absolutely no white space around your stamped image, it cuts the thinnest and tiniest insect legs and antennae.

With this layout, I got messy using distress inks, Heidi Swapp shine and some DIY shine. I messed around smooshing and spraying the inks, creating backgrounds to use in the layout. Some I liked and some didn’t quite work.

Then, I used a floral stencil and some white gesso to create some texture on my main background. I used an old membership card to scrape the gesso across the stencil, very rough and messy. IMG_4215

The paper which I wasn’t keen on became the cardstock for my insect embellishments. Just a tip, if you do purchase this wee crawly critter die set, use some washi tape to hold the dies in place while cutting. They do need to be lined up precisely and being so little may move when you crank them through your Sizzix.

Next, I added some more distress ink to the stencilled flowers, the white gesso made them stand out a little too much. I stamped some insects onto the background using a soft grey and a brown distress ink. Then, I got busy stamping orange daisies onto some orange/apricot patterned paper scraps (from my kit), scraps of my mixed media cardstock and onto some white cardstock.  Does this look familiar? Yep, it is the same stamp used on this layout here. A few stamped flowers where hit with some distress green, just to pull in some colours in my photo. Then I spent some time watching scrap blogs on Youtube while I fussy cut out all the flowers.IMG_4219

I then built up the layout, layering die cuts and flowers, and fixing everything into place using double sided tape and foam.

So, “Where are the numbers?”I hear you ask. Good question, after all, it was a Math challenge. Well, the numbers tied in with my title and photo and were cut using dies. I used this particular photo because my daughter’s face shone with happiness. We were having a lovely day just messing around on our property, enjoying the sunshine and the abundance of flowers spreading colour everywhere. In a burst of energy, she literally tiptoed into the flowers and sat amongst the colour. Her son did not want to miss out on this opportunity and joined her. Her face said it all…let me ‘Count the Ways’.

IMG_4224