Flowers and AB Studio!

Good morning,

This weekend I am having fun playing with some AB Studio papers, I love all of their collections and recently purchased papers and sets from a few new ones. Two which I purchased are the ‘Breeze of the Forest’ and ‘Secret Wood’ set, both are very Winter snow and Christmas themed with beautiful illustrations of forest animals and snowy landscapes. Hmmm, those who know me may be asking why I would purchase these, given that I live where it never snows? Well, they are beautiful and many of the snowscapes have pine trees, which do surround our town. I hoped to be able to use them creatively for events and themes other than snowy weather and Christmas.

I also purchased some of the ‘Diary’ collection papers and the shabby  ‘Love Symphony’ papers, also beautiful papers with floral and heritage costume elements. So, a few weeks ago when I was up and about at 5am, I went around our garden taking photos of all the spring flowers blooming, these became my inspiration for creating with some of the AB Studio papers.
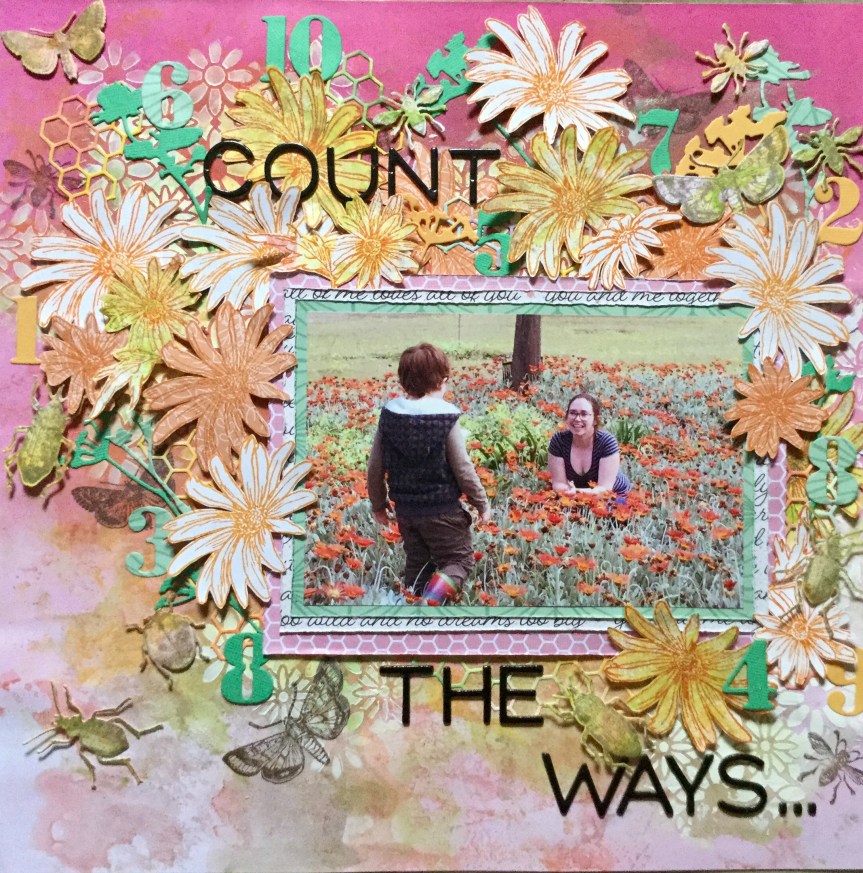
Layout #1,

I selected the ‘Memories’ paper from the Diary collection and the ‘First Rose’ cut apart element sheet. Plus, a few other bits and bobs from other companies to embellish the page, including some very old TLC chipboards buckles.

Then I decided to pull out an old Tim Holtz product, some grunge board, a giant @ symbol and used some oxide inks, water and colour sprays to add the right colour to match the background paper. I also added colour spray to the background, trying to not to form halo effects.

Then, it was simply a matter of adhering my photos, fussy cut roses and embellishments onto the dried background. Because my photos were of a climbing rose, I tried to make the rose embellishments climb around the photos. I also used some of the tags from the Diary collection cut apart sheet ‘Red is Bad’, some Kaisercraft paper roses (which I squashed to reduce the thickness) and some silver Thickers for the title.

The finished layout ended up over-embellished, taking up lots of space much like the rambling rose in our garden.
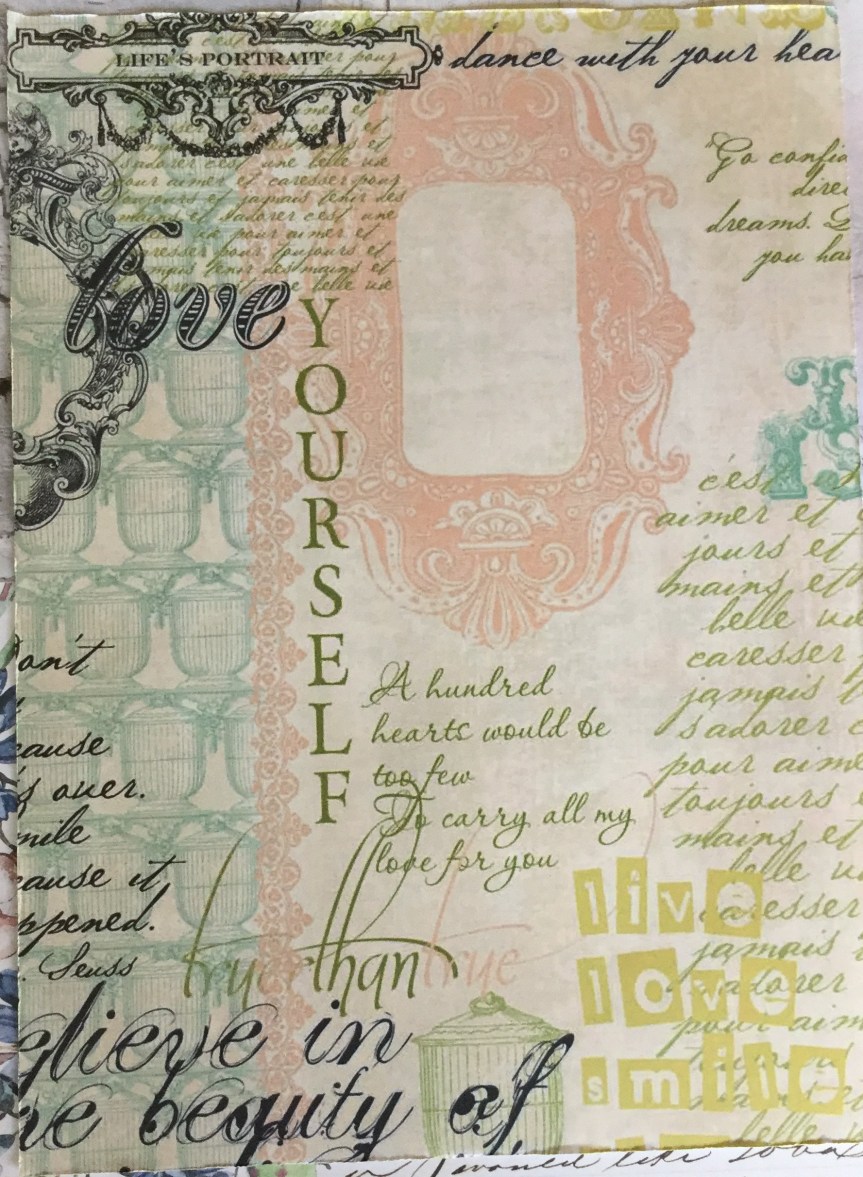
IMG_9953

Layout #2

For this layout, I selected another Diary collection paper for the background, ‘Your Own’, and the ‘4 Different Ways’ paper to fussy cut for embellishments, I only used one-quarter of the page. I had some old Kaisercraft door and quote diecuts and some more of those TLC buckles (which I didn’t end up using).

My photos of orchids had yellow and pink tones in the flowers and so I added some pink distress ink to the background, before adhering the photos into place.

Then, I adhered the fussy cut flowers and diecuts into place, with some of them I inked and distressed the edges first.  I love how this layout turned out, the subtle sepia brown flower diecuts enhance the photos.
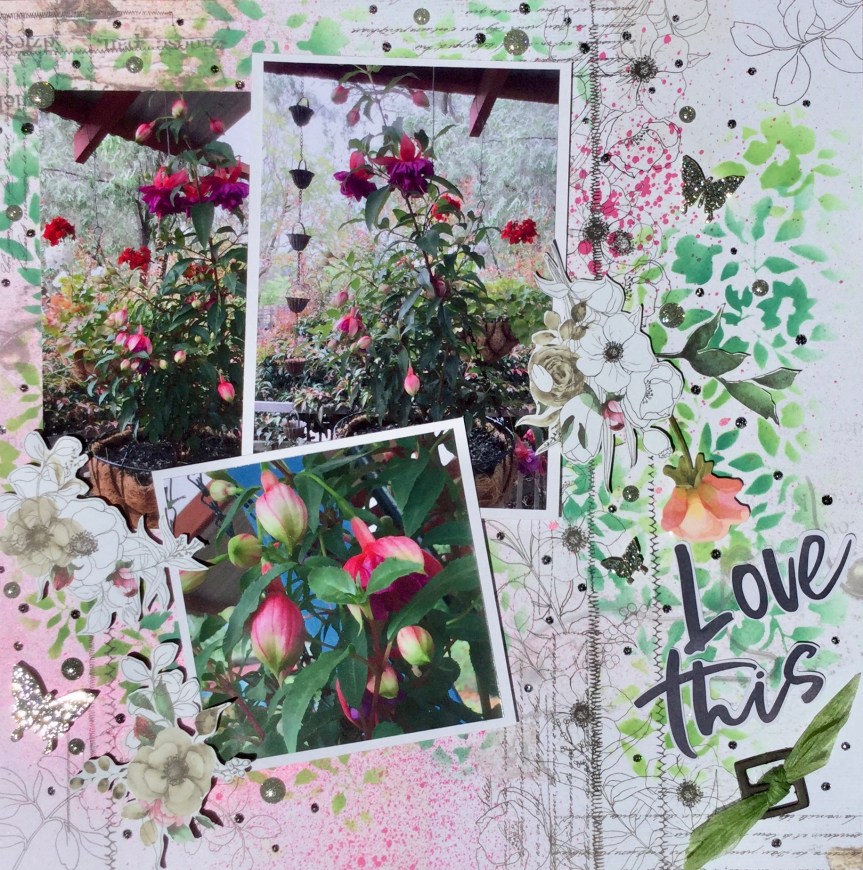
 

IMG_9947

Layout #3

For this layout, I used the reverse of the ‘4 Different Ways’ paper (I purchased a few of this sheet)  which has a lovely black and white floral design and some stitching/costume elements. I also decided to use the leftover piece of the cut apart ‘First Rose’ sheet and fussy cut out the flowers for embellishments. There was also some leftover tags and quotes from the ‘Red is Bad’cut apart sheet.

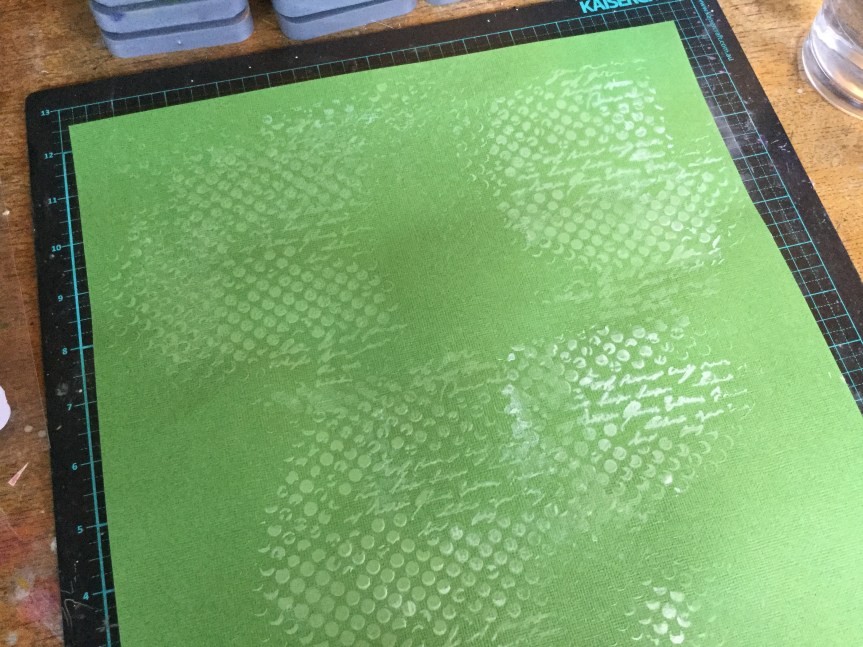
This time my photos had a lot of green foliage in them and I decided to add green and pink to the background sheet. I lightly spritzed two shades of pink in the main area where my photos would be placed. I used a Kaisercraft stencil and after sampling different green inks went with Tim Holtz Oxide inks, they blend so beautifully and are thick and creamy. I wanted to create a halo of foliage around where my photos would sit and have the greenery travel across the page.

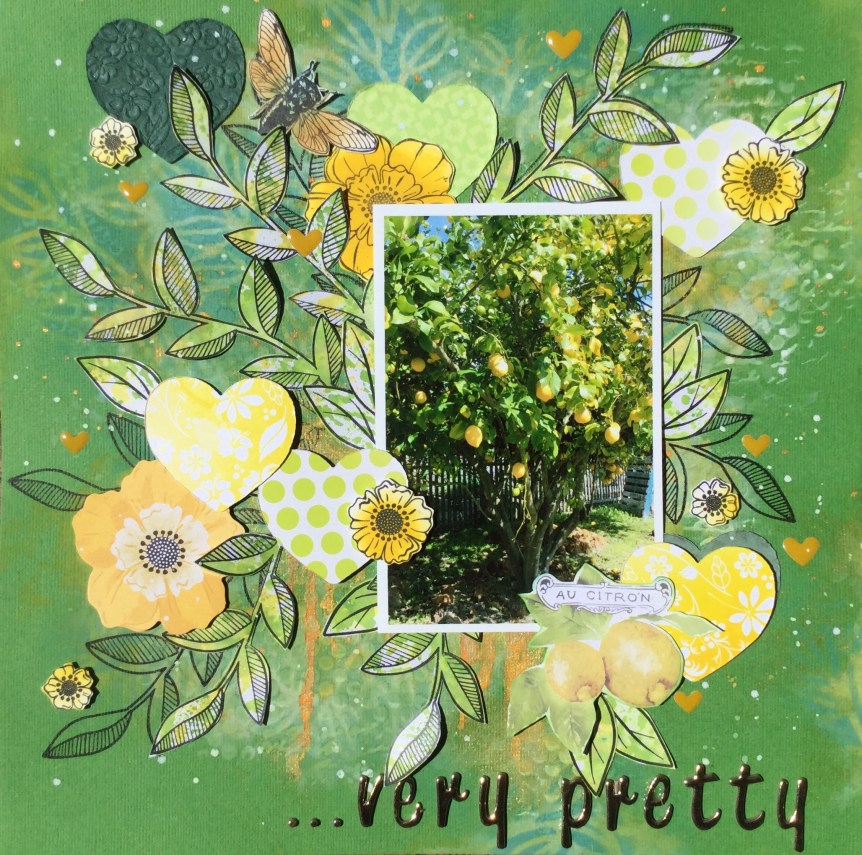
After mounting and adhering my photos into place, I added my fussy cut flowers, tucking the on and under the photos. When I ordered the AB Studio collections, etc., the lovely Bri from Anna’s Craftcupboard included a little freebie, 3 little silver glitter acrylic embellishments, so I added them to this layout. They are very cute and of good quality. Then I popped on some silver sparkle enamel dots and some little dots of Antique Silver Kindy Glitz. Here I am the anti glitter girl…adding sparkle!
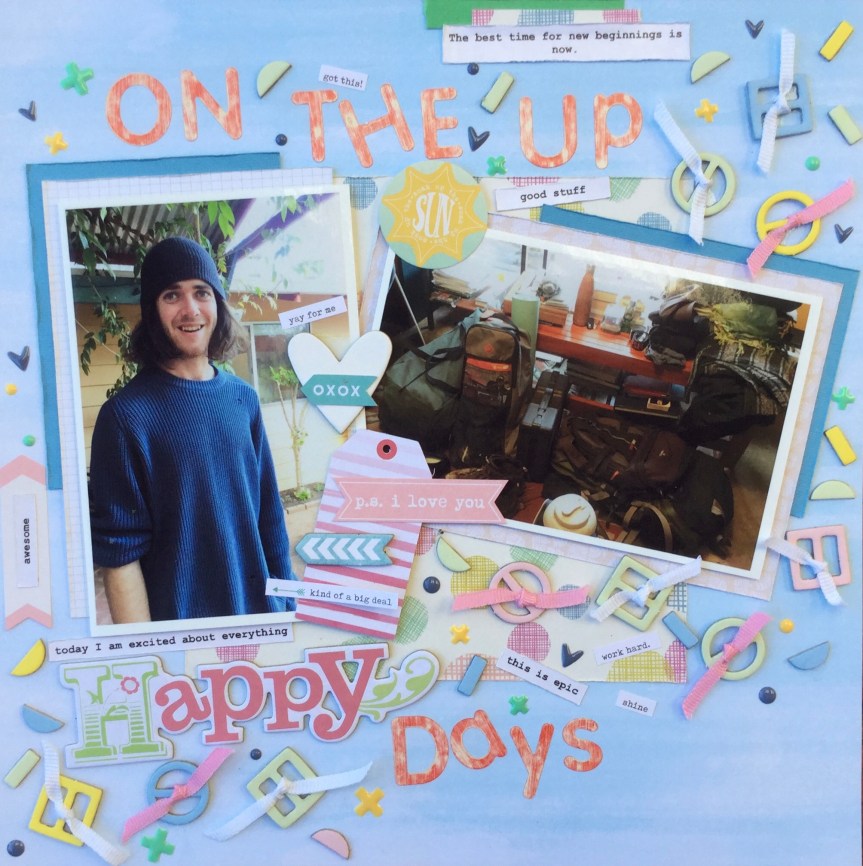
2019-11-16 10.46.25-1

Layout #4

This time I used papers from the ‘Secret Wood’ and the ‘Breeze of the Forest’ Christmas/Snowy collections. Yep, snowy papers with rose hips, snow and winter foliage, with a few scraps from other companies, for a spring layout. The papers used are the bonus cut apart sheet, sheet #4, sheet #8 from the ‘Secret Wood’ and sheet #5 from the ‘Breeze of the Forest’.  I had six photos to include on this layout and decided to make a double page layout using a sketch map from a Scrapbook Generations travel ebook.

It was a pretty easy sketch to follow with good directions for selecting and cutting the papers. I grunged up the background by dragging some oxide ink across each page in a lovely soft yellow called Scattered Straw, before mounting and adhering my photos in place.

Then, I added some fussy cut flowers, some butterfly and quote die cuts, and some Nuvo Crystal Drops and rose gold Kindy Glitz. Plus, one of the TLC buckles with some organza ribbon. Overall, I am pretty happy with this layout, I doubt anyone would pick the papers as being Christmas themed.

2019-11-17 07.50.00-1

Please leave a comment below or share with other creatives, remember you need to open the post by clicking on the title to access the comment box if you are on the home page.

Happy scrapping everyone  🙂

Catching up with CKC Oct. 2019

Good morning,

I’m running behind with using my Counterfeit Kit for October, already it is the 19th and I have only made 3 layouts! This month is busy for me with starting a new teaching term, plus I have a whole different class again, nothing like being swapped around three times in a year.

Anyway, here is my kit and what I have managed to produce…

First, the inspiration for this month’s CKC is based on the ‘Summer of ‘69 Kit‘ from Studio Calico. It is a lovely summery kit with some cute elements that reminded me of my mum’s country kitchen. There are doilies and bunting with buttons and chevron. The main colours are red, orange, coral, soft pink and little pops of green and blue.

My kit was selected based mostly on pattern and colour, I also included a selection of B side papers similar to the ‘Summer of 69’ kit.

Ok, the first layout, though made with both papers and embellishments from my kit took on a completely different colour palette. Just before starting using my kit I did a tidy up, trying to get some organisation happening with my supplies and some space to work. When cleaning and sorting I came across several leftover kits with bits and pieces left in them and decided that it was easier to use some of the bits than have to put them away. So, glitter, diecuts, chipboard buckles, ribbon and other bits and bobs merged into my kit. On my desk, I also had some Vicki Boutin product and my usual supply of Tim Holtz inks, so what’s a girl to do but use those as well.

Anyhow, the colours in the photos spoke to me, some more strongly than others and my layout took on a lot more ruby red, singing with the theme of my layout…wine!

I toned down the bright red of my Kaisercraft sticker alphas by sanding them, added some glitter to the diecuts and inked up the doily.

2019-10-13 16.24.58-1

My next layout is using a sketch from Scrapbook Generation, it is from their travel ebook. Sometimes, you just want to scrap and not have to think too much about the detail, just get it done. A sketch can speed things up.

Layout two is made with the same patterned paper from my kit, as in layout one, but what a difference in the look. No mixed media and a gorgeous, jadeite green cardstock make the photos pop.

2019-10-19 07.55.21-1

Layout three is a completely different colour palette, I went all soft and dreamy trying to use the sky paper and get rid of some of those chipboard buckles. The photos are of my youngest son all packed and ready to move to a new location, and start a new job! He was super excited, who wouldn’t be going to work at a resort, on the beach with bars, restaurants, etc., and amazing wildlife? He is very lucky to be working at a major holiday destination in Western Australia, Monkey Mia Dolphin Resort! Yep, there are dolphins!

2019-10-19 07.55.41-1

*The little space in the bottom corner is for my journal writing which will be strip journalling.

I’m not sure that this layout works that well, I went a little crazy using the centres of the buckles as confetti embellishments and threw a lot of enamel dots and hearts onto the page. It’s happy and fun and a little crazy, I guess it captures the excitement we were feeling about this new adventure. At least I used those buckles, only about another 50 packets to use up!

Hope everyone is getting some scrappy time this weekend, keep on scrapping 🙂

Please leave a comment below or share with other creatives, remember you need to open the post by clicking on the title to access the comment box.


Beauty! Mix it up!

Hello,

Today is a quick share using some old and newish papers. When I was tidying through my patterned paper collection I came across a FREEBY paper which I had stashed away years ago. It was from one of the now defunct scrapbook magazines, I’m not sure which magazine, as it was so long ago, but back in the day, a free paper cut apart sheet was often included in the monthly edition.

Anyhow, today was the day to use it! It is an A4 size sheet, one half is a lovely patterned piece of paper with lots of antique style text and images and the other half of the sheet has some lovely rectangular embellishment to cut out. There are gorgeous pastel tones of colour with a hint of mustard.

2019-10-02-10.53.55.jpg

Now, I wasn’t sure what I was going to mix it up with, nor what photos I was going to use but over the long weekend (the Queen’s birthday holiday, thank you Queenie.) my beautiful eldest daughter and grandson came to visit and as usual, I took a plethora of photos. When printing them out, I loved these photos of my daughter, she was enjoying the warmth of the morning sun on the patio, bare feet and messy hair drying, a cheeky smile and happiness glowing from her at just being in this moment, of being home with family. She will hate these photos…no makeup, wet hair, bare feet, yikes!

Ok, photos selected, what contemporary papers would I use with my freeby sheet? Well, as usual, I am drawn to colour and mood when selecting supplies. In the photos, there is some blues, navy and cornflower blue, and some lovely greens from the garden in the background. So, what I selected was some beautiful papers from the AB Studio, Enchanted Flowers collection.  I love this companies paper collections, the quality of the paper is like cardstock and the designs are very unique with just the right amount of vintage and grunge. Each collection has a cut apart sheet, sometimes two, often one sheet is a set of tags, the other is objects to fussy cut. For this layout, I used two papers from the collection, the Past Forgotten and the Poisonous Flowers, both papers had hints of blue and green.


2019-10-02-10.53.44.jpg

Putting the layout together was a simple process of fussy cutting and layering the foliage 2019-10-02 10.41.51and flowers, creating some texture and depth. I also added some tags cut from the Botanical Beauty, DCWV paper pad and a few Kaisercraft butterflies. Some sprinkles and splatters of watercolour paint in magenta, navy and green finished off the layout.

2019-10-02-11.29.20.jpg

I like how the layout turned out, somehow even though the photos are very contemporary the vintage and botanical elements seem to work well together.

Happy scrapping everyone, I hope you are all getting some creative me time. Please leave a comment below or share with other creatives, remember you need to open the post by clicking on the title to access the comment box.


Lemon Tree…Very Pretty!

Morning,

Does anyone remember that old song where it goes ‘Lemon tree very pretty…’? When I looked at my photos of my citrus garden this song popped into my head and became the inspiration to my layout. This layout is all about pretty with lots of mixed media, flowers and foliage.

The background was fun to create with a layer of stencilling using a Kaisercraft stencil and texture gesso paste, some painting and splatter with Tim Holtz oxide inks and then sponging on some more ink using a Vicki Boutin leaf stencil.

2019-09-21 17.02.422019-09-21 17.02.472019-09-21 17.28.532019-09-21 17.29.052019-09-21 17.56.45

Next, to finish off the background, I stamped on some leaves using a Vicki Boutin stamp.

2019-09-21 18.09.49

Time to make some embellishments with more layers of oxide ink, Vicki Boutin stamps and some fussy cutting. It’s amazing what you can do with a scrap of white cardstock.

With my leaves cut, it was time to punch out some hearts. I pulled out a range of patterned paper scraps with different textures and patterns to keep things interesting, and even used the Vicki Boutin packaging!

Next, I dribbled some Heidi Swapp mustard color shine onto the background where I wanted my photo to be placed. I adhered my photo in place with some fun foam and glue and got to work adhering and layering my hearts and foliage embellishments. I added a Prima die cut and some stamped Vicki Boutin flowers. Then, finished off with some mustard coloured puffy hearts, a gold title of chipboard alphas and some white and yellow watercolour paint splatter.

I love how this turned out, it is so fresh with the mix of greens and yellows. A fun layout to create, though it was time-consuming…6 hours! I don’t usually spend this amount of time on a layout but I was chilling out and creating on a Friday night. Overall, time well spent!

2019-09-22 11.31.09-1

November CKC-Forgery on the Fourth

Here we go, a little early perhaps, but it is already the 4th of November down our neck of the woods. So, what did I forge? I decided to cheat a little and use someone else’s images which they had freely shared, to create some die cuts and puffy stickers.

Luckily for us participants in the November CKC, the inspiration company, Citrus Twist Kits often has FREE cut apart PDFs and cut files available to download. So, I went looking for some cut apart sheets which would match with my kit. There was a lot, including one designed for their October kit. I decided to print out a range of different ones onto white cardstock.

IMG_4381

Then, I had a look at the cut files available. These I thought are of no use to me…think again! They had quite a few florals which would work well as die cuts, so I downloaded the files. Now, how to use them? I tried printing out the images, this didn’t work for me because the images are large (I imagine they are 12 inches) and I only have an A4 printer. So, then I took a print screen of the image and pasted it into WORD. This allowed me to crop them and make them any size or colour I liked.

IMG_4375

Once printed, I tried a few different ways to colour them. I didn’t like the look of the Copics and decided to try watercolour paints. Duh…the Indigo Hills die cuts are in a PFRC500418_die_cuts_aac9bab1-0b17-406f-b268-d3b39322e601_1024x1024watercolour style! This worked well, I tried out both the black printed image and the light grey. What I found with both was that the paint did put an opaque film across the printed image. This was easily fixed by going over the images with a black permanent marker. It even enhanced it, giving them a more handmade look.

Then, I went in search of pandas online. There were quite a few FREE pandas to download, I went with some little panda heads which are similar to the original kit. I coated them with Ranger’s Glossy Accent glue to get that puffy look. The glue dries clear.IMG_4374

Before fussy cutting the printed cut apart sheets, I gave them a clear coating of Clear Gel Medium. You don’t need to do this but it gave them a little sheen (not super glossy), the easier way would be to print them on a better quality cardstock paper which already has a sheen.

I ended up with a huge pile of die cuts to use on layouts. I have a lot more flowers printed which I will colour and cut as needed. My next forgery may be the Vicki Boutin paper, who can resist dipping cups/glasses into the paint and making some mess?

IMG_4382

November Counterfeit Kit Challenge

Hello everyone, it’s a new month and once again I am having a go participating in the November Counterfeit Kit Challenge. What I really like about joining in with this challenge is that it makes you look through your supplies and really see what you have. You realise what you don’t need, what you should use up and you see what you are getting low on. That can mean a little shopping without the guilt. For me, this month I realised I really have very little indigo, navy blue to mid blue patterned paper left. Much like the earlier kits, when I had very little woodgrain paper left. It is because, for the last 18 months, I have mostly been scrapping boy layouts for my grandson and son’s albums. There have been some girly layouts along the way (with fussy cut flowers), but the IMG_3989majority have been male. Also, remember that I had a go making my own Indigo Hills 2 collection, well…there goes my indigo coloured papers!

This months CKC inspiration is a good mix of colours and papers for both sexes. It is very contemporary, as it is based on a kit from the wonderful Citrus Twist Kit company, released only last month! Wow, yep, October!

CTKOct_Main_-_1_590x (1)

There is a lovely range of papers in this kit, including an Indigo Hills 2 paper, some scrummy Maggie Holmes papers and a gorgeous Vicki Boutin paper. My selection of papers is less indigo IMG_4370and more pinks and greens. I have tried to base mine on picking up the colours and feel of this kit.

*Note: Sorry for the slight blue tinge to the photos, I took them in daylight at 5am. Note to self, DO NOT DO THAT AGAIN!

IMG_4389

Because I didn’t have any stars or multi-patterned stripe papers, I decided to select some similar papers with which I could create my own striped paper. Here’s what I came up with…

IMG_4390


The embellishments from the Citrus Twist kit is a lovely mix of colours and styles with a little craziness. Pandas, foxes, cats and tassel bows, why not?

IMG_4394

My choices are based on colour and using stuff up, I have several packets of mismatched puffy shape stickers. I have thrown in a few stamps and text dies to create embellishments, some wood veneers and some embroidery thread to make tassel bows. I am going to make some die cuts using some FREE cut apart sheets from the Citrus Twist Kite site.

IMG_4395

So, my kit is almost complete. I am looking forward to getting started on making some layouts. This month will be a challenge for me, I have a lot of work commitments to get done and a house to get ready for the silly season. It is funny how things finally have to be completed and fixed when you are having long, lost relatives coming for Christmas! Out comes the paint and a major spring clean organised…it is Spring down under.


Mixing Challenges! ACC & CKC

Hello everyone. Today I am sharing a layout which I did in a Cyber Crop with Anna’s Craft Cupboard community group on FaceBook, last weekend. It was a lot of fun and had a challenging theme, Old School, which opened up a whole lot of creative thinking and making. Each challenge was based around a learning subject area or using an Old School style of scrapping, using up supplies which have gone out of style in the world of scrapbooking. This layout was my attempt at the Math challenge, your layout needed to include numbers!

Because I was participating in the  October Counterfeit Challenge Kit I wanted to use the papers and embellishments from my kit. I also wanted to use some of my recent purchases, if I buy something new I make sure I use it and not stash it away. What arrived in the mail two weeks ago was the new Tim Holtz Entomology die which matches IMG_4214
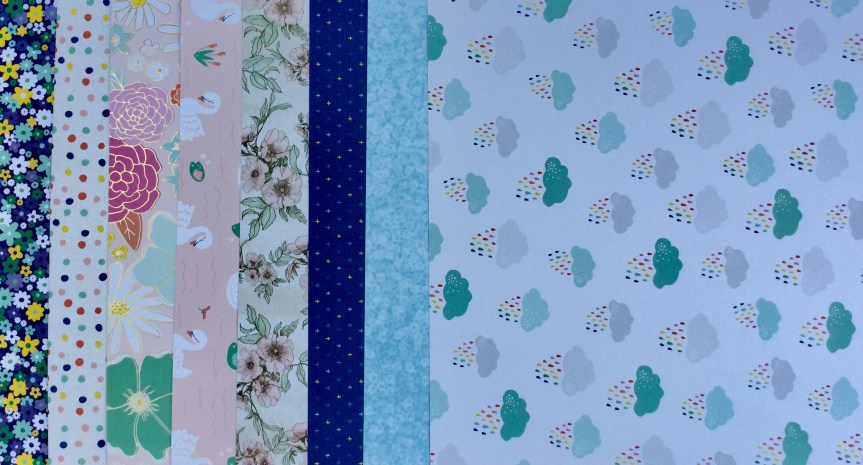
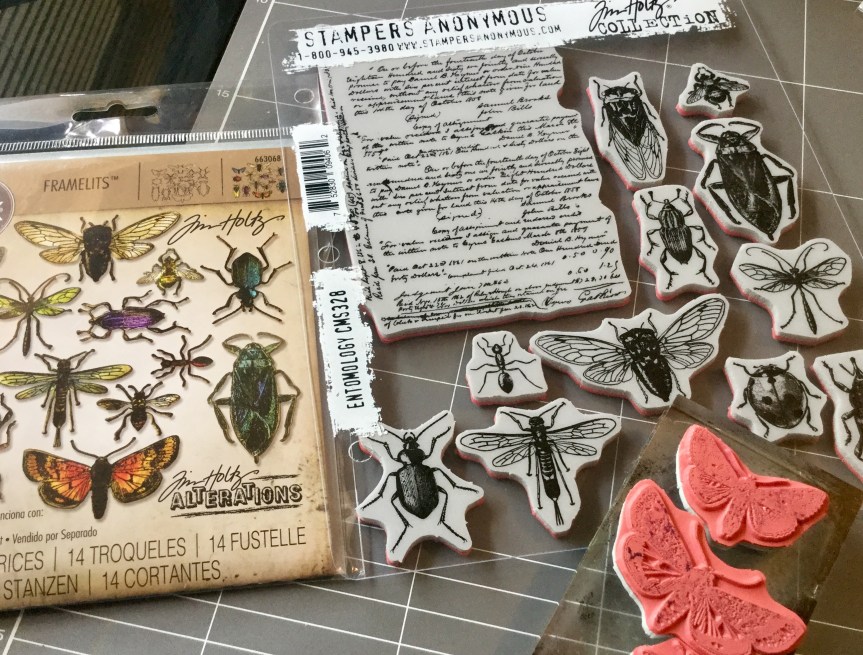
with the stamp set (released earlier in the year). I had been waiting for months for the release and then for it to arrive in Australia, it is amazing! The die is spot on, there is absolutely no white space around your stamped image, it cuts the thinnest and tiniest insect legs and antennae.

With this layout, I got messy using distress inks, Heidi Swapp shine and some DIY shine. I messed around smooshing and spraying the inks, creating backgrounds to use in the layout. Some I liked and some didn’t quite work.

Then, I used a floral stencil and some white gesso to create some texture on my main background. I used an old membership card to scrape the gesso across the stencil, very rough and messy. IMG_4215

The paper which I wasn’t keen on became the cardstock for my insect embellishments. Just a tip, if you do purchase this wee crawly critter die set, use some washi tape to hold the dies in place while cutting. They do need to be lined up precisely and being so little may move when you crank them through your Sizzix.

Next, I added some more distress ink to the stencilled flowers, the white gesso made them stand out a little too much. I stamped some insects onto the background using a soft grey and a brown distress ink. Then, I got busy stamping orange daisies onto some orange/apricot patterned paper scraps (from my kit), scraps of my mixed media cardstock and onto some white cardstock.  Does this look familiar? Yep, it is the same stamp used on this layout here. A few stamped flowers where hit with some distress green, just to pull in some colours in my photo. Then I spent some time watching scrap blogs on Youtube while I fussy cut out all the flowers.IMG_4219

I then built up the layout, layering die cuts and flowers, and fixing everything into place using double sided tape and foam.

So, “Where are the numbers?”I hear you ask. Good question, after all, it was a Math challenge. Well, the numbers tied in with my title and photo and were cut using dies. I used this particular photo because my daughter’s face shone with happiness. We were having a lovely day just messing around on our property, enjoying the sunshine and the abundance of flowers spreading colour everywhere. In a burst of energy, she literally tiptoed into the flowers and sat amongst the colour. Her son did not want to miss out on this opportunity and joined her. Her face said it all…let me ‘Count the Ways’.

IMG_4224