

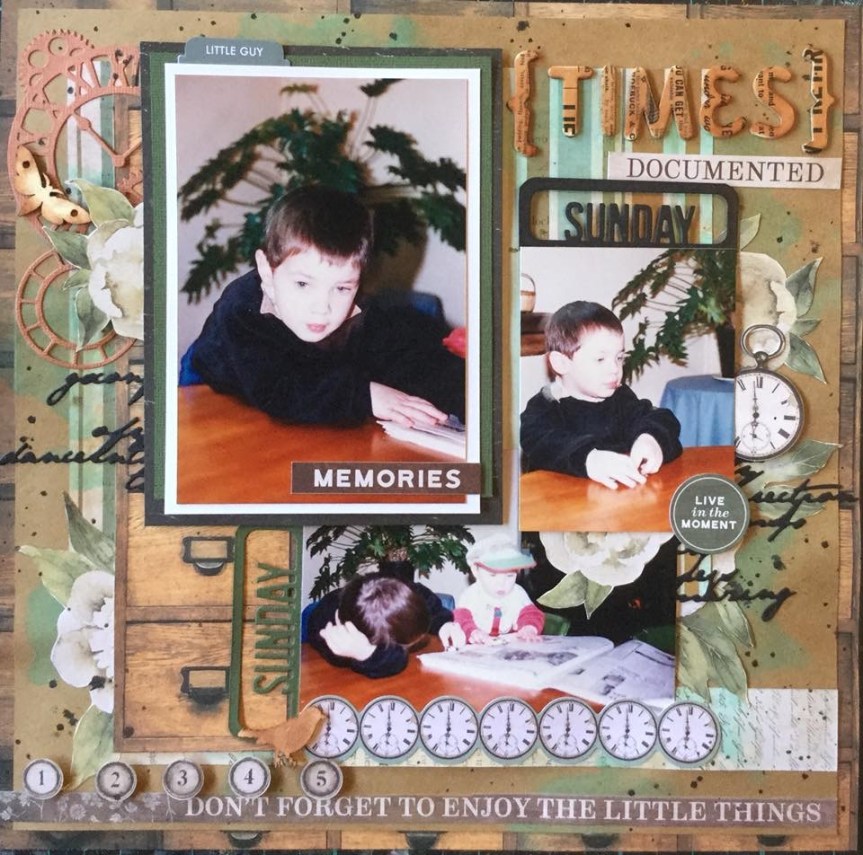
My first Counterfeit Kit layout features photos of a few of the autumn foliage trees on our property, they were planted over the last 25yrs by my husband. One photo shows some of our daily wildlife which resides in our garden, several well fed kangaroos who love to nibble anything available. They have exotic tastes and at the moment have developed a taste for citrus, stripping our orchard trees of any leaves within their reach. Fencing garden areas and netting the trees is the only way we can harvest anything for ourselves.
I had fun creating this layout. My design inspiration came from Meggy Blethen. Meggy just released a video of her latest layout featuring a shaker section. It is a great layout and the shaker made me think of falling leaves…ahha…genious! I asked Meggy if I could scrap lift her shaker idea and she kindly agreed. With visions of falling autumn foliage tumbling down I got started. I decided to use a piece of paper which I had been holding on to for years. I really loved the crayoned drawn leaves in the design but had not wanted to cover it up. Years later, the answer was simple…fussy cutting! I got busy and fussy cut all of the leaves.


I then went on to make my shaker pocket. I used another old product, a sheet of printed vellum from the now defunct TLC scrapbook company. I used my craft punched mini leaves, I literally sprinkled a handful over my strip of white cardstock and then spent time turning over any wrong side up (white) leaves, and fixing the leaves into place using some clear gel medium. The gel medium worked well, I poured a small amount into the lid of the bottle and applied it with my fingers to the cardstock, pouring a little on and smooshing it around. Some leaves did move a bit but it just added to the random, chaotic effect of leaves in the wind.


Next, I got out the sewing machine and stitched down three sides of the vellum and tossed in some of my forged stamped leaves and some sequin leaves. Then I stitched down the opening and voila…a pocket of falling autumn leaves!

Then I got busy with the sewing machine stitching on my fussy cut leaves. I tried to enhance the leaves by adding some stitched veins. If you try this make sure you shake the loose leaves to the bottom of the pocket before you stitch, otherwise you get them caught up in your sewing and will lose the motion aspect of falling leaves.


I then used one of my 6×6 papers to make some corner strips to mount my photos with. I was able to just use one half (one triangle) for the whole layout.

Next, I got busy sticking down my photo and adding some embellishments and a title. I used a few of the forged stamped leaves and handmade bows.


I was very happy with the finished one-page layout but then decided to turn it into a two-page spread. It took me a while to put together anything I was happy with, I walked away several times and had a break. Which is why this blog post is late, I just couldn’t get the layout finished and fussed around, moving pieces back and forth. I slept on it and finally got it completed the next day. My journaling is missing, it will go into space at the top of the layout. I may also add a few more leaves around the top edge…see, still not completely happy. I need to let it go and move on to the next layout. I had loads of fun making the shaker pocket and doing the stitching.


 original Crisp Apple Classic kit designed by Noel Mignon.


 Hello Scrappers, I am excited to be joining in with the September


 My substitute for the Tim Holtz distress stain is two Heidi Swapp shines in gold and mustard. I haven’t decided on which stamps to use but will most likely use some leaf and foliage stamps. The bows I will make out of scraps from the kit and I will turn some of my embellishment die-cuts into chipboard elements. My choice in washi tape is a lovely metallic and white diagonal stripe for some added bling. I may also add some wood veneers and some ribbon.


 The first is one of the layouts designed by Tracey Schultz. I swapped the paint colours to suit my photo and used different bird embellishments.


 I started off by altering the paper itself, my photo is of my son and daughter bathed and ready for bed, and I was thinking about what related to clean. Bubbles seemed to pop into my creative brainstorm and would link nicely with the circular design on the paper. I used a Kaisercraft stencil and acrylic paint to sponge bubbles across the page.
 sponge to apply my mix media colours. I have been using car wash sponge for years, you can pick one up from any of the cheap, two dollar type shops. Use some large scissors to snip the sponge into 8-10 pieces and you a have a very versatile application tool which has only cost you a couple of dollars for the whole lot. When working with inks you can use each edge of your sponge piece for a different colour! They wash clean very easily with soap and water, some staining will occur but doesn’t transfer when you use them next. When you use them with acrylic paint, wash them as soon as you finish otherwise they will dry with a firm crust. Should this happen, you can simply trim off the stiffened surface and you are good to go again.


 This challenge has been one of my favourite this month. The Show Us Your Stuff, June challenge is very open ended, you can do anything you like. They are encouraging you to hand make elements for your layout. Yay, time to get messy!


