

Hey all,
I have just had a lovely four-day crafty weekend of painting and scrapping. It started off with my best friend arriving to spend the day watercolour painting with me and ended with me sorting old family photos with my darling mum.
The watercolour painting is a new obsession after I went to a workshop at Summer School. The workshop was for botanical watercolour painting and I must say I was a little worried at my ability to paint flora to a scientific standard. Turns out that it wasn’t that strict and I did alright. So, my friend and I have become very keen to keep up with the watercolour painting and now spend every free Friday we have painting! Nothing better than painting with good company, a gourmet lunch and wine 🙂
Here’s what I painted on Friday, fruit and foliage from our fig tree.


Onto the scrapbooking…
This weekend I worked on using my subscription kit from Uniquely Creative. For those of you who haven’t heard of them, Uniquely Creative is an Australian company who sell both cardmaking and scrapbooking products, they offer a few different subscription kits each month. This months scrapbook kit features their new collection called ‘Urban Garden’. It is a gorgeous collection filled with floral and geometric designs in purples and greens. Each kit comes with a detailed booklet of scrapbook layout and card designs for you to create. I decided to try a few layouts from the booklet and get creative making my own layouts using the kit supplies.
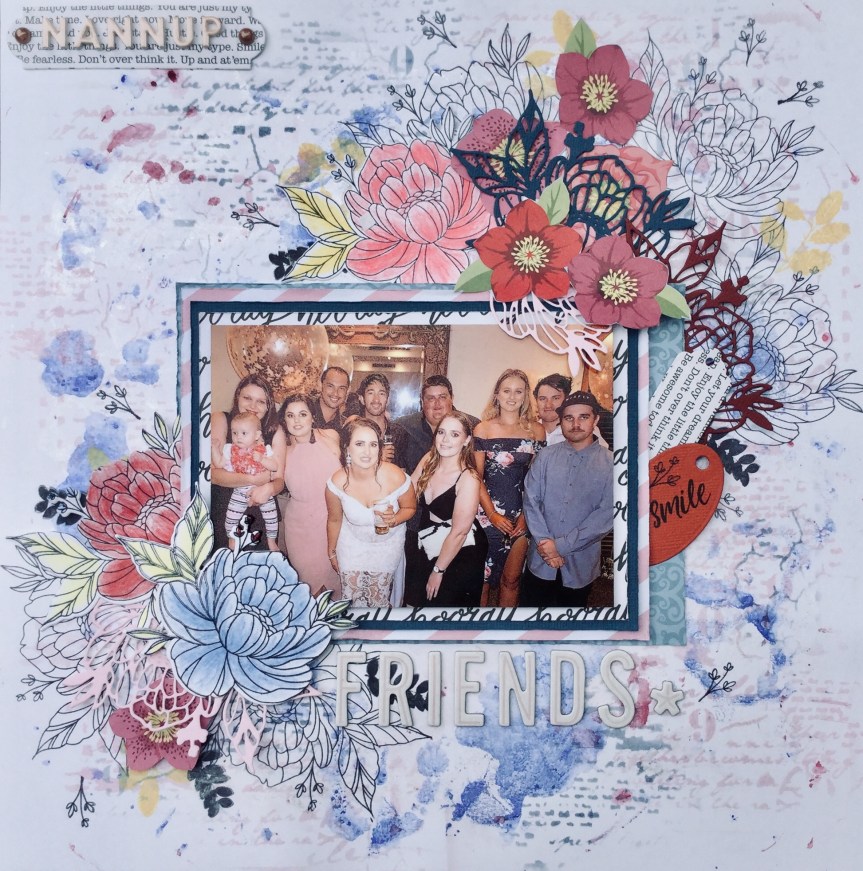
I tried Kylie Kingham’s ‘Inspirational Layout’, not going to lie but this was a lot of work! This particular layout in the booklet doesn’t have instructions, it justs states which kit supplies you need. I was able to work out how it was constructed just by studying the photograph, well, I guessed how she had created it. A few people have asked me how I made the heart like in Kylie’s original layout. So, here is my version and what I used…


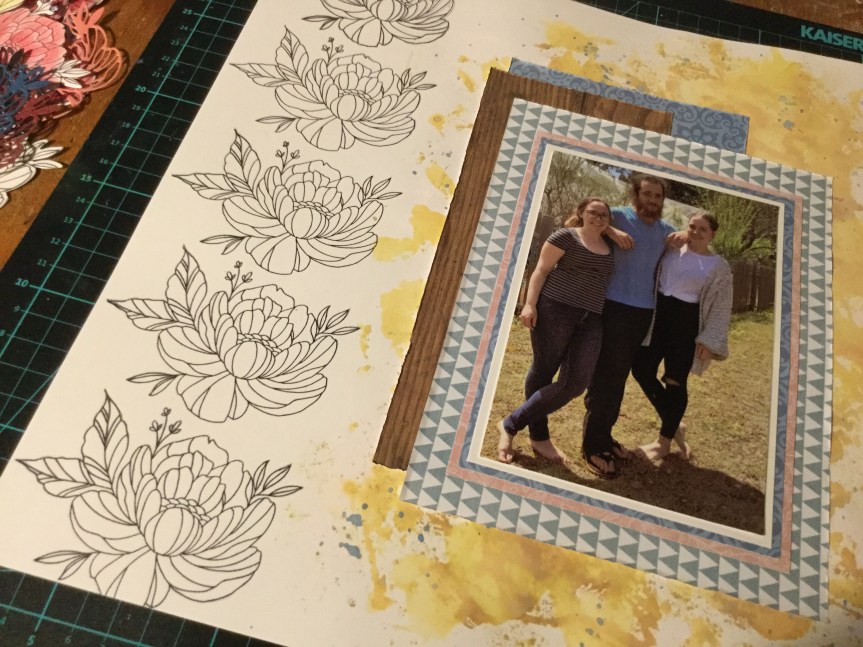
The background of the layout is made from three layers (see pic above), I used a darker purple patterned paper from my stash for the second layer, instead of the lighter paper Kylie used.
I think perhaps Kylie used an electronic die cutting machine to cut out the heart shape from the background but as you know, I don’t own one. So, I did it the old school style and cut it by hand. Here’s how…


I freestyle drew a heart on a scrap piece of card, the easiest way to do this is to cut the card to the size you need and then fold the card in half. Draw half a heart on the folded card, then measure an inch in around the inside of your heart and draw a second inner half heart. Keeping the card folded in half, cut around both of your heart line drawings, when you unfold the card you will have a heart template (see photo with pencil).
Flip the paper/cardstock layout background that you will cut the heart from over to the reverse side, use washi tape to hold the template in place and carefully trace around the inner of the template. Remove the washi tape and using scissors carefully punch a hole into the centre of the drawn heart, then cut around the drawn heart line neatly. Hurray, you now have a heart hole in your paper! You then need to secure the striped paper behind the heart cutout.


Next, use a ruler and pencil to measure and mark the stitch holes around the heart. Then pierce each hole ready for hand stitching.


Use embroidery thread and a needle to stitch around the heart. The rest of the process is fussy cutting out flowers and embellishments, and building them up into layers around your photo. I also added a touch of purple glitter(from the kit) to some of the circle designs on the background paper, if you try this do it before you add your embellishments and make sure you let it dry. I then added a title cut out to my layout which was from a previous UC kit.


I love Kylie’s design and was pleased with how mine turned out. I may even have another go making a second layout with the heart feature, though the stitching nearly did me in! I’ll share the other layouts I made in another post soon.
Keep on scrapping 🙂


 that I don’t know who created the original layout, I tried Google image search and had no luck…they linked it to artificial flowers! I wonder why? Haha. So, if you know whose layout this is please let me know, I would like to credit them? What I loved about this layout was the negative space and the layering on both sides of the layout.


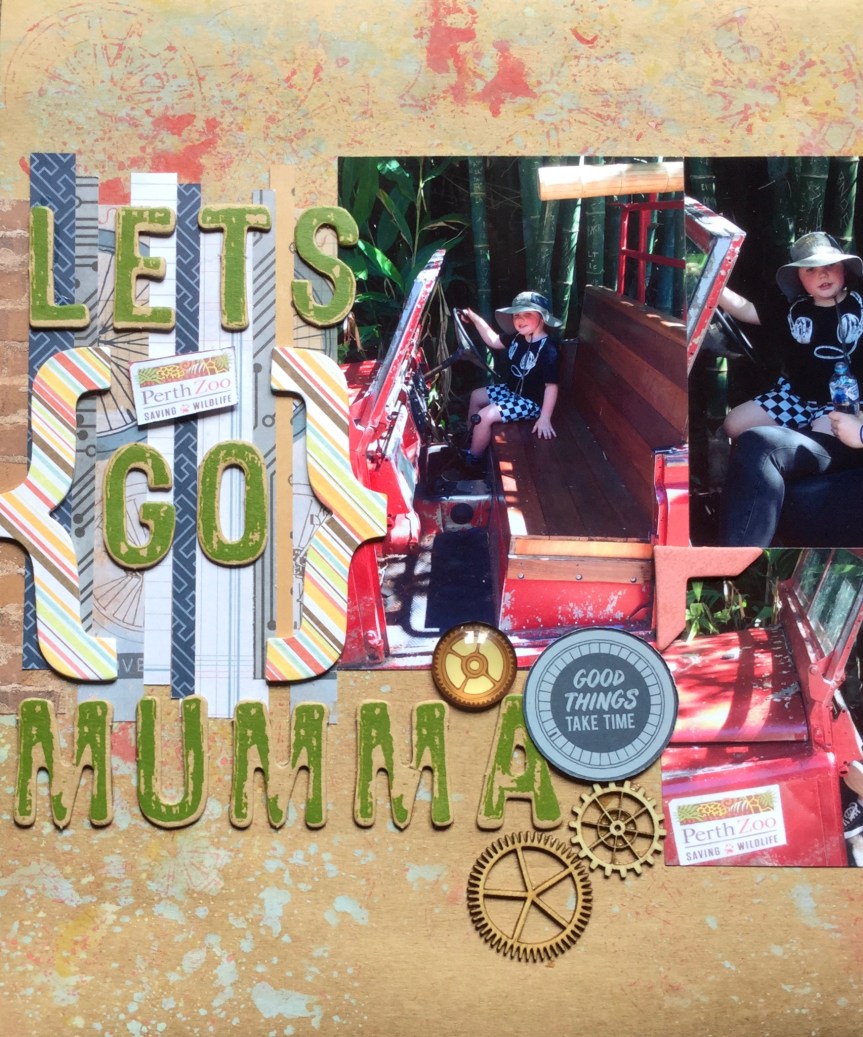


 kit had been sitting on my desk, under a pile of supplies and when having a clean up I found the kit and broke it down, separating and sorting all the components. Now I don’t make cards but I loved the stamps and stencils in the kit, which is why I purchased it. The design of both is very Australian, using patterns similar to indigenous art. The booklet which came with the kit had a picture of a wonderful layout made by


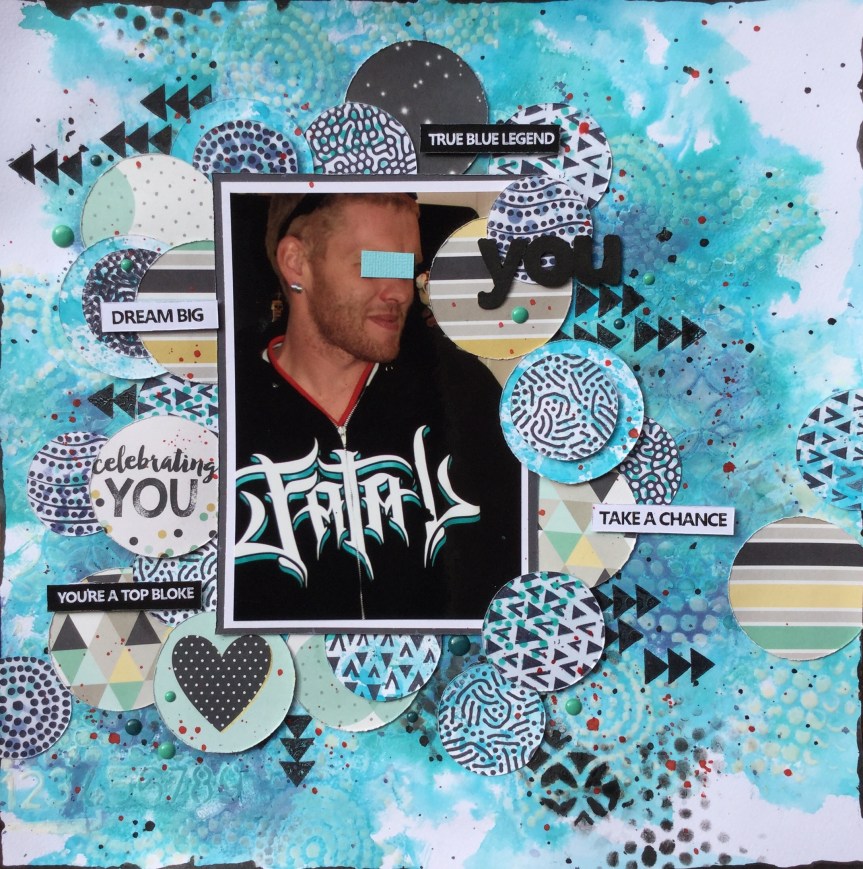

 I am loving the papers, all that greenery, yummy teals and beautiful, bright hibiscus flowers. The problem is I don’t have any tropical photos, no tropical island holidays for us yet! Though, it did give me the opportunity to remind hubby about how he mentioned he’d like to go to Fiji, the perfect reason to holiday…to use up scrapbook paper.


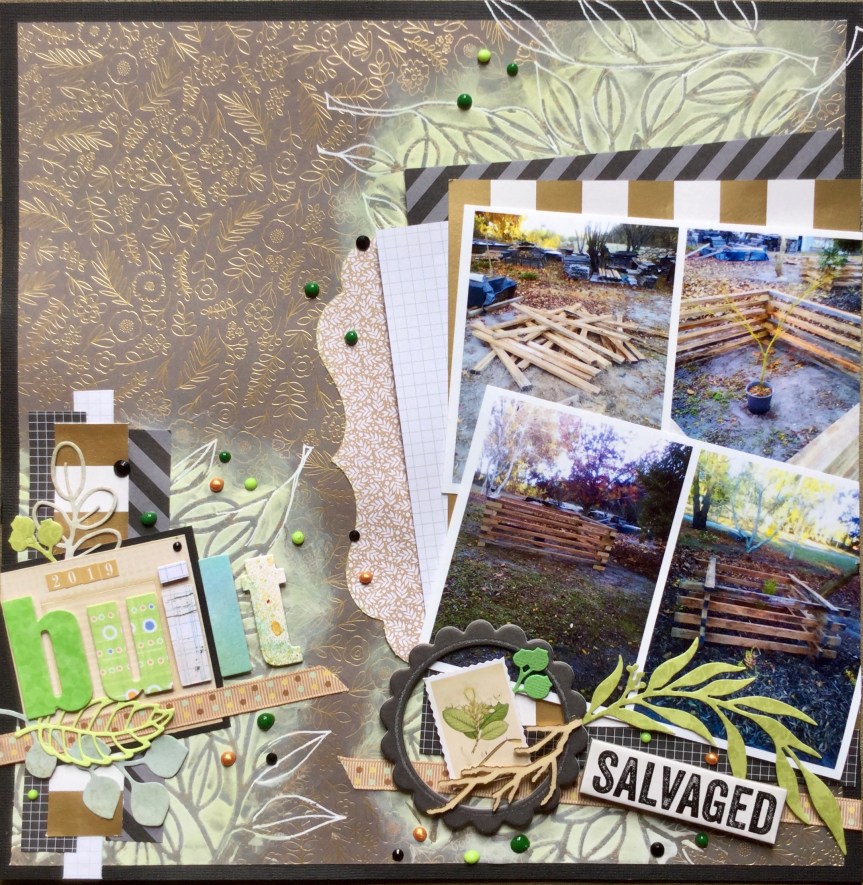
 posing for the photo, so the quality is not great. It is a little blurry but does capture his cheekiness. Let me just say that the playdough man is magnificent, a work of art! Well, I may be biased, it does have all the important elements of a human which is the goal when you are four. It was the playdough figure which triggered my idea for the forged paper. The playdough feet are rough circles, much like the black and white circle paper featured in the Felicity Jane ‘Hannah’ kit.


 decided to substitute this with a strip of polka dot paper trimmed down to create a scalloped edge. I attached this to the edge of the woodgrain background.


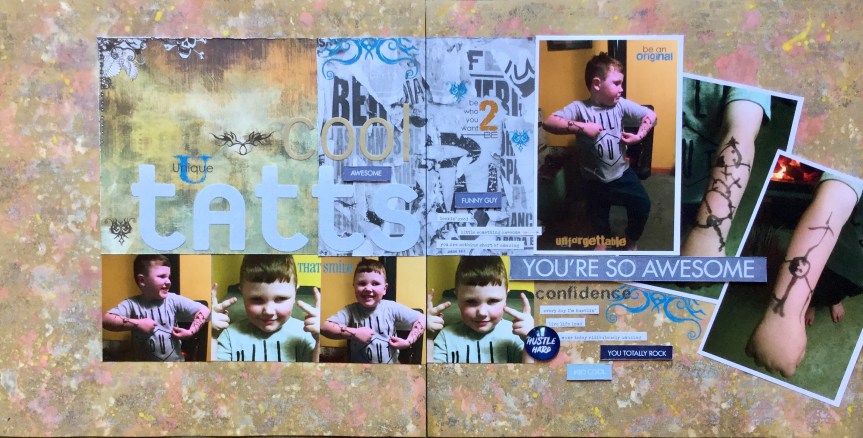
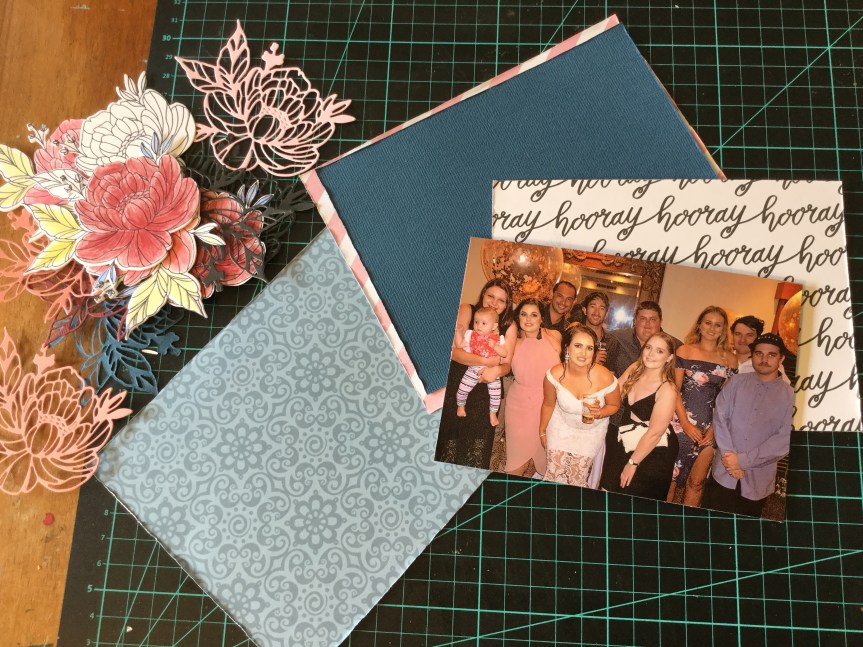
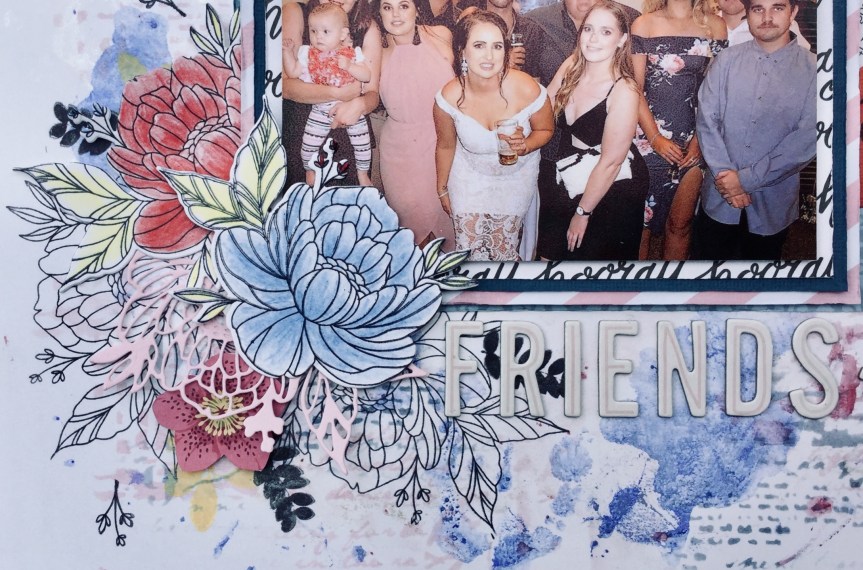
 So, first up, I went with a photo of my daughter and her friends having a night out. The photo has several of the pinks, blues and burgundies found in the Felicity Jane ‘Hannah’ collection.


")

")


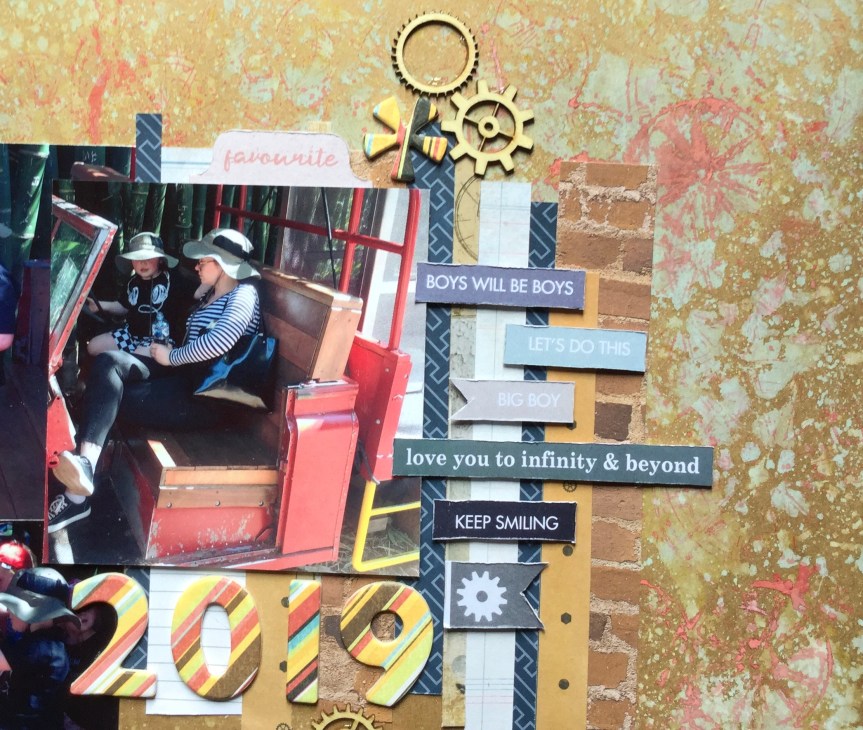
 simple in pattern and design, but I fell short when rummaging through my supplies. I struggled to find just the right subtle blues, greens and pinks. I didn’t quite make it with the patterns, mine were either too heavy and thick in line or not geometric. Even though I knew I had previously had some fish scale/scallop paper, I could not find a scrap of it. So, here is what I ended up with…


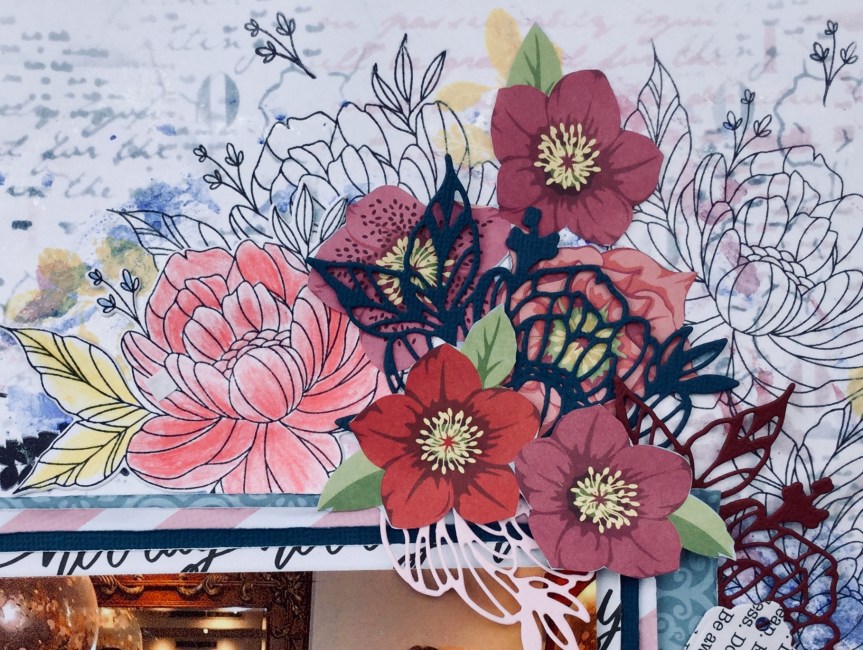
 For my embellishments, I didn’t have a lot which matched with the original kit. Being a girl obsessed with colour, I don’t tend to buy scrapbook supplies with such a mild palette. I decided that I could forge many of them and make my own. So, I dug deep into my dies and stamps and found similarly themed ones which I could use with my papers/cardstock to make a range of embellishments.


